
sdk install java 11.0.5.hs-adptPort of the Laravel Intermediate Task List tutorial to Spring Boot with Thymeleaf

Interested in learning more about Thymeleaf? Check out my book
Taming Thymeleaf.
The book combines all of my Thymeleaf knowledge into an easy to follow step-by-step guide.
Laravel is a very interesting PHP framework for building web applications. Their docs have a nice tutorial to build a task list to explain many of their concepts. This blog post basically mirrors that tutorial but shows how to build the same web application using Spring Boot and Thymeleaf.
1. Installation
1.1. Prerequisites
The preferred way to install Laravel is to use composer. For our Spring Boot port, we will be using Maven as our build tool.
Installation of Java and Maven on macOS is very easy if you use SDKMAN!. Follow the installation instructions at https://sdkman.io/install to get started.
-
Install Java:
-
Install Maven
sdk install maven
We need to specify a version for Java since we want to have the current LTS (Long Term Support) version which is 11 at the time of writing. For Maven, we can just get the latest one (3.6.3 at the time of writing)
To check if both are installed correctly, run:
> mvn --version
Apache Maven 3.6.3 (cecedd343002696d0abb50b32b541b8a6ba2883f)
Maven home: /Users/wdb/.sdkman/candidates/maven/current
Java version: 11.0.5, vendor: AdoptOpenJDK, runtime: /Users/wdb/.sdkman/candidates/java/11.0.5.hs-adpt
Default locale: en_BE, platform encoding: UTF-8
OS name: "mac os x", version: "10.15.3", arch: "x86_64", family: "mac"
1.2. Spring installation
With Laravel, the project is created using the following command:
composer create-project laravel/laravel quickstart --prefer-distSpring Boot has no such command. Instead, a project is generated via https://start.spring.io. Open that web page and select the following options:
| Option | Value | Description |
|---|---|---|
Project |
Maven |
Allows to select the build tool to use. The 2 most widely used options are Maven and Gradle. |
Language |
Java |
Java code runs on the JVM (Java Virtual Machine). However, there are also other languages that run in the same environment. Kotlin and Groovy are other options that are possible. |
Spring Boot |
2.2.4 |
Selection of the Spring Boot version to use. This also defines what compatible versions of dependencies that will be used. |
Project Metadata |
|
The |
Options |
Java 11 |
The "Options" item hides some more advanced options. For now, the most important to select "Java 11" since that is the version of Java we want to use. |
Dependencies |
Spring Web, Thymeleaf, Spring Data JPA, Flyway Migration, Spring Security |
Spring Boot is a very modular system. When creating our project, we need to specify which modules we want to use. In this case, we need to following 4 modules:
|
When everything is correctly selected, the page should look similar to this:
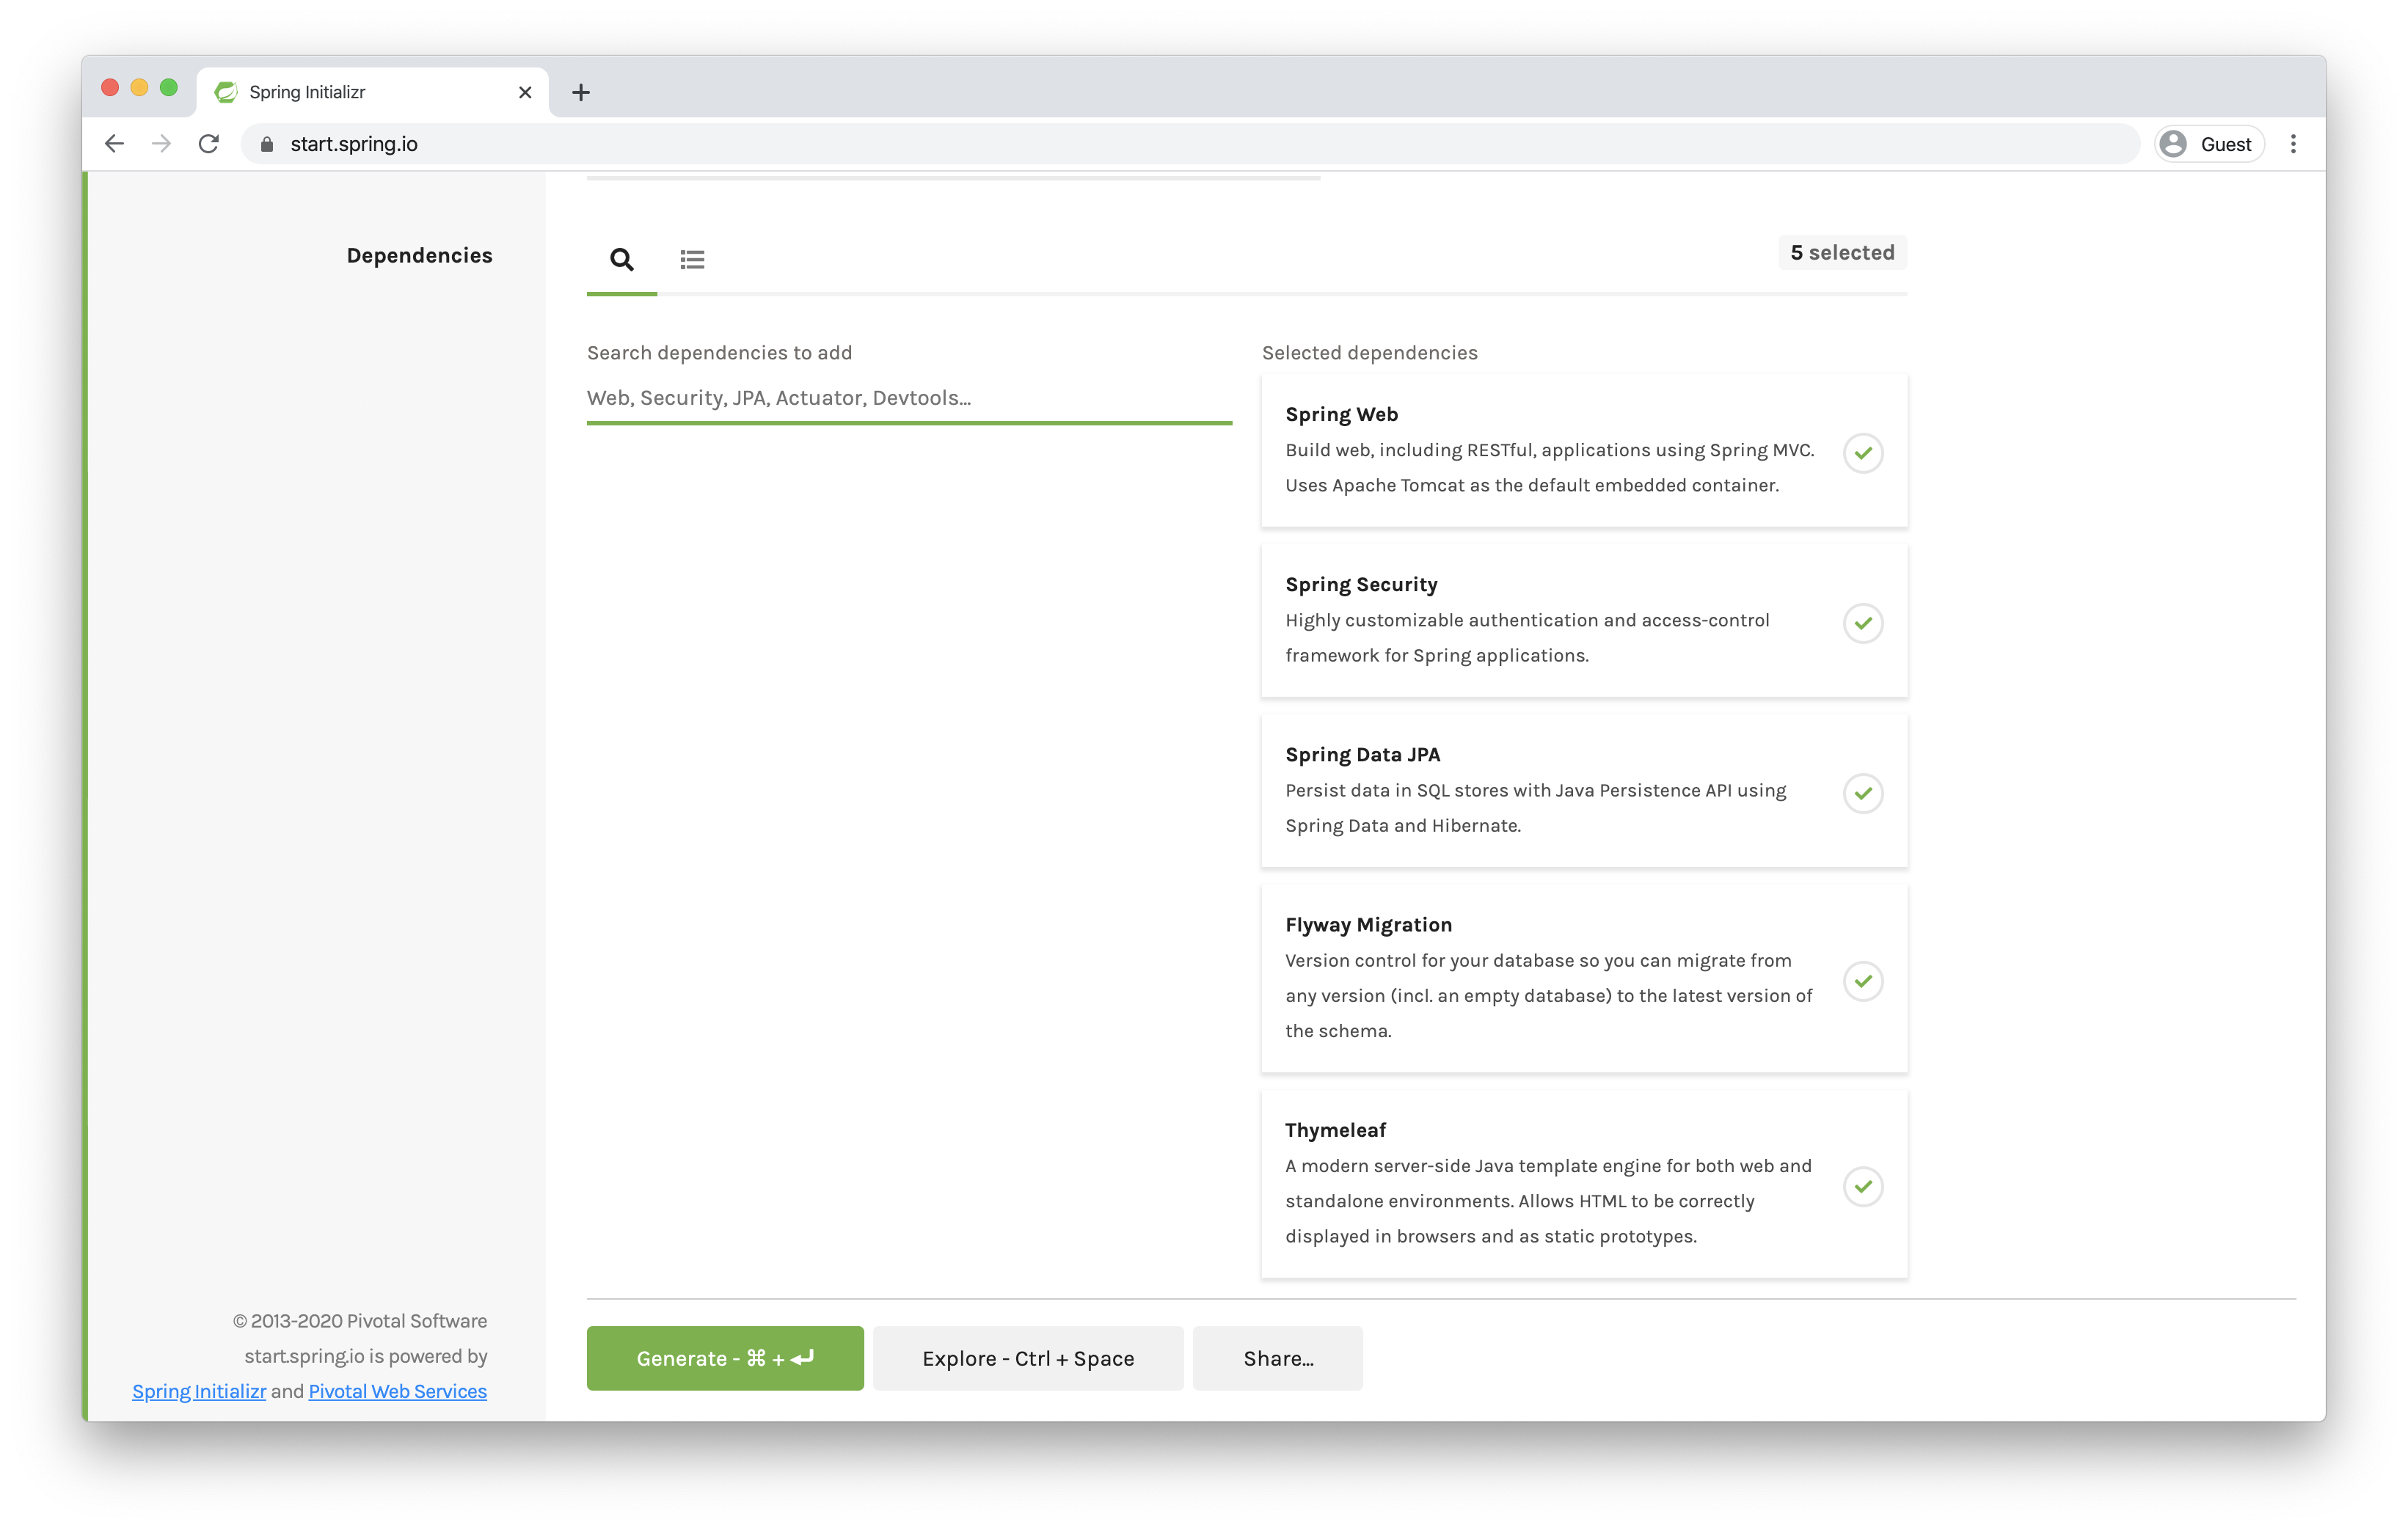
Press the 'Generate' button and a zip file with your project will be downloaded. Unzip the project and open it in your favorite IDE (I use IntelliJ IDEA)
2. Prepping the database
2.1. Database migrations
Laravel uses the Artisan CLI to generate PHP code that defines the database migration. With Spring Boot, we will be using Flyway.
Most important differences:
-
Flyway uses plain SQL script to define the migrations (although you can use Java classes as well if you want)
-
There is no code to reverse the migrations (like the
down()method in Laravel migrations) by default. It is possible with Flyway Pro to use Undo Migrations if you require this.
Spring Boot assumes Flyway migrations are put in src/main/resources/db/migration by default.
After creating those directories, we can add our first migration file:
V1.0__init.sql
CREATE TABLE task_user
(
    id       SERIAL       NOT NULL,
    name     VARCHAR(255) NOT NULL,
    email    VARCHAR(255) NOT NULL,
    password VARCHAR(255) NOT NULL,
    PRIMARY KEY (id)
);

CREATE TABLE task
(
    id      SERIAL       NOT NULL,
    user_id SERIAL       NOT NULL,
    name    VARCHAR(255) NOT NULL,
    PRIMARY KEY (id)
);

ALTER TABLE task
    ADD CONSTRAINT FK_task_to_user FOREIGN KEY (user_id) REFERENCES task_user;
See the Naming chapter in the Flyway documentation for more information about how the name of the SQL file influences the order of the migrations.
|
We are using |
The database for this application will be PostgreSQL. Java needs a JDBC driver to talk to the database.
We can add the PostgreSQL driver by adding a dependency in the pom.xml file that was generated by the Spring Boot website.
Go to https://start.spring.io again and go straight for the "Dependencies" section.
Type "PostgreSQL" and select the "PostgreSQL Driver" dependency that pops up.
Now use the 'Explore' button to view the pom.xml that would be generated if we would create a project.
In the popup, you will find the dependency section:
<dependency>
    <groupId>org.postgresql</groupId>
    <artifactId>postgresql</artifactId>
    <scope>runtime</scope>
</dependency>
Add this XML snippet to your own pom.xml inside the <dependencies> node.
|
There is no need to specify a version for the dependency, because Spring Boot handles this for us via the |
Next, we need to tell our application to connect to our PostgreSQL database.
We do this by adding some properties to src/main/resources/application.properties:
spring.datasource.url=jdbc:postgresql://localhost/taskdb
spring.datasource.username=postgres
spring.datasource.password=my-secret-pwd
spring.jpa.hibernate.ddl-auto=validate
This assumes that we already created a database called taskdb in the PostgreSQL database.
|
|
If you don’t have a PostgreSQL database, you can use H2, which is an embedded database that can run in-memory so you don’t have to install anything. In that case, add this dependency in the Use this in |
If you now start the application, you should see output similar to this:
  .   ____          _            __ _ _
 /\\ / ___'_ __ _ _(_)_ __  __ _ \ \ \ \
( ( )\___ | '_ | '_| | '_ \/ _` | \ \ \ \
 \\/  ___)| |_)| | | | | || (_| |  ) ) ) )
  '  |____| .__|_| |_|_| |_\__, | / / / /
 =========|_|==============|___/=/_/_/_/
 :: Spring Boot ::        (v2.2.4.RELEASE)

2020-02-20 21:01:38.990  INFO 23191 --- [           main] l.LaravelIntermediateTaskListApplication : Starting LaravelIntermediateTaskListApplication on Wims-MacBook-Pro.local with PID 23191
2020-02-20 21:01:38.997  INFO 23191 --- [           main] l.LaravelIntermediateTaskListApplication : No active profile set, falling back to default profiles: default
2020-02-20 21:01:39.745  INFO 23191 --- [           main] .s.d.r.c.RepositoryConfigurationDelegate : Bootstrapping Spring Data JPA repositories in DEFAULT mode.

...

2020-02-20 21:01:41.794  INFO 23191 --- [           main] o.s.b.w.embedded.tomcat.TomcatWebServer  : Tomcat started on port(s): 8080 (http) with context path ''
2020-02-20 21:01:41.800  INFO 23191 --- [           main] l.LaravelIntermediateTaskListApplication : Started LaravelIntermediateTaskListApplication in 3.134 seconds (JVM running for 3.859)
If you get an error, carefully check all described steps. Or have a look to this commit in the example code repository.
We can now check using a database tool that the tables have been created according to our Flyway script:
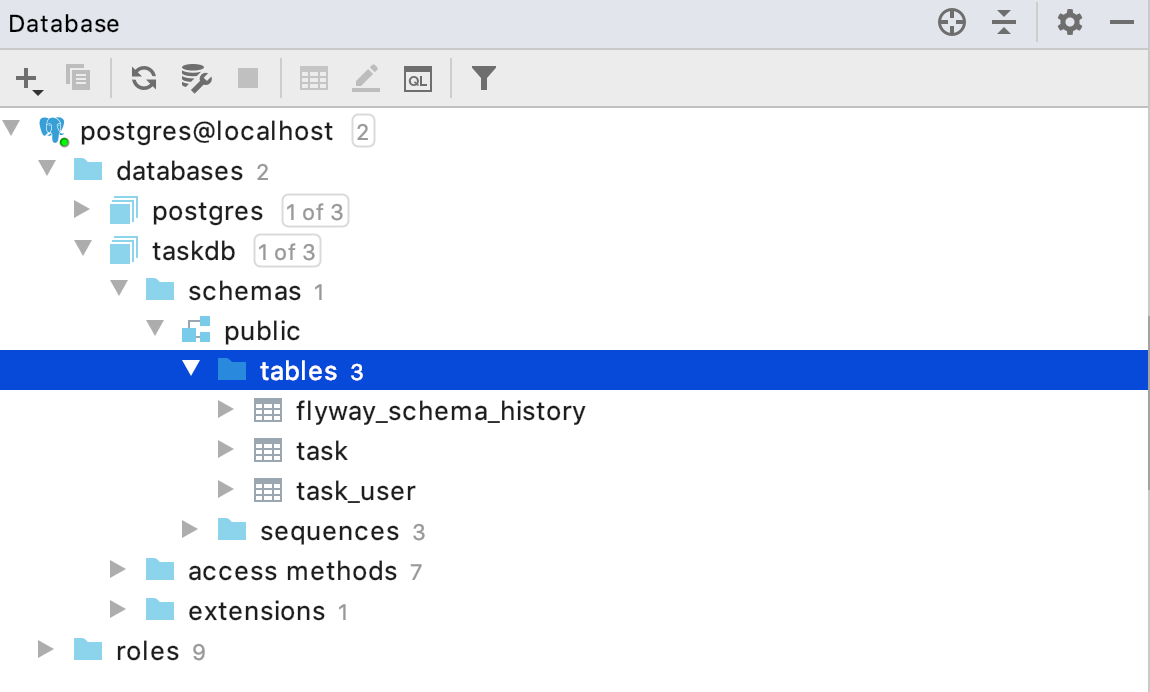
There is also the flyway_schema_history table.
This is used internally by Flyway to keep track of what migration have already run.
2.2. Models
Laravel uses Eloquent as ORM (object-relational mapper). In the Java world, there is a standard called JPA (Java Persistence API) that is similar to that. As JPA is only an API, you need an implementation as well. The most known implementation is Hibernate and this is what we are going to use here.
To start, we create our User class:
package com.wimdeblauwe.examples.laravelintermediatetasklist.user;

import javax.persistence.Entity;
import javax.persistence.GeneratedValue;
import javax.persistence.Id;
import javax.persistence.Table;

@Entity (1)
@Table(name = "task_user") (2)
public class User {
    @Id
    @GeneratedValue(strategy = GenerationType.IDENTITY)
    private Long id; (3)
    private String name;
    private String email;
    private String password;

    protected User() { (4)

    }

    public User(Long id, String name, String email, String password) {
        this.id = id;
        this.name = name;
        this.email = email;
        this.password = password;
    }

    public Long getId() {
        return id;
    }

    public String getName() {
        return name;
    }

    public String getEmail() {
        return email;
    }

    public String getPassword() {
        return password;
    }
}| 1 | The @Entity annotation indicates that this class is the object model for a database table |
| 2 | The @Table annotation allows to specify the name of the table in our database.
If we don’t specify the annotation at all, Hibernate uses the class name converted to snake_case. |
| 3 | The @Id and @GeneratedValue annotations are used to indicate our id field is an auto-increment primary key in the database. |
| 4 | Hibernate requires a no-argument constructor.
We hide this constructor from the rest of the application by making it protected.
Our "normal" application code should not use that constructor. |
We also create the Task class:
package com.wimdeblauwe.examples.laravelintermediatetasklist.task;

import javax.persistence.Entity;
import javax.persistence.GeneratedValue;
import javax.persistence.Id;

@Entity (1)
public class Task {
    @Id
    @GeneratedValue(strategy = GenerationType.IDENTITY)
    private Long id;
    private String name;

    protected Task() {

    }

    public Task(Long id, String name) {
        this.id = id;
        this.name = name;
    }

    public Long getId() {
        return id;
    }

    public String getName() {
        return name;
    }
}| 1 | We don’t have the @Table annotation here since the database table is called task, which follows the default naming scheme. |
|
Eloquent defaults to plural names for the database tables when deriving the table name from the model. In Spring Boot, it is singular by default:
|
2.3. Relationships between models
Now that our models are defined, we need to link them.
For example, our User can have many Task instances. A Task is assigned to a single User.
Defining a relationship will allow us to fluently walk through our relations like so:
User user = repository.findById(1);

for (Task task : user.getTasks()) {
    System.out.println(task.getName());
}
The first relation is from User to Task:
public class User {

    ...

    @OneToMany(mappedBy = "user", (1)
            cascade = CascadeType.ALL, (2)
            orphanRemoval = true) (3)
    private Set<Task> tasks;

    ...

    public Set<Task> getTasks() {
        return tasks;
    }

    public void setTasks(Set<Task> tasks) {
        this.tasks = tasks;
    }
}| 1 | The @OneToMany annotation indicates that one User has many Task objects.
The mappedBy property refers to the name of the property in the Task class that refers to the User class. |
| 2 | cascade defines how the persistence of the Task objects should be done when saving a User in the database.
With CascadeType.ALL, we specify that we want all tasks to be saved when we save the User object. |
| 3 | orphanRemoval indicates that we want all task records removed from the database automatically when a user is removed. |
The inverse relation from Task to User should be coded like this:
public class Task {
    ...

    @ManyToOne(fetch = FetchType.LAZY) (1)
    private User user;

    public User getUser() {
        return user;
    }

    public void setUser(User user) {
        this.user = user;
    }
}| 1 | The @ManyToOne annotation indicates that one Task is linked to one User, but that a User can have many Task objects.
See Eager/Lazy Loading In Hibernate if you want to know more about the FetchType.LAZY value. |
Now that our relationships are defined, we can start building our controllers.
3. Routing
With Laravel, you use an app/Http/routes.php file to link URLs to methods on controllers.
With Spring MVC, we annotate the controller methods with the URLs directly.
For example:
import org.springframework.stereotype.Controller;
import org.springframework.web.bind.annotation.GetMapping;

@Controller (1)
public class RootController {

    @GetMapping("/") (2)
    public String welcome() {
        return "welcome";
    }
}| 1 | Class must be annotated with @Controller to be picked up by Spring MVC. |
| 2 | The @GetMapping annotation indicates that a request on / should call this method. |
|
Although not common, it is also possible to define routes in a central place with Spring. See https://www.baeldung.com/spring-mvc-functional-controllers for more info on that. |
3.1. Displaying a view
The controller methods return a String. The value of that String indicates the name of the server-side view that will be rendered.
With Thymeleaf, templates should be put in src/main/resources/templates so that they are picked up automatically.
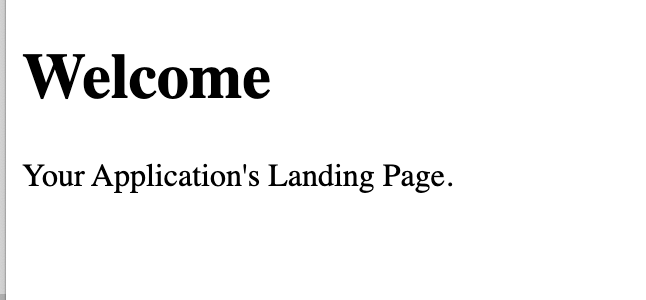
Since we return "welcome" in our welcome() method in the RootController, we need to create a src/main/resources/templates/welcome.html file:
<!DOCTYPE html>
<html lang="en">
<head>
    <meta charset="utf-8">
    <meta http-equiv="X-UA-Compatible" content="IE=edge">
    <meta name="viewport" content="width=device-width, initial-scale=1">

    <title>Welcome</title>
</head>
<body>
<h1>Welcome</h1>
<div>
    Your Application's Landing Page.
</div>
</body>
</html>
If you now start the application and go to http://localhost:8080, you should see something like this:
|
Since Spring Security is in the list of our dependencies (in the Use |
3.2. Authentication
As stated in the warning above, our application is "secure" by just adding the Spring Security dependency in our Maven project. However, having only a single user and a password that restarts every time we start the application is hardly convenient for any application.
Let’s configure our application to use a fixed password so we can get to know a bit about configuration of Spring Security.
We will create a WebSecurityConfiguration class for this:
package com.wimdeblauwe.examples.laravelintermediatetasklist.infrastructure.security;

import org.springframework.beans.factory.annotation.Autowired;
import org.springframework.context.annotation.Bean;
import org.springframework.security.config.annotation.authentication.builders.AuthenticationManagerBuilder;
import org.springframework.security.config.annotation.web.configuration.WebSecurityConfigurerAdapter;
import org.springframework.security.crypto.factory.PasswordEncoderFactories;
import org.springframework.security.crypto.password.PasswordEncoder;
import org.springframework.stereotype.Component;

@Component (1)
public class WebSecurityConfiguration extends WebSecurityConfigurerAdapter { (2)

    @Bean
    public PasswordEncoder passwordEncoder() { (3)
        return PasswordEncoderFactories.createDelegatingPasswordEncoder();
    }

    @Autowired
    public void configureGlobal(AuthenticationManagerBuilder auth, PasswordEncoder passwordEncoder) throws Exception {
        auth.inMemoryAuthentication() (4)
            .withUser("user") (5)
            .password(passwordEncoder.encode("password")) (6)
            .roles("USER"); (7)
    }
}| 1 | The @Component annotation instructs Spring to create a Singleton instance of this class when our application starts. |
| 2 | By extending from WebSecurityConfigurerAdapter, we can override methods to configure the security |
| 3 | Define what PasswordEncoder should be used in our application |
| 4 | We want to "store" our users in-memory (We will switch to using our database later) |
| 5 | Specify the username of the user |
| 6 | Specify the password of the user using the password encoder |
| 7 | Specify the roles of the defined user. We use USER here as this is the default role that is needed on secured pages. |
If you now restart the application, you should be able to log on using user/password.
3.2.1. Authentication views
Laravel has the make:auth Artisan command to generate default registration and login templates, which are really convenient.
There is no such thing in Spring (except for the default login form), so we will need code this ourselves.
Let’s start with the login form:
src/main/resources/templates/login.html
<!DOCTYPE html>
<html lang="en" xmlns:th="http://www.thymeleaf.org">
<head>
    <meta charset="utf-8">
    <meta http-equiv="X-UA-Compatible" content="IE=edge">
    <meta name="viewport" content="width=device-width, initial-scale=1">

    <title>Login</title>
</head>
<body>
<h1>Tasks List - Login</h1>
<div>
    <form th:action="@{/login}" method="post"> (1)
        <div>
            <div>
                Username:
                <input type="text" name="username" id="username"
                       required
                       autofocus>
            </div>
            <div>
                Password:
                <input type="password" name="password"
                       required>
            </div>
            <div>
                <button type="submit">Sign In</button>
            </div>
        </div>
    </form>
</div>
</body>
</html>| 1 | Define a HTML form that does a POST to /login |
In this template we use a Thymeleaf link URL expression: @{/login}
This defines on what URL the POST should be done when the form is submitted.
Next, we create the corresponding controller:
import org.springframework.security.core.annotation.AuthenticationPrincipal;
import org.springframework.stereotype.Controller;
import org.springframework.web.bind.annotation.GetMapping;

import java.security.Principal;

@Controller
public class UserController {
    @GetMapping("/login") (1)
    public String login(@AuthenticationPrincipal Principal principal) { (2)
        if (principal == null) {
            return "login"; (3)
        } else {
            return "redirect:/"; (4)
        }
    }
}| 1 | Map the GET request on /login to the login method. |
| 2 | Inject the authenticated user, if there is already an authenticated user.
Is null if there is none. |
| 3 | Show the login.html template when there is no authenticated user. |
| 4 | Redirect to the home page if there is already an authenticated user. |
Lastly, override the configure(HttpSecurity http) method in the WebSecurityConfiguration class:
@Component
public class WebSecurityConfiguration extends WebSecurityConfigurerAdapter {

    ...

    @Override
    protected void configure(HttpSecurity http) throws Exception {
        http.authorizeRequests() (1)
            .anyRequest() (1)
            .authenticated() (1)
            .and()
                .formLogin() (2)
                .loginPage("/login") (3)
                .permitAll() (4)
            .and()
                .logout() (5)
                .permitAll();
    }
}| 1 | States that any request should be authenticated |
| 2 | Use form based login |
| 3 | Specify that the login page is available at the /login endpoint |
| 4 | Allow all users (also the not authenticated ones) to access the login page |
| 5 | Configure logout |
If you now restart the application and go to http://localhost:8080, you will be redirected to http://localhost:8080/login. Our (ugly 🙈) custom login page will be shown:
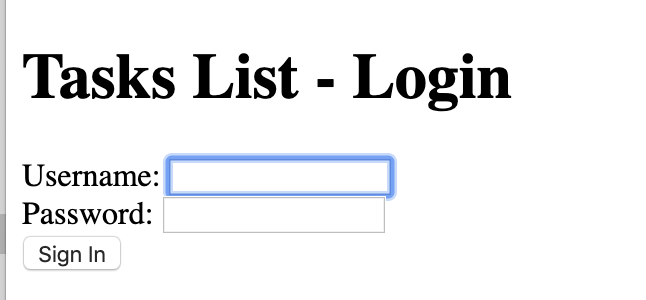
You can log in using user/password and after that you are redirected to the welcome page.
|
If you manually access http://localhost:8080/login after you are already logged on, then
you are immediately redirected to the welcome page.
This is due to the redirect we have set up in |
3.3. The task controller
To create and retrieve task, we’ll need to build a TaskController.
Artisan has a command make:controller to do this.
With Spring, we just create the class manually:
package com.wimdeblauwe.examples.laravelintermediatetasklist.task.web;

import org.springframework.stereotype.Controller;
import org.springframework.web.bind.annotation.*;

@Controller
@RequestMapping("/tasks") (1)
public class TaskController {

    @GetMapping
    public String index() {
        return null;
    }

    @PostMapping (2)
    public String store() {
        return null;
    }

    @DeleteMapping("/{taskId}") (3)
    public String destroy(@PathVariable Integer taskId) {
        return null;
    }
}| 1 | The RequestMapping annotation indicates that all methods in this class map to the /tasks URL (and below). |
| 2 | Declare a POST mapping on the root (below /tasks). |
| 3 | Declare a DELETE mapping on /tasks/<taskId>.
The <taskId> part of the URL will be injected as the taskId variable in the method. |
3.3.1. Authenticating All Task Routes
For this application, we want all of our task routes to require an authenticated user. In other words, the user must be "logged into" the application in order to create a task. So, we need to restrict access to our task routes to only authenticated users.
In Laravel, you need to add a call to the middleware method.
With Spring, we handle authentication centrally in our WebSecurityConfiguration class we have created before.
Since we declared there that all routes should be authenticated, there is no extra work to do for our TaskController.
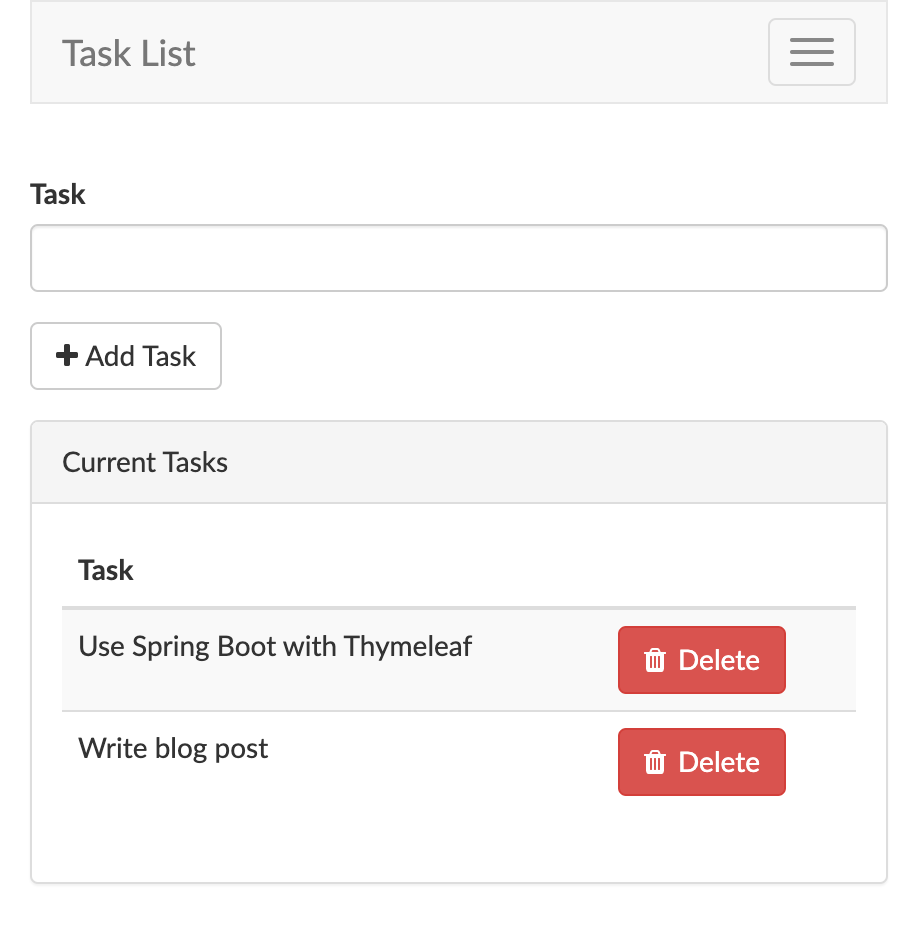
4. Building Layouts & Views
The primary part of this application only has a single view which contains a form for adding new tasks as well as a listing of all current tasks. To help you visualize the view, here is a screenshot of the finished application with basic Bootstrap CSS styling applied:
4.1. Defining The Layout
Almost all web applications share the same layout across pages. For example, this application has a top navigation bar that would be typically present on every page (if we had more than one). Laravel makes it easy to share these common features across every page using Blade layouts.
Thymeleaf has a very similar layout feature as well called Thymeleaf Layout Dialect.
Start with adding the necessary dependency in our pom.xml:
<project>
    <dependencies>
        ...
        <dependency>
            <groupId>nz.net.ultraq.thymeleaf</groupId>
            <artifactId>thymeleaf-layout-dialect</artifactId>
        </dependency>
    </dependencies>
</project>
Now we can create our layout template file:
src/main/resources/templates/layouts/app.html
<!DOCTYPE html>
<html lang="en"
      xmlns:th="http://www.thymeleaf.org"
      xmlns:layout="http://www.ultraq.net.nz/thymeleaf/layout"> (1)
<head>
    <title>Tasks</title>

    <!-- Fonts -->
    <link href="https://cdnjs.cloudflare.com/ajax/libs/font-awesome/4.4.0/css/font-awesome.min.css" rel='stylesheet' type='text/css'>
    <link href="https://fonts.googleapis.com/css?family=Lato:100,300,400,700" rel='stylesheet' type='text/css'>

    <!-- Styles -->
    <link href="https://maxcdn.bootstrapcdn.com/bootstrap/3.3.6/css/bootstrap.min.css" rel="stylesheet">

    <style>
        body {
            font-family: 'Lato';
        }
        .fa-btn {
            margin-right: 6px;
        }
    </style>
</head>

<body>
<div class="container">
    <nav class="navbar navbar-default">
        <!-- Navbar Contents here (See GitHub sources) -->
    </nav>
</div>

<div layout:fragment="content"> (2)

</div>

<!-- JavaScript -->
<script src="https://cdnjs.cloudflare.com/ajax/libs/jquery/2.1.4/jquery.min.js"></script>
<script src="https://maxcdn.bootstrapcdn.com/bootstrap/3.3.6/js/bootstrap.min.js"></script>
</body>
</html>| 1 | Declare the layout namespace |
| 2 | Declare an extension point content for the pages using this layout (Similar to the @yield statement in Blade templates) |
4.2. Defining The Child View
Great, our application layout is finished.
Next, we need to define a view that contains a form to create a new task as well as a table that lists all existing tasks.
Let’s define this view in src/main/resources/task/index.html, which will correspond to the index() method in our TaskController.
We’ll skip over some of the Bootstrap CSS boilerplate and only focus on the things that matter. Remember, you can download the full source for this application on GitHub:
src/main/resources/templates/task/index.html
<!DOCTYPE html>
<html lang="en"
      xmlns:th="http://www.thymeleaf.org"
      xmlns:layout="http://www.ultraq.net.nz/thymeleaf/layout"
      layout:decorate="~{layouts/app}"> (1)
<body>
<div layout:fragment="content"> (2)
    <div class="panel-body">

        <!-- New Task Form -->
        <form th:action="@{/tasks}" method="POST" class="form-horizontal">

            <!-- Task Name -->
            <div class="form-group">
                <label for="task-name" class="col-sm-3 control-label">Task</label>

                <div class="col-sm-6">
                    <input type="text" name="name" id="task-name" class="form-control">
                </div>
            </div>

            <!-- Add Task Button -->
            <div class="form-group">
                <div class="col-sm-offset-3 col-sm-6">
                    <button type="submit" class="btn btn-default">
                        <i class="fa fa-plus"></i> Add Task
                    </button>
                </div>
            </div>
        </form>
    </div>

    <!-- TODO: Current Tasks -->
</div>
</body>
</html>| 1 | The layout:decorate attribute indicates that this file should be decorated with the layout defined by layouts/app.html. |
| 2 | All HTML inside this div will put in the content section of the layout |
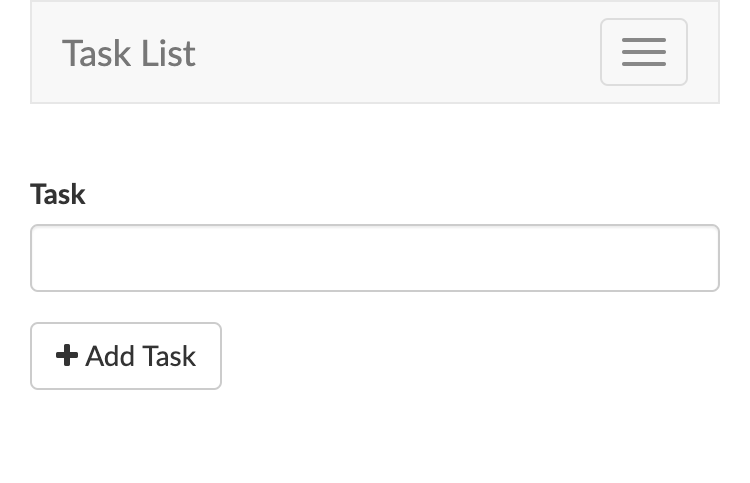
Now we have defined a basic layout and view for our application.
Let’s go ahead and return this view from the index() method of our TaskController:
filename.java
@Controller
@RequestMapping("/tasks")
public class TaskController {

    @GetMapping
    public String index() {
        return "task/index"; (1)
    }

    ...
}| 1 | Indicate the view that should be used. The path is relative to src/main/resources/templates.
Since our index.html is located in the src/main/resources/templates/task directory, we need to return task/index (so without the .html extension). |
The resulting web page will look like this:
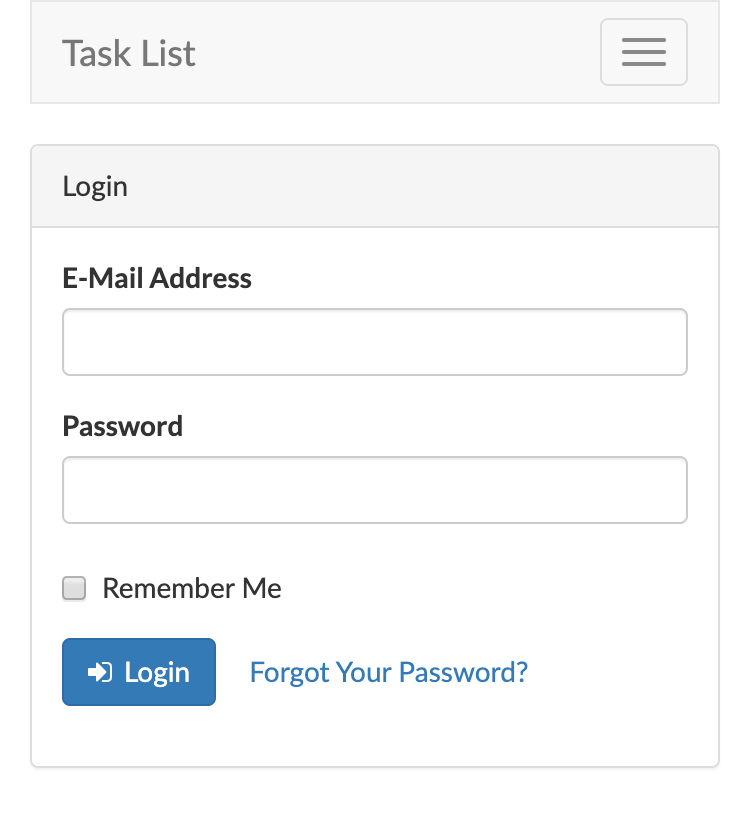
Now that we have our nice layout, we will also update the login page to use this. Check out the source code for details. The result looks like this:
One thing to note is the error handling if there was a problem to log on:
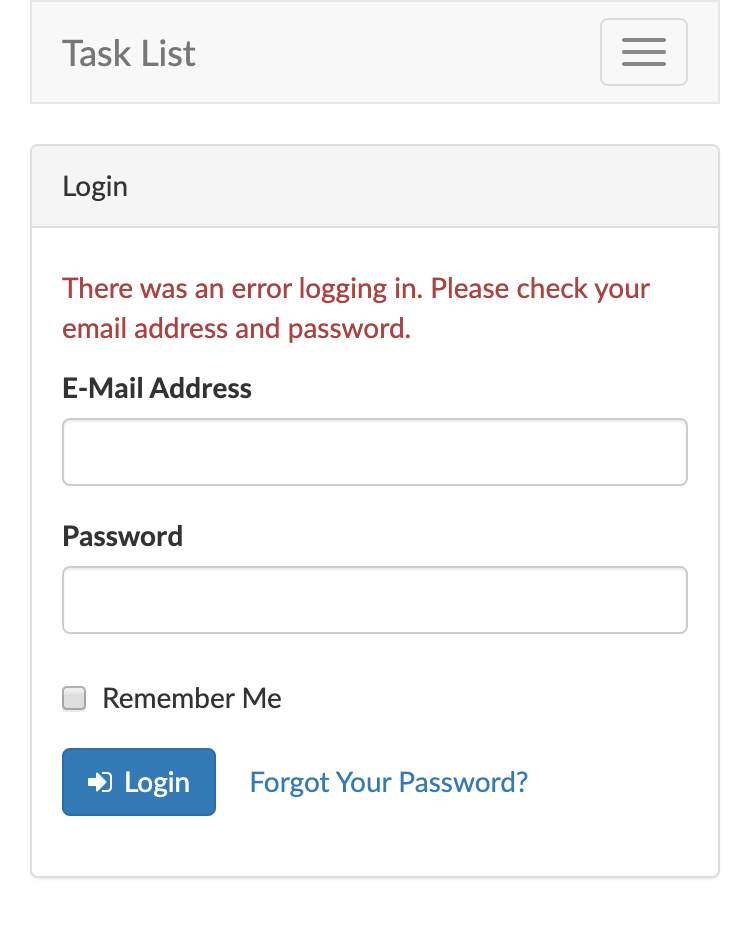
This is done via this piece of HTML:
<div th:if="${param.error}" class="help-block">
    <p class="text-danger">There was an error logging in. Please check your email address and password.</p>
</div>
When there is an error, Spring will add the error query parameter to the URL.
We can use this in our Thymeleaf template to show an error message.
Next, we’re ready to add code to our POST /tasks route’s controller method to handle the incoming form input and add a new task to the database.
5. Adding tasks
5.1. Validation
Now that we have a form in our view, we need to add code to our TaskController.store() method to validate the incoming form input and create a new task.
First, let’s validate the input. We want to make the name required and it can be maximum 255 characters.
To capture the form data, we will create an object that represents that data:
import javax.validation.constraints.NotEmpty;
import javax.validation.constraints.Size;

public class CreateTaskParameters {
    @NotEmpty (1)
    @Size(max = 255) (2)
    private String name;

    public String getName() {
        return name;
    }

    public void setName(String name) {
        this.name = name;
    }
}| 1 | The name property cannot be empty (Also disallows null values). |
| 2 | The name property can be 255 characters maximum. |
Now we update the controller so that this object is available in the model:
@GetMapping
public String index(Model model) { (1)
    model.addAttribute("createTaskParameters", new CreateTaskParameters()); (2)
    return "task/index";
}| 1 | Add Model parameter. Spring will inject an instance automatically. |
| 2 | Add a new CreateTaskParameters instance under the createTaskParameters key |
With this, we can update our Thymeleaf template to use this object in our form:
<!-- New Task Form -->
<form th:action="@{/tasks}" method="POST" class="form-horizontal" th:object="${createTaskParameters}"> (1)

    <div th:replace="fragments/messages :: fieldErrors"></div>

    <!-- Task Name -->
    <div class="form-group">
        <label for="task-name" class="col-sm-3 control-label">Task</label>

        <div class="col-sm-6">
            <input type="text" th:field="*{name}" class="form-control"> (2)
        </div>
    </div>

    ...
</form>| 1 | Using th:object we can bind the createTaskParameters object to the form. |
| 2 | Bind the name property of the CreateTaskParameters object to the input. |
With this update, we can now update our POST request in the controller:
@PostMapping
public String store(@Valid @ModelAttribute("createTaskParameters") CreateTaskParameters parameters, (1)
                    BindingResult bindingResult, (2)
                    Model model) {
    if (bindingResult.hasErrors()) { (3)
        model.addAttribute("createTaskParameters", parameters); (4)
        return "task/index"; (5)
    }

    // TODO store new task

    return "redirect:/tasks"; (6)
}| 1 | We add CreateTaskParameters object as a parameter with 2 annotations.
@Valid ensures the object is validated according to the annotations we used on it.
@ModelAttribute allows us to configure the model attribute key. |
| 2 | The BindingResult parameter is injected by Spring and allows to check for errors. |
| 3 | Check if there are validation errors. |
| 4 | Put the parameters object back in the form. This ensures that the user input remains in the form so the user can fix his mistake(s). |
| 5 | Show the index page again with the errors. |
| 6 | Redirect back to the /tasks page when there are no errors. |
In the HTML template, we need to show the errors to the user. This is done via a custom Thymeleaf fragment. This is basically a piece of HTML that we can include where needed.
In our index.html, it is used like this:
<!-- New Task Form -->
<form th:action="@{/tasks}" method="POST" class="form-horizontal" th:object="${createTaskParameters}"> (1)

    <div th:replace="fragments/messages :: fieldErrors"></div>

    ...
</form>
If we look closely, the th:replace exists of 2 parts:
-
fragments/messages: refers to the path relative tosrc/main/resources/templateswhere the fragment HTML page is located. -
fieldErrors: name of the fragement (defined viath:fragment) inside the fragment HTML file.
So, for this to work, create the src/main/resources/templates/fragments/messages.html file and add this content:
<html xmlns="http://www.w3.org/1999/xhtml" xmlns:th="http://www.thymeleaf.org">
<body>
<div th:fragment="fieldErrors" class="alert alert-danger" th:if="${#fields.hasErrors('*')}">
<p><span>There was a problem creating the task:</span></p>
<ul>
<li th:each="err : ${#fields.errors('*')}" th:text="${err}"></li>
</ul>
</div>
</body>
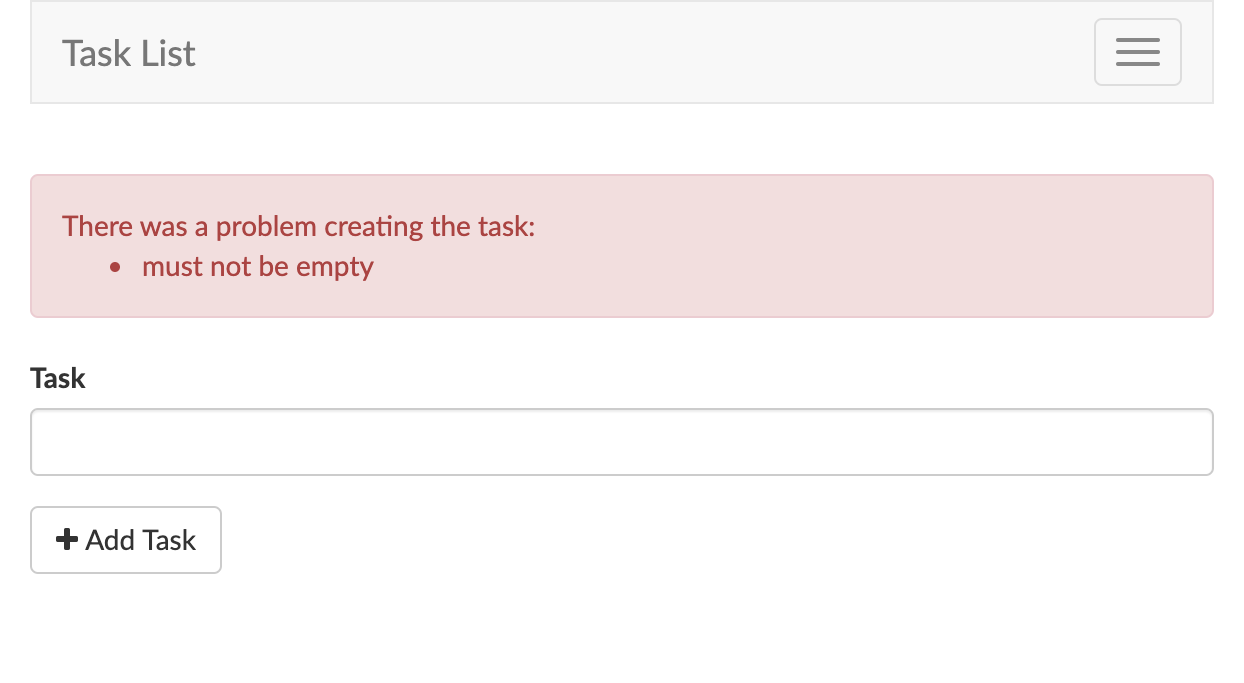
</html>We can now try to add a task with an empty name and it will show a proper error message:
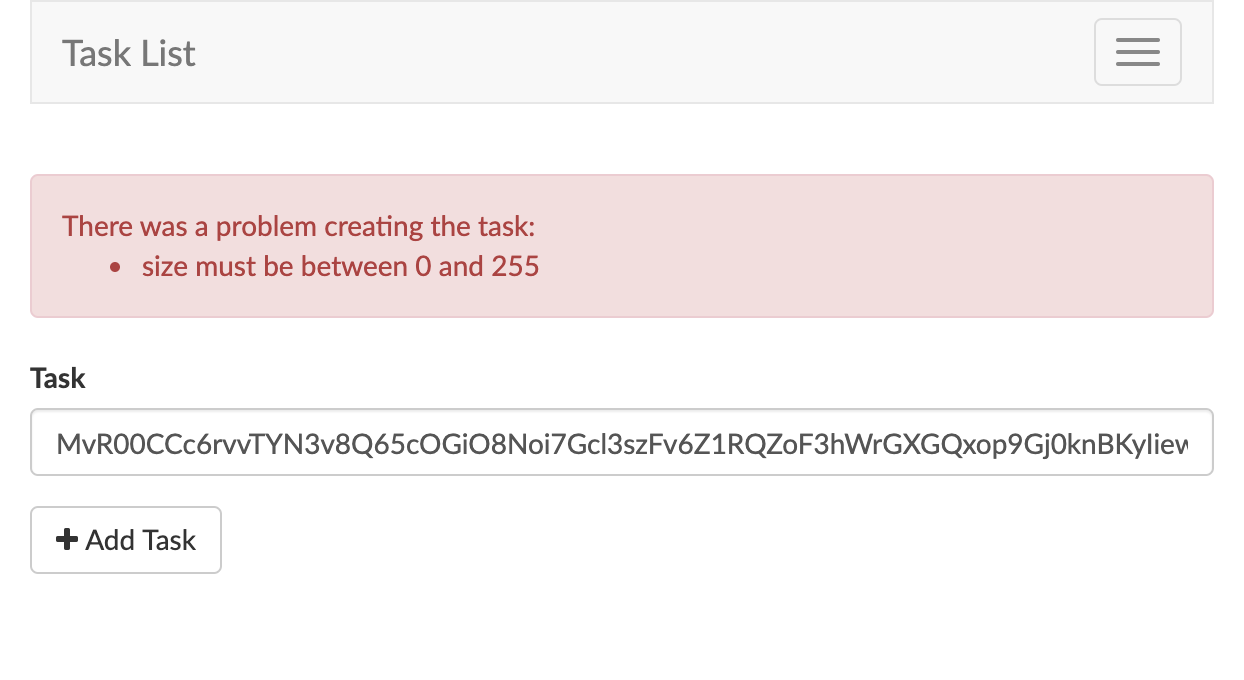
Or if you try to add a task with name of more than 255 characters:
5.2. Creating the task
Now that input validation is handled, let’s actually create a new task in the database.
With Laravel, this is done via Eloquent relationships like this:
$request->user()->tasks()->create([
        'name' => $request->name,
    ]);
With Spring, we will do this differently. No worries, Spring Data JPA will make this real easy as well.
First, we create a TaskRepository interface. This interface will allow to add, update and delete Task objects, handling the conversion to and from the database in the process:
package com.wimdeblauwe.examples.laravelintermediatetasklist.task;

import org.springframework.data.repository.CrudRepository;

public interface TaskRepository extends CrudRepository<Task, Integer> {
}
The interface just extends from CrudRepository.
This is fact the only thing we need to do to be able to store Task objects.
The actual implementation of the interface is handled automatically by Spring Data JPA.
If we inject the TaskRepository somewhere, we can add a task like this:
taskRepository.save(new Task(null, "My task", user));Before we can do this, we need to take care of some other things.
5.2.1. Database-based authentication
Up until now, we used an in-memory authentication user. Since we now want to link tasks in the database to a user that created those tasks, we need to put the user in the database and use that database user for authentication.
We start by creating a repository for the users:
import org.springframework.data.repository.CrudRepository;

import java.util.Optional;

public interface UserRepository extends CrudRepository<User, Integer> {
    Optional<User> findByEmail(String email);
}
The method findByEmail is a query method.
The implementation is derived automatically from the name of the method.
This means that findByEmail will automatically used the method argument to query the database for the email field.
Next, we create a UserService that will allow to add new users to the database:
public interface UserService {
    User createUser(String name, String email, String password);
}
The implementation of the interface is UserServiceImpl:
import org.springframework.security.crypto.password.PasswordEncoder;
import org.springframework.stereotype.Service;
import org.springframework.transaction.annotation.Transactional;

@Service (1)
@Transactional
public class UserServiceImpl implements UserService {
    private final UserRepository repository;
    private final PasswordEncoder passwordEncoder;

    public UserServiceImpl(UserRepository repository,
                           PasswordEncoder passwordEncoder) { (2)
        this.repository = repository;
        this.passwordEncoder = passwordEncoder;
    }

    @Override
    public User createUser(String name, String email, String password) {
        return repository.save(new User(null, name, email, passwordEncoder.encode(password))); (3)
    }
}| 1 | @Service indicates the Spring needs to create a singleton instance of this class |
| 2 | Spring will use Dependency Injection to pass the singleton instances of the UserRepository and PasswordEncoder into our constructor. |
| 3 | Use the passwordEncoder to ensure the database is encrypted in the database. |
|
Dependency Injection is an important concept when working with Spring. It allows loose coupling of different parts of the application. But it is not exclusive to Spring. See Service Container for more details on a similar pattern in Laravel. |
We declared the PasswordEncoder bean in WebSecurityConfiguration before, but we will now create a dedicated configuration class for the whole application.
We move the @Bean declaration in this new class:
@Configuration
public class LaravelIntermediateTaskListApplicationConfiguration {

    @Bean
    public PasswordEncoder passwordEncoder() {
        return PasswordEncoderFactories.createDelegatingPasswordEncoder();
    }

}
We now want to create the user in the database.
We could do this manually with SQL scripts, but it is easier to use our UserService for this.
We create a CommandLineRunner instance.
Such a class gets executed after the application is started.
We can inject our UserService and ask for the creation of our user:
package com.wimdeblauwe.examples.laravelintermediatetasklist;

import com.wimdeblauwe.examples.laravelintermediatetasklist.user.UserService;
import org.springframework.boot.CommandLineRunner;
import org.springframework.context.annotation.Profile;
import org.springframework.stereotype.Component;

@Profile("seed-db") (1)
@Component (2)
public class SeedDatabaseCommandRunner implements CommandLineRunner {
    private final UserService userService;

    public SeedDatabaseCommandRunner(UserService userService) {
        this.userService = userService;
    }

    @Override
    public void run(String... args) throws Exception {
        userService.createUser("User", "user", "password"); (3)
    }
}| 1 | Add a profile so that this code is only active when running with the seed-db profile.
This is important since we only want to run this once.
Upon next runs, the user is in the database, so no need to add the user again. |
| 2 | Register this class as a Spring component |
| 3 | Create the user |
With this code in place, we can create a user in the database by running our application with the seed-db profile.
The easiest way to do this in IntelliJ is setting the "Active profiles" setting in the run configuration.

After doing that, the database table task_user should contain something like:
| id | name | password | |
|---|---|---|---|
|
|
|
|
As a last step, we need to configure the authentication configuration to use the database user.
First, create a UserDetails implementation. This class is the bridge between our User class and Spring Security:
public class ApplicationUserDetails implements UserDetails {
    private final Integer id;
    private final String username;
    private final String password;
    private final Set<GrantedAuthority> authorities;

    public ApplicationUserDetails(User user) {
        this.id = user.getId();
        this.username = user.getEmail();
        this.password = user.getPassword();
        this.authorities = Set.of(new SimpleGrantedAuthority("ROLE_USER"));
    }

    ...
}
Next, create a UserDetailsService implementation.
This will allow Spring Security to look up the user in the database:
package com.wimdeblauwe.examples.laravelintermediatetasklist.infrastructure.security;

import com.wimdeblauwe.examples.laravelintermediatetasklist.user.User;
import com.wimdeblauwe.examples.laravelintermediatetasklist.user.UserRepository;
import org.springframework.beans.factory.annotation.Autowired;
import org.springframework.security.core.userdetails.UserDetails;
import org.springframework.security.core.userdetails.UserDetailsService;
import org.springframework.security.core.userdetails.UsernameNotFoundException;
import org.springframework.stereotype.Service;
import org.springframework.transaction.annotation.Transactional;

import static java.lang.String.format;

@Service (1)
@Transactional
public class DatabaseUserDetailsService implements UserDetailsService { (2)

    private final UserRepository userRepository;

    @Autowired
    public DatabaseUserDetailsService(UserRepository userRepository) { (3)
        this.userRepository = userRepository;
    }

    @Override
    public UserDetails loadUserByUsername(String username) throws UsernameNotFoundException {
        User user = userRepository.findByEmail(username) (4)
                                  .orElseThrow(() -> new UsernameNotFoundException(
                                          format("User with username %s could not be found", username)));

        return new ApplicationUserDetails(user); (5)
    }
}| 1 | Register the implementation as a Spring bean |
| 2 | Implement the UserDetailsService interface from Spring Security |
| 3 | Inject the UserRepository |
| 4 | Use the custom finder method findByEmail to find the user using the email address that is passed down from the login form. |
| 5 | Return the ApplicationUserDetails instance with the details of the user. |
|
The role of the user is now hardcoded to be |
Finally, adjust the WebSecurityConfiguration to use our UserDetailsService implementation.
@Component
public class WebSecurityConfiguration extends WebSecurityConfigurerAdapter {

    @Autowired
    private UserDetailsService userDetailsService;
    @Autowired
    private PasswordEncoder passwordEncoder;

    @Override
    protected void configure(AuthenticationManagerBuilder auth) throws Exception {
        auth.userDetailsService(userDetailsService)
            .passwordEncoder(passwordEncoder);
    }

    ...
}
After doing all this, you should be able to log on again, this time using database-backed authentication.
5.2.2. Storing the task
Now that we have our user in the database, we can finish storing the task.
First, create a TaskService:
public interface TaskService {
    Task createTask(int userId, String name);
}
with implementation:
@Service
@Transactional
public class TaskServiceImpl implements TaskService {
    private final TaskRepository repository;
    private final UserService userService;

    public TaskServiceImpl(TaskRepository repository, UserService userService) {
        this.repository = repository;
        this.userService = userService;
    }

    @Override
    public Task createTask(int userId, String name) {
        User user = userService.getUser(userId)
                               .orElseThrow(() -> new UserNotFoundException("Could not find user with id " + userId));
        return repository.save(new Task(null, name, user));
    }
}|
I am using a |
Inject the TaskService into the TaskController and use it like this:
@Controller
@RequestMapping("/tasks")
public class TaskController {
    private final TaskService service;

    public TaskController(TaskService service) {
        this.service = service;
    }

    @PostMapping
    public String store(@AuthenticationPrincipal ApplicationUserDetails userDetails, (1)
                        @Valid @ModelAttribute("createTaskParameters") CreateTaskParameters parameters,
                        BindingResult bindingResult, Model model) {
        if (bindingResult.hasErrors()) {
            model.addAttribute("createTaskParameters", parameters);
            return "task/index";
        }

        service.createTask(userDetails.getId(), parameters.getName()); (2)

        return "redirect:/tasks";
    }

    ...
}| 1 | Have Spring inject the authenticated user via the @AuthenticationPrincipal annotation.
NOTE: We need to use the UserDetails subclass here, not our User object. |
| 2 | Have the service create the task linked to the user. |
Great! We can now successfully create tasks. Next, let’s continue adding to our view by building a list of all existing tasks.
6. Displaying existing tasks
Now that we can create tasks, we should display the tasks we have created. The Laravel tutorial shows Dependency Injection here, but since we have already used it above, I will not repeat this here.
First, we need a way to retrieve all tasks for a user from the database.
For this, we update the TaskRepository with an extra finder method:
public interface TaskRepository extends CrudRepository<Task, Integer> {

    List<Task> findByUser(User user);
}
Again, we don’t need to write any implementation. By using this specific name of the method, Spring Data will figure out what SQL to use.
Next we update the TaskService and TaskServiceImpl to use this new method:
@Service
@Transactional
public class TaskServiceImpl implements TaskService {
    ...

    @Override
    public List<Task> getTasksByUser(int userId) {
        User user = userService.getUser(userId)
                               .orElseThrow(() -> new UserNotFoundException("Could not find user with id " + userId));

        return repository.findByUser(user);
    }
}
Finally, we update the TaskController to use the new service method:
@Controller
@RequestMapping("/tasks")
public class TaskController {
    ...

    @GetMapping
    public String index(@AuthenticationPrincipal ApplicationUserDetails userDetails, (1)
                        Model model) {

        model.addAttribute("createTaskParameters", new CreateTaskParameters());
        model.addAttribute("tasks", service.getTasksByUser(userDetails.getId())); (2)
        return "task/index";
    }
}| 1 | Add the ApplicationUserDetails parameter so Spring Security will inject the details of the logged on user. |
| 2 | Put the list of tasks in a model attribute called tasks. |
The final piece of the puzzle for displaying the current tasks is using our model attribute in the Thymeleaf template:
<!-- Current tasks -->
<th:block th:if="${#lists.size(tasks) > 0}"> (1)
<div class="panel panel-default">
<div class="panel-heading">
Current Tasks
</div>
<div class="panel-body">
<table class="table table-striped task-table">
<!-- Table Headings -->
<thead>
<th>Task</th>
<th> </th>
</thead>
<!-- Table Body -->
<tbody>
<tr th:each="task : ${tasks}"> (2)
<!-- Task Name -->
<td class="table-text">
<div th:text="${task.name}"></div> (3)
</td>
<td>
<!-- TODO: Delete Button -->
</td>
</tr>
</tbody>
</table>
</div>
</div>
</th:block>| 1 | Count the number of tasks to decide to display the section or not |
| 2 | Iterate over each task. There will be a <tr/> in the resulting HTML for each task. |
| 3 | Display the name property of the task. |
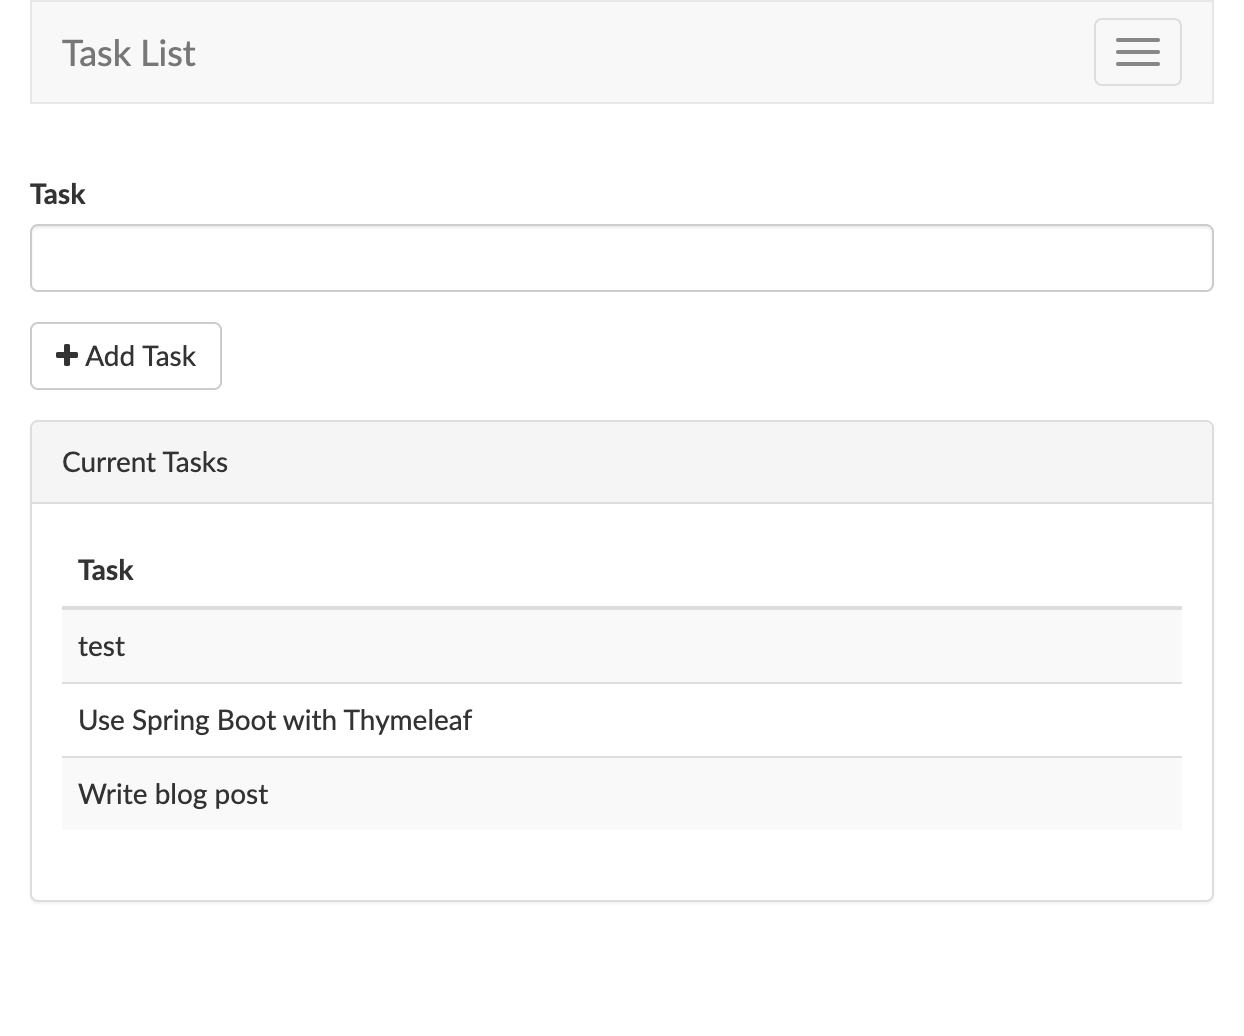
Restart the application and add some tasks. The result should be something like this:
Our task application is almost complete. But, we have no way to delete our existing tasks when they’re done. Let’s add that next!
7. Deleting tasks
7.1. Adding the delete button
We left a "TODO" note in our code where our delete button is supposed to be.
So, let’s add a delete button to each row of our task listing within the templates/task/index.html view.
We’ll create a small single-button form for each task in the list.
When the button is clicked, a DELETE /tasks/:id request will be sent to the application which will trigger our TaskController.destroy() method:
<tr th:each="task : ${tasks}">
    <!-- Task Name -->
    <td class="table-text">
        <div th:text="${task.name}"></div>
    </td>

    <!-- Delete Button -->
    <td>
        <form th:action="@{/tasks/{id}(id=${task.id})}" th:method="DELETE"> (1)

            <button type="submit" th:id="${'delete-task-' + task.id}" class="btn btn-danger"> (2)
                <i class="fa fa-btn fa-trash"></i>Delete
            </button>
        </form>
    </td>
</tr>| 1 | th:action configures the URL for the form. Thymeleaf allows to use a URL template where we can use a property of our task variable. |
| 2 | Give each submit button a different id via th:id |
|
Method Spoofing
HTML forms only allow the GET and POST HTTP verbs, so we need a way to spoof a DELETE request from the form.
|
7.2. Authorization
If we look back at the TaskController, we see our destroy method is implemented like this:
    @DeleteMapping("/{taskId}")
    public String destroy(@PathVariable("taskId") Integer taskId) {
        // TODO delete task

        return "redirect:/tasks";
    }
Due to our security configuration (See WebSecurityConfiguration) all requests need to be autheticated.
However, a user could send a malicious request where a random taskId is used to try to delete the task of a different user.
So, we need to use Spring Security’s authorization capabilities to make sure the authenticated user actually owns the Task instance.
First, update TaskService with a new method to retrieve a Task given a task id:
public interface TaskService {
    ...

    Optional<Task> getTask(int taskId);
}
Second, implement the method in TaskServiceImpl:
@Service
@Transactional
public class TaskServiceImpl implements TaskService {
    ...

    @Override
    public Optional<Task> getTask(int taskId) {
        return repository.findById(taskId); (1)
    }
}| 1 | findById is a method from CrudRepository so it is automatically available to us |
Next, we annotate our controller method to check if the id of the user linked to the Task is the same id as the authenticated user id:
    @DeleteMapping("/{taskId}")
    @PreAuthorize("@taskServiceImpl.getTask(#taskId).orElse(null)?.user.id == #userDetails.id") (1)
    public String destroy(@AuthenticationPrincipal ApplicationUserDetails userDetails,
                          @PathVariable("taskId") Integer taskId) {
        ...

        return "redirect:/tasks";
}| 1 | The @PreAuthorize annotation ensures users can only delete their own tasks |
To ensure Spring Security will take the PreAuthorize into account, we need to configure it in WebSecurityConfiguration.
Add @EnableGlobalMethodSecurity(prePostEnabled = true) at the class level:
@Component
@EnableGlobalMethodSecurity(prePostEnabled = true)
public class WebSecurityConfiguration extends WebSecurityConfigurerAdapter {
    ....
}
7.3. Deleting the task
Finally, let’s finish adding the logic to our destroy method to actually delete the given task.
We can use CrudRepository 's deleteById method to delete the given model instance in the database.
@Service
@Transactional
public class TaskServiceImpl implements TaskService {
    ...

    @Override
    public void deleteTask(Integer taskId) {
        repository.deleteById(taskId);
    }
}
Once the record is deleted, we will redirect the user back to the /tasks URL.
Full code of the controller method:
    @DeleteMapping("/{taskId}")
    @PreAuthorize("@taskServiceImpl.getTask(#taskId).orElse(null)?.user.id == #userDetails.id")
    public String destroy(@AuthenticationPrincipal ApplicationUserDetails userDetails,
                          @PathVariable("taskId") Integer taskId) {

        service.deleteTask(taskId);
        return "redirect:/tasks";
    }
Restart the application and we have a fully functional task application that allows to add, view and delete tasks for multiple users.
8. Conclusion
This has been the longest blog post I have written so far. But I learned a ton doing this!
Laravel is a very capable framework for PHP development, but hopefully I showed that you can use Spring Boot and Thymeleaf as well. See tags/thymeleaf and tags/spring-boot for other blog posts if you want to learn more.
9. References
-
Original Laravel tutorial: https://laravel.com/docs/5.2/quickstart-intermediate
-
Source code for this blog entry: https://github.com/wimdeblauwe/blog-example-code/tree/master/laravel-intermediate-task-list
-
Source code PHP tutorial: https://github.com/laravel/quickstart-intermediate/
-
Spring Boot website: https://spring.io/projects/spring-boot
-
Thymeleaf website: https://www.thymeleaf.org/
If you want to be notified in the future about new articles, as well as other interesting things I'm working on, join my mailing list!
I send emails quite infrequently, and will never share your email address with anyone else.