I recently played around with Shoelace, a library of web components. The nice thing about web components is that they are framework agnostic, so we can use them with Thymeleaf as well. This blog post will show how to use the Alert Toast component to show a confirmation or an error to the user.
|
See also part 2 for a similar demo where the HTML of the notifications is generated in Thymeleaf instead of in JavaScript. |
Sample
The sample shows a single page from a fake shop which allows to buy some item. There is a button 'Add to cart' which will send a request to the server and will show a toast notification if there was a success, or an error message if something went wrong.
This is the page:
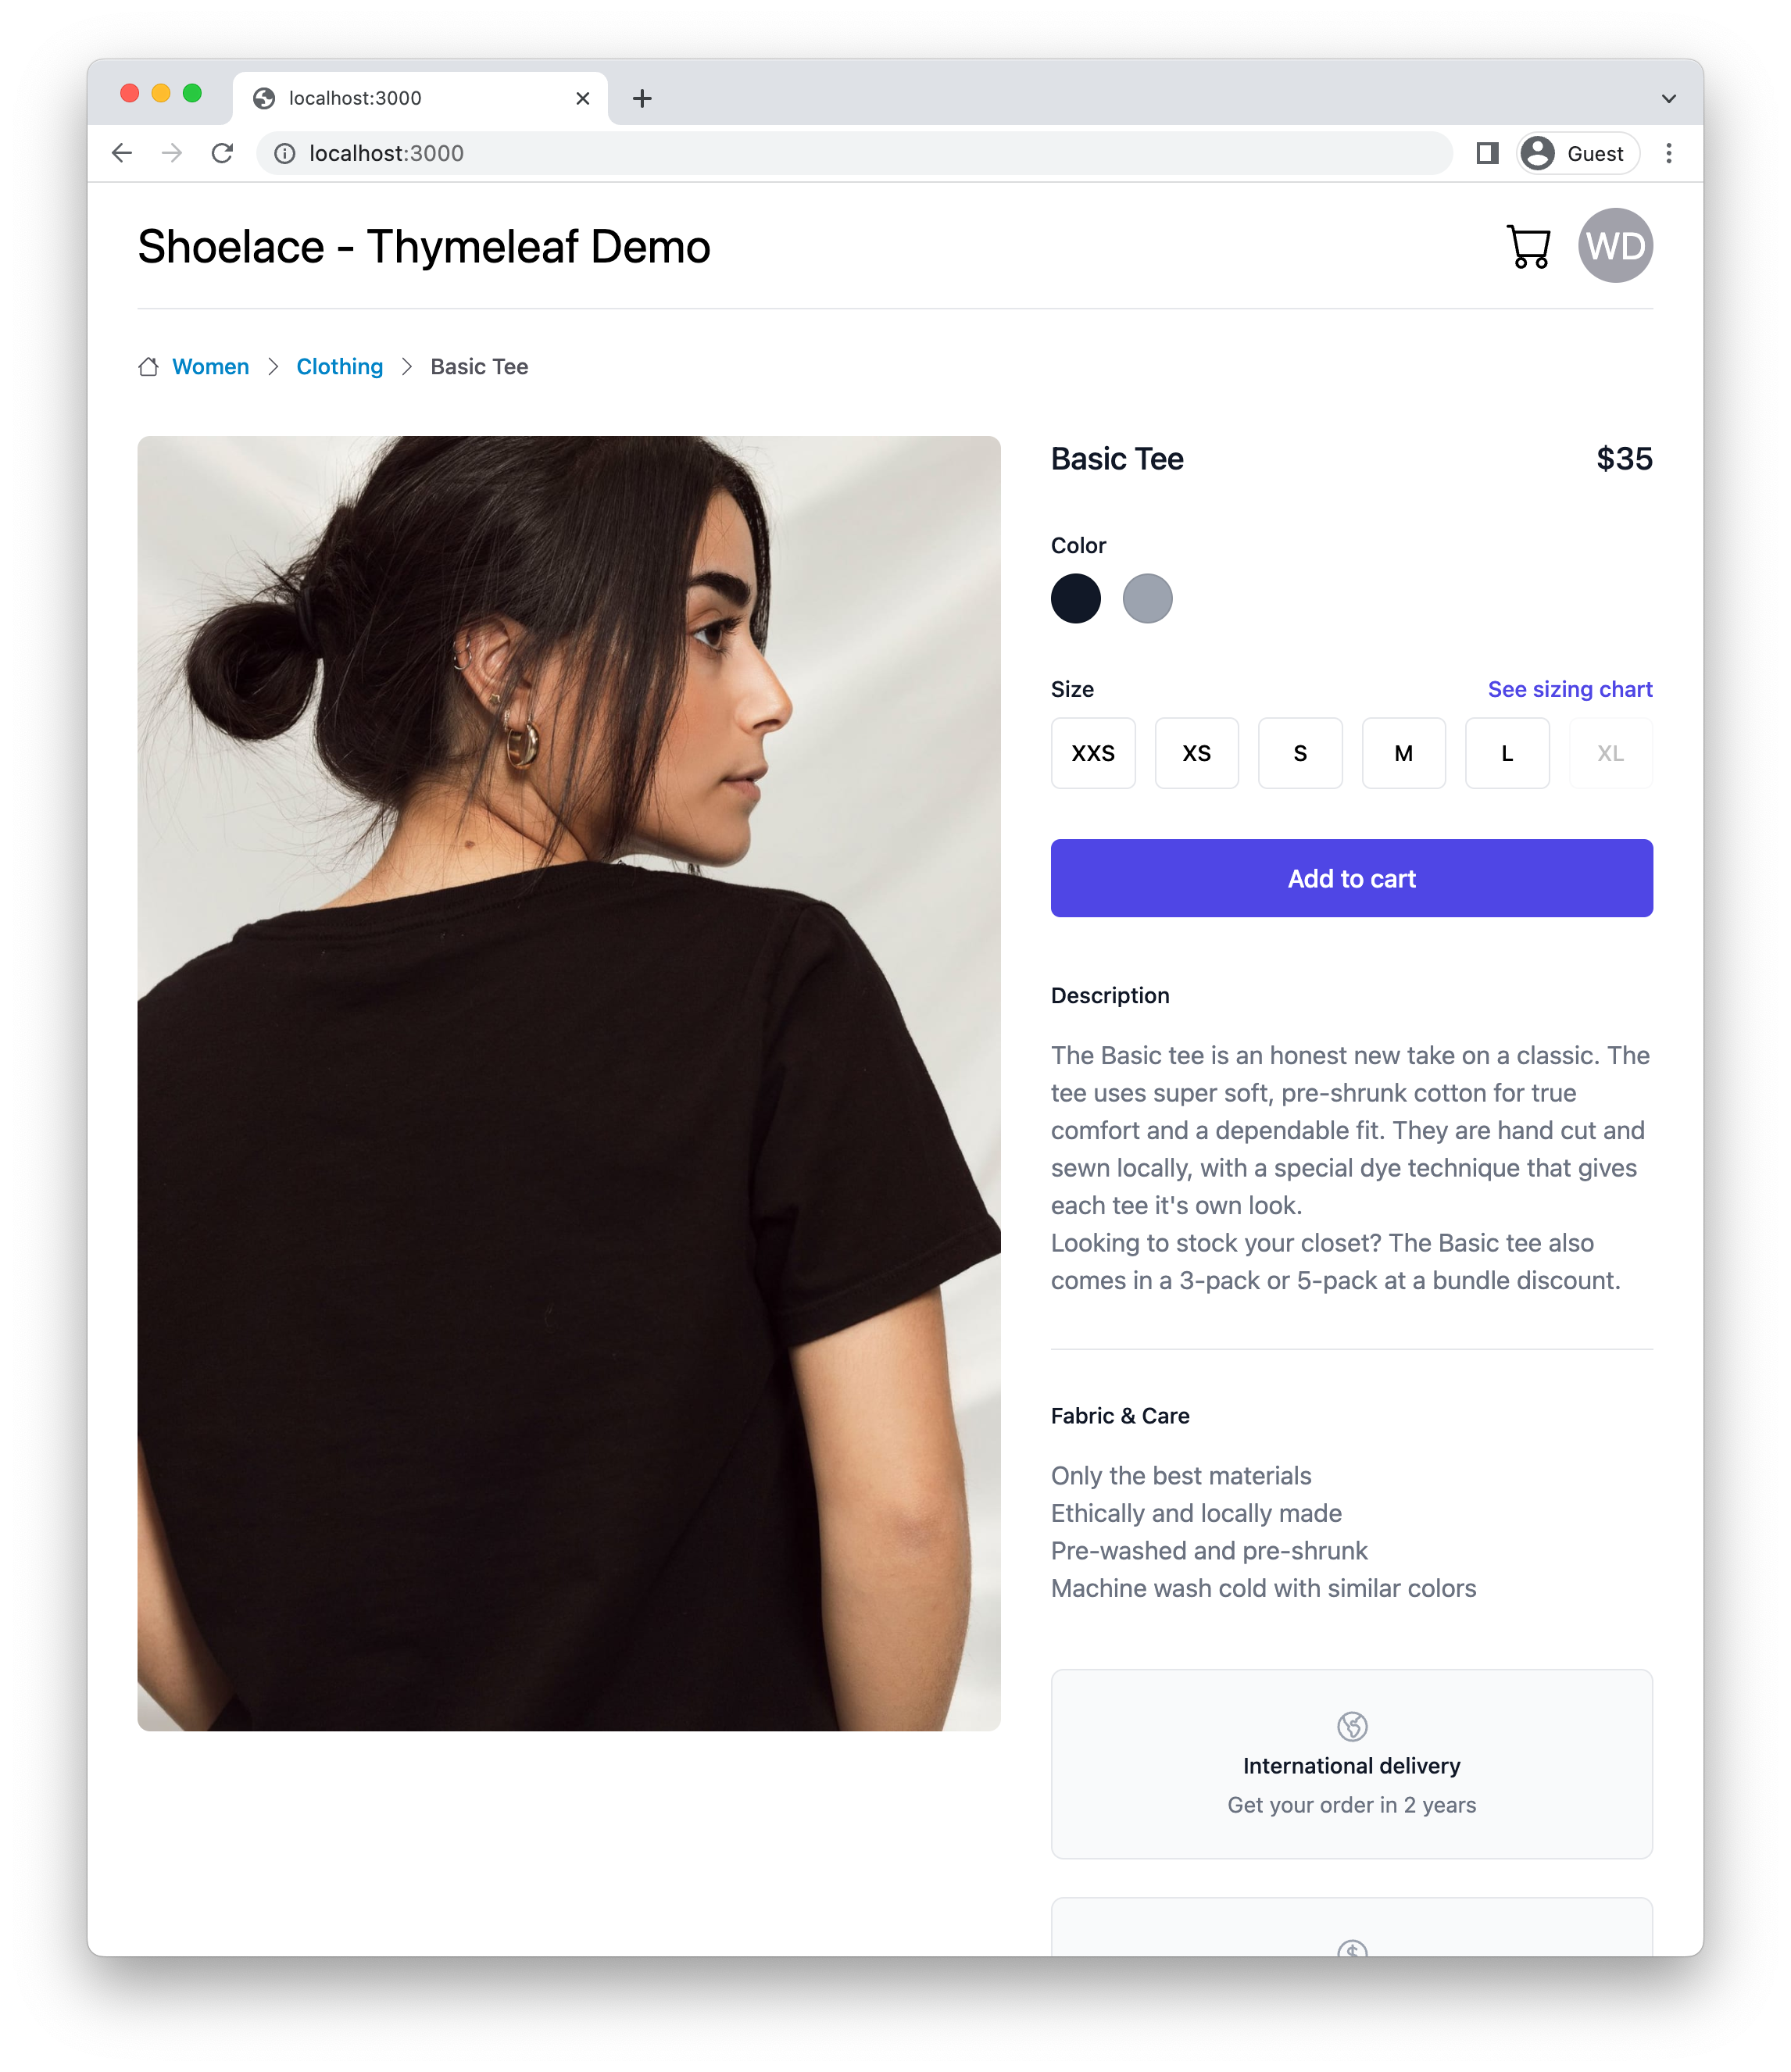
It uses the following components from the Shoelace library:
-
Avatar: The "WD" circle in the top right
-
Breadcrumb: Showing above the image
-
Icon: The cart icon next to the avatar
When the button is clicked, the notification is shown like this in the top-right corner:
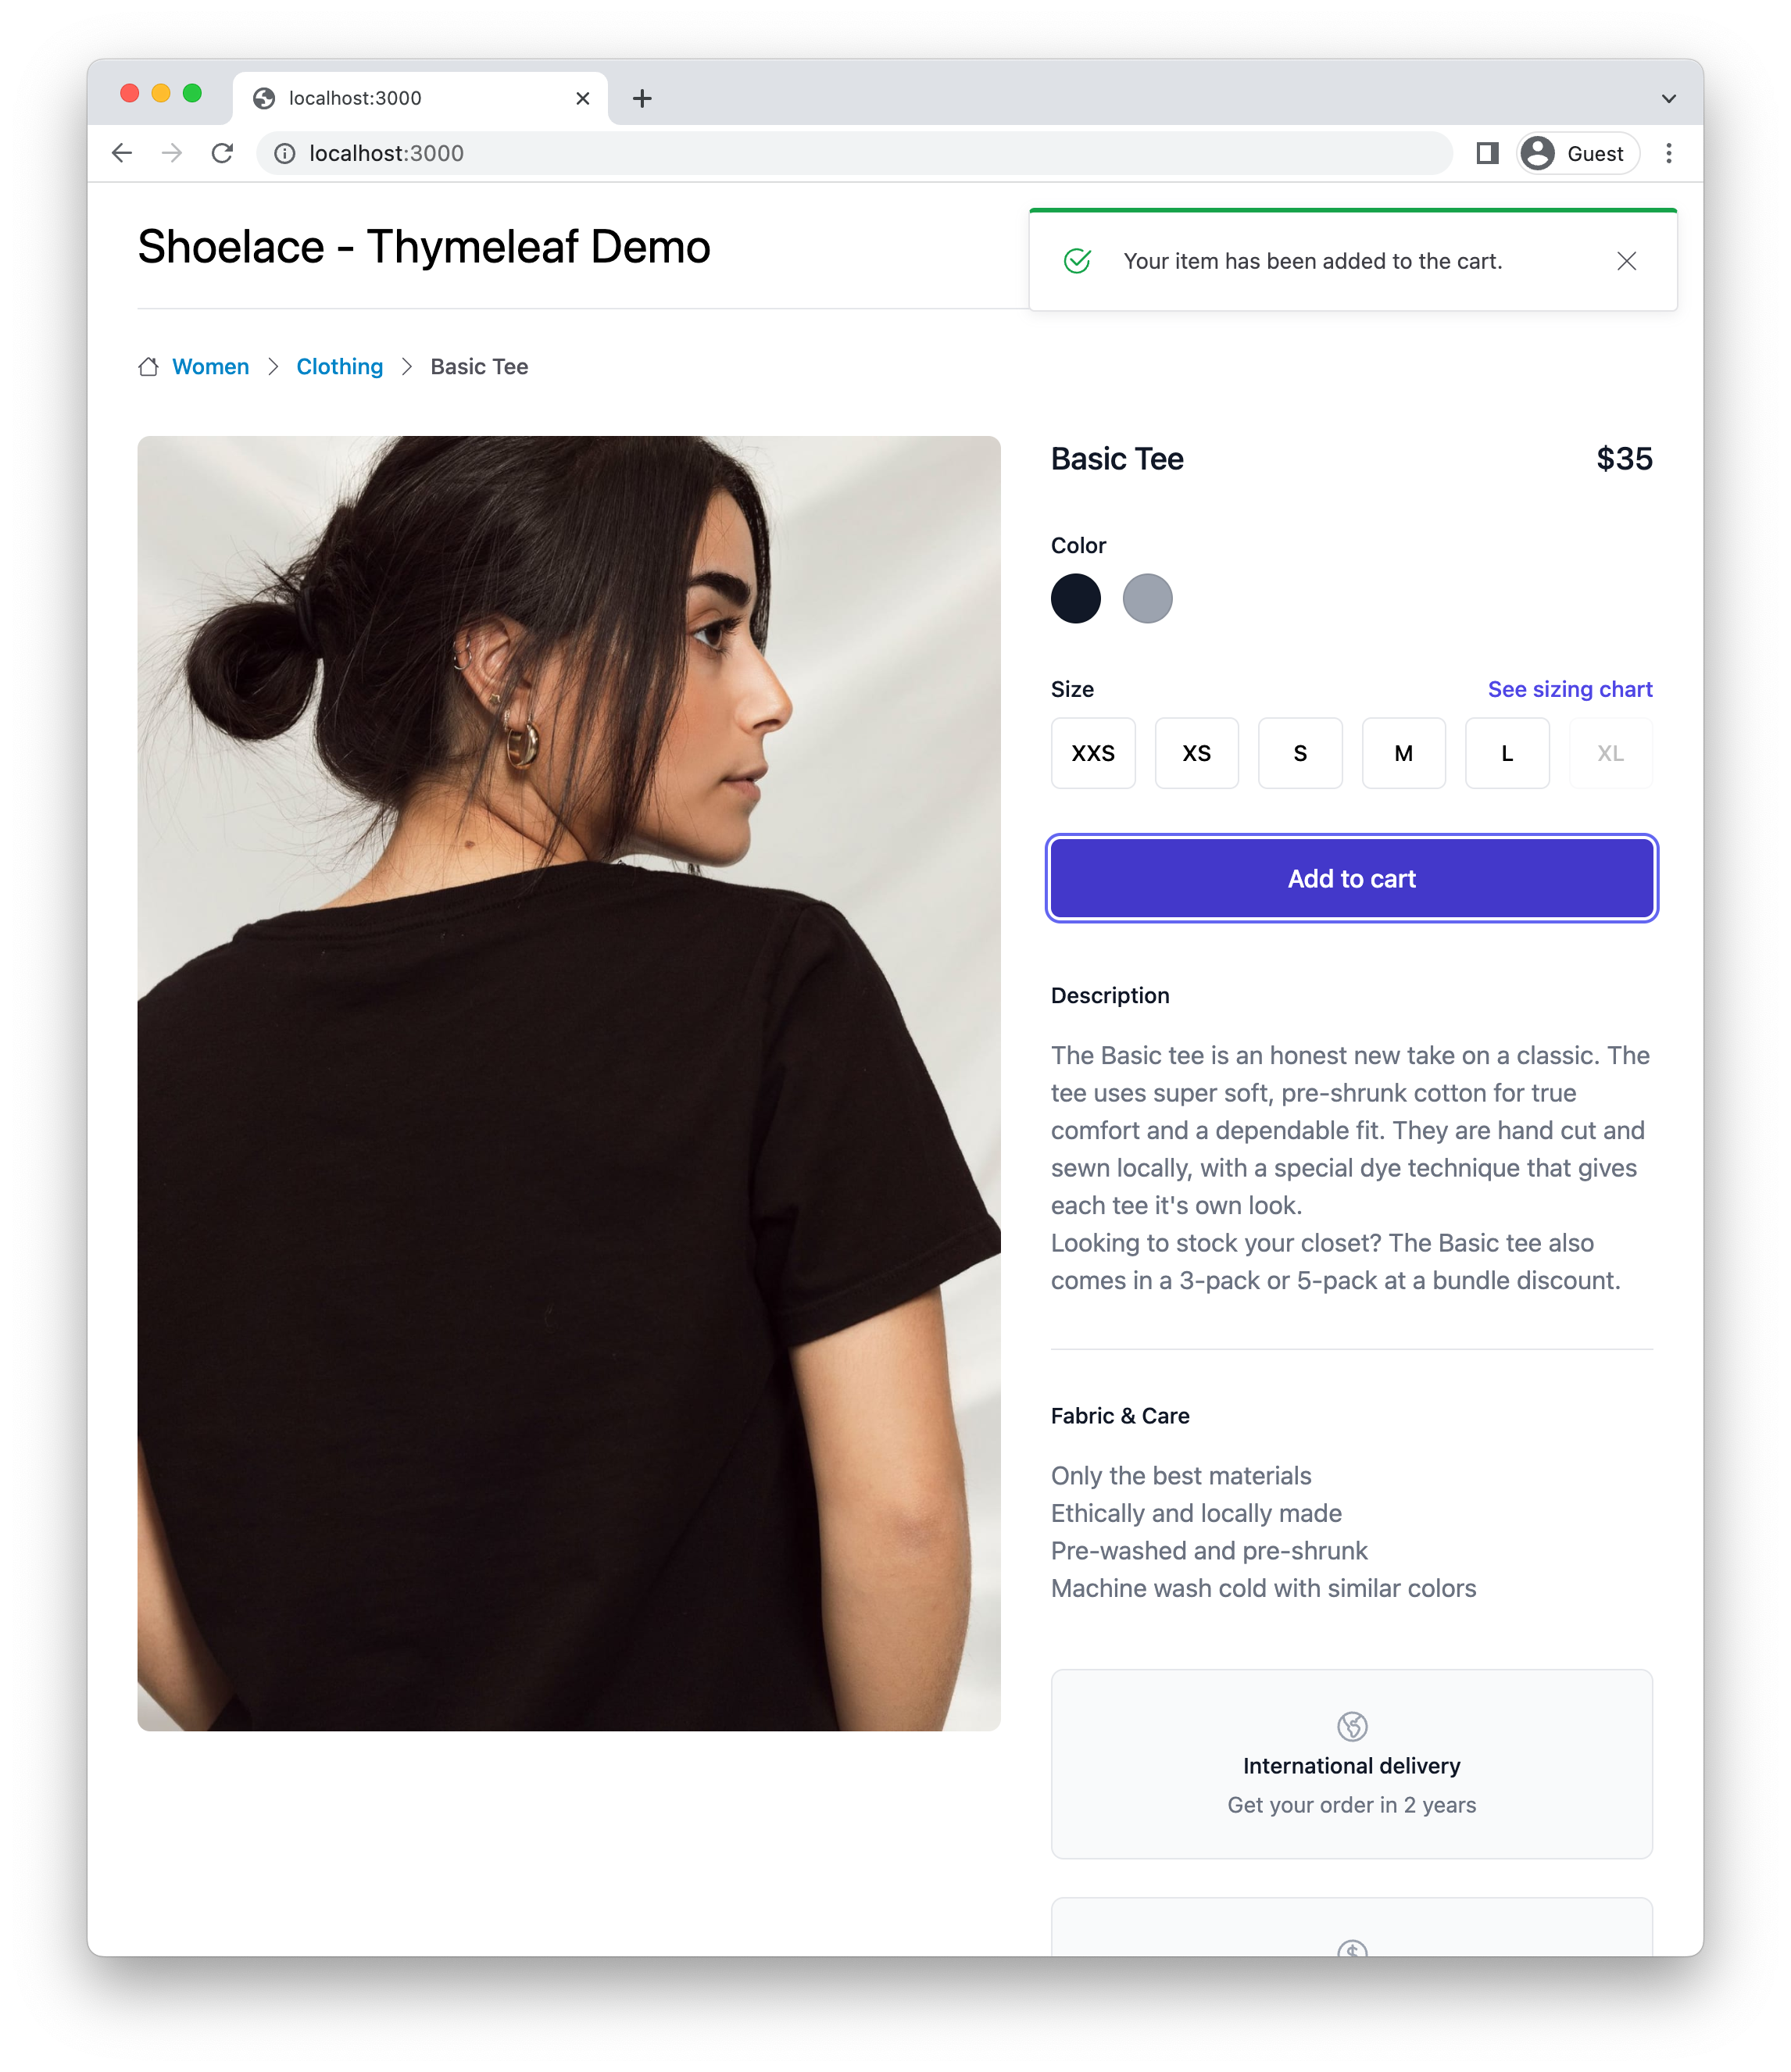
Thanks to htmx, this will all happen without page reloads.
Project setup
We start by generating our Spring Boot with Thymeleaf project using ttcli (version 0.5.1). I selected the following options:
-
Spring Boot 3.0.2
-
NPM based live reload with Tailwind CSS
-
Alpine.js enabled
-
Htmx enabled
Open the project in your editor and add the Shoelace library as a webjar to the project in the pom.xml:
<dependency>
    <groupId>org.webjars.npm</groupId>
    <artifactId>shoelace-style__shoelace</artifactId>
    <version>2.1.0</version>
</dependency>
We also need to reference the Shoelace CSS and JavaScript files in our src/main/resources/templates/layout/main.html file:
<!DOCTYPE html>
<html th:lang="|${#locale.language}-${#locale.country}|"
      xmlns:th="http://www.thymeleaf.org"
      xmlns:layout="http://www.ultraq.net.nz/thymeleaf/layout">
<head>
    <meta charset="UTF-8">
    <meta name="viewport" content="width=device-width, initial-scale=1">
    <title></title>
    <link rel="stylesheet" th:href="@{/css/application.css}">
    <link rel="stylesheet" th:href="@{/webjars/shoelace-style__shoelace/dist/themes/light.css}"> (1)
    <script type="module" th:src="@{/webjars/shoelace-style__shoelace/dist/shoelace.js}"></script> (2)
</head>
<body>
<main layout:fragment="content">
</main>

<script type="text/javascript" th:src="@{/webjars/alpinejs/dist/cdn.min.js}"></script>
<script type="text/javascript" th:src="@{/webjars/htmx.org/dist/htmx.min.js}"></script>
<script layout:fragment="js-content"> (3)

</script>
</body>
</html>| 1 | Shoelace CSS file |
| 2 | Shoelace JavaScript file. Because it is a type="module" dependency, it can be put in the <head> section without a negative effect on the initial rendering of the page. |
| 3 | An extra <script> layout fragment that will allow us to add some custom JavaScript in our index.html. |
Now we create a controller and a Thymeleaf template to have something to test our setup with.
The controller will serve the index.html template at the root of the application:
import org.springframework.stereotype.Controller;
import org.springframework.web.bind.annotation.GetMapping;
import org.springframework.web.bind.annotation.RequestMapping;

@Controller
@RequestMapping("/")
public class HomeController {

    @GetMapping
    public String home() {
        return "index";
    }
}
We can update the Thymeleaf template at src/main/resources/templates/index.html to create the header:
<!DOCTYPE html>
<html lang="en"
      xmlns:th="http://www.thymeleaf.org"
      xmlns:layout="http://www.ultraq.net.nz/thymeleaf/layout"
      layout:decorate="~{layout/main}">
<body>
<div layout:fragment="content">
    <div class="mx-auto max-w-7xl px-4">
        <div class="flex justify-between items-center m-4">
            <div class="text-3xl">Shoelace - Thymeleaf Demo</div>
            <div class="flex items-center text-3xl gap-4">
                <sl-icon name="cart"></sl-icon> (1)
                <sl-avatar initials="WD" label="Avatar with initials: WD"></sl-avatar> (2)
            </div>
        </div>
        <hr class="mx-4">
    </div>
</div>
</body>
</html>| 1 | The sl-icon web component to show the cart icon |
| 2 | The sl-avatar web component to show the user initials |
The rest of the page is copied from the product overview component from Tailwind UI to have something nice to work with. Check out the linked GitHub repo for the full code.
Toast notification
To simulate doing something on the server, we update the HomeController with a purchase method:
import io.github.wimdeblauwe.hsbt.mvc.HxRequest;
import io.github.wimdeblauwe.hsbt.mvc.HxTrigger;
import org.springframework.http.HttpStatus;
import org.springframework.stereotype.Controller;
import org.springframework.web.bind.annotation.GetMapping;
import org.springframework.web.bind.annotation.PostMapping;
import org.springframework.web.bind.annotation.RequestMapping;
import org.springframework.web.bind.annotation.ResponseStatus;

import java.util.random.RandomGenerator;
import java.util.random.RandomGeneratorFactory;

@Controller
@RequestMapping("/")
public class HomeController {

    private static final RandomGenerator RANDOM_GENERATOR = RandomGeneratorFactory.getDefault().create();

    @GetMapping
    public String index() {
        return "index";
    }

    @PostMapping("/purchase") (1)
    @HxRequest (2)
    @HxTrigger("item-bought") (3)
    @ResponseStatus(HttpStatus.CREATED) (4)
    public void purchase() {
        if (RANDOM_GENERATOR.nextBoolean()) { (5)
            throw new RuntimeException("There was a problem registering the purchase!");
        }
    }
}| 1 | Allow to send a POST from the browser to trigger this method. |
| 2 | Only trigger this method if the request came from htmx. This requires the Spring Boot and Thymeleaf library for htmx which ttcli will add by default if you selected to use htmx. |
| 3 | Sets the HX-Trigger response header with the item-bought value. |
| 4 | Have the method return a 201 Created. Adding a @ResponseStatus also avoids that Spring MVC wants to render a HTML page which is exactly want we want here as we will update on the client using the HX-Trigger. |
| 5 | We flip a digital coin to determine if the operation is a success or not for demonstration purposes. |
We can now update the button in the HTML page to trigger our POST method:
<form method="post"
        hx:post="@{/purchase}" (1)
        hx-swap="none"> (2)
    ...
    <button type="submit"
            class="...">
        Add to cart
    </button>
</form>| 1 | hx:post will trigger our /purchase endpoint when the button is pressed. |
| 2 | hx-swap="none" since we don’t send any HTML back for htmx to swap. |
Now at the bottom of our index.html we add a little bit of JavaScript to combine the item-bought event that htmx will send out when it receives the response from the server with the toast notifications:
<script layout:fragment="js-content">

    document.addEventListener('item-bought', () => { (1)
        notifySuccess('Your item has been added to the cart.');
    });

    document.addEventListener('htmx:responseError', () => { (2)
        notifyError('There was a problem communicating with the server.')
    });

    function notifySuccess(message) {
        notify(message, 'success', 'check2-circle')
    }

    function notifyError(message) {
        notify(message, 'danger', 'exclamation-octagon')
    }

    // Custom function to emit toast notifications
    function notify(message, variant = 'primary', icon = 'info-circle', duration = 3000) { (3)
        const alert = Object.assign(document.createElement('sl-alert'), {
            variant,
            closable: true,
            duration: duration,
            innerHTML: `
        <sl-icon name="${icon}" slot="icon"></sl-icon>
        ${escapeHtml(message)}
      `
        });

        document.body.append(alert);
        return alert.toast();
    }

    // Always escape HTML for text arguments!
    function escapeHtml(html) {
        const div = document.createElement('div');
        div.textContent = html;
        return div.innerHTML;
    }
</script>| 1 | Listen for the item-bought event and show a notification when it arrives. |
| 2 | For the error, we can use the default htmx:responseError event and also show a notification. |
| 3 | This method is straight out of the Shoelace docs on Creating Toats Imperatively. |
This GIF shows everything in action, randomly showing the success and error messages depending on what the server sends back:
Notice how Shoelace positions the notifications in a nice stack if there are multiple active.
Conclusion
Shoelace is a very nice library with great documentation. Combining it with htmx and you have something very nice in no time!
See shoelace-thymeleaf on GitHub for the full sources of this example.
If you have any questions or remarks, feel free to post a comment at GitHub discussions.