Starting a new application can be a daunting task. How will you structure your code? How can you get started quickly? There are a few tools such as JHipster that help you setup your project. One such alternative that I recently looked at is Bootify.
What is Bootify?
Bootify allows to quickly prototype your next project. It is created by Thomas Surmann, a freelance developer from Berlin (Germany). The Bootify application has a web interface that allows you to define your entities and related classes. You select from various options such as your programming language (Java or Kotlin), what database you want to use, what database migration tool you want to use and much more. The tool also allows you to have Thymeleaf views generated using Bootstrap or Tailwind CSS.
You can also have it generate the Spring Security setup with your database users coupled to Spring Security, or via a separate Authentication server such as Keycloak.
At the end, it generates a Spring Boot based project.
Trying it out
To play around with Bootify, I tried to generate the project from my book Taming Thymeleaf. I wanted to see how quickly I would get something out of it, and how usable the generated project would be.
|
I used the professional plan so I could try out all the options, including security, paging and sorting, flyway support, … The pricing is very comfortable given all the nice extra features you get with it. |
You start by selecting some general options. I made these selections:
| Selection | Value |
|---|---|
Build system |
Maven |
Language |
Java 21 |
Database |
PostgreSQL |
DB generation |
Flyway |
App. format |
Properties |
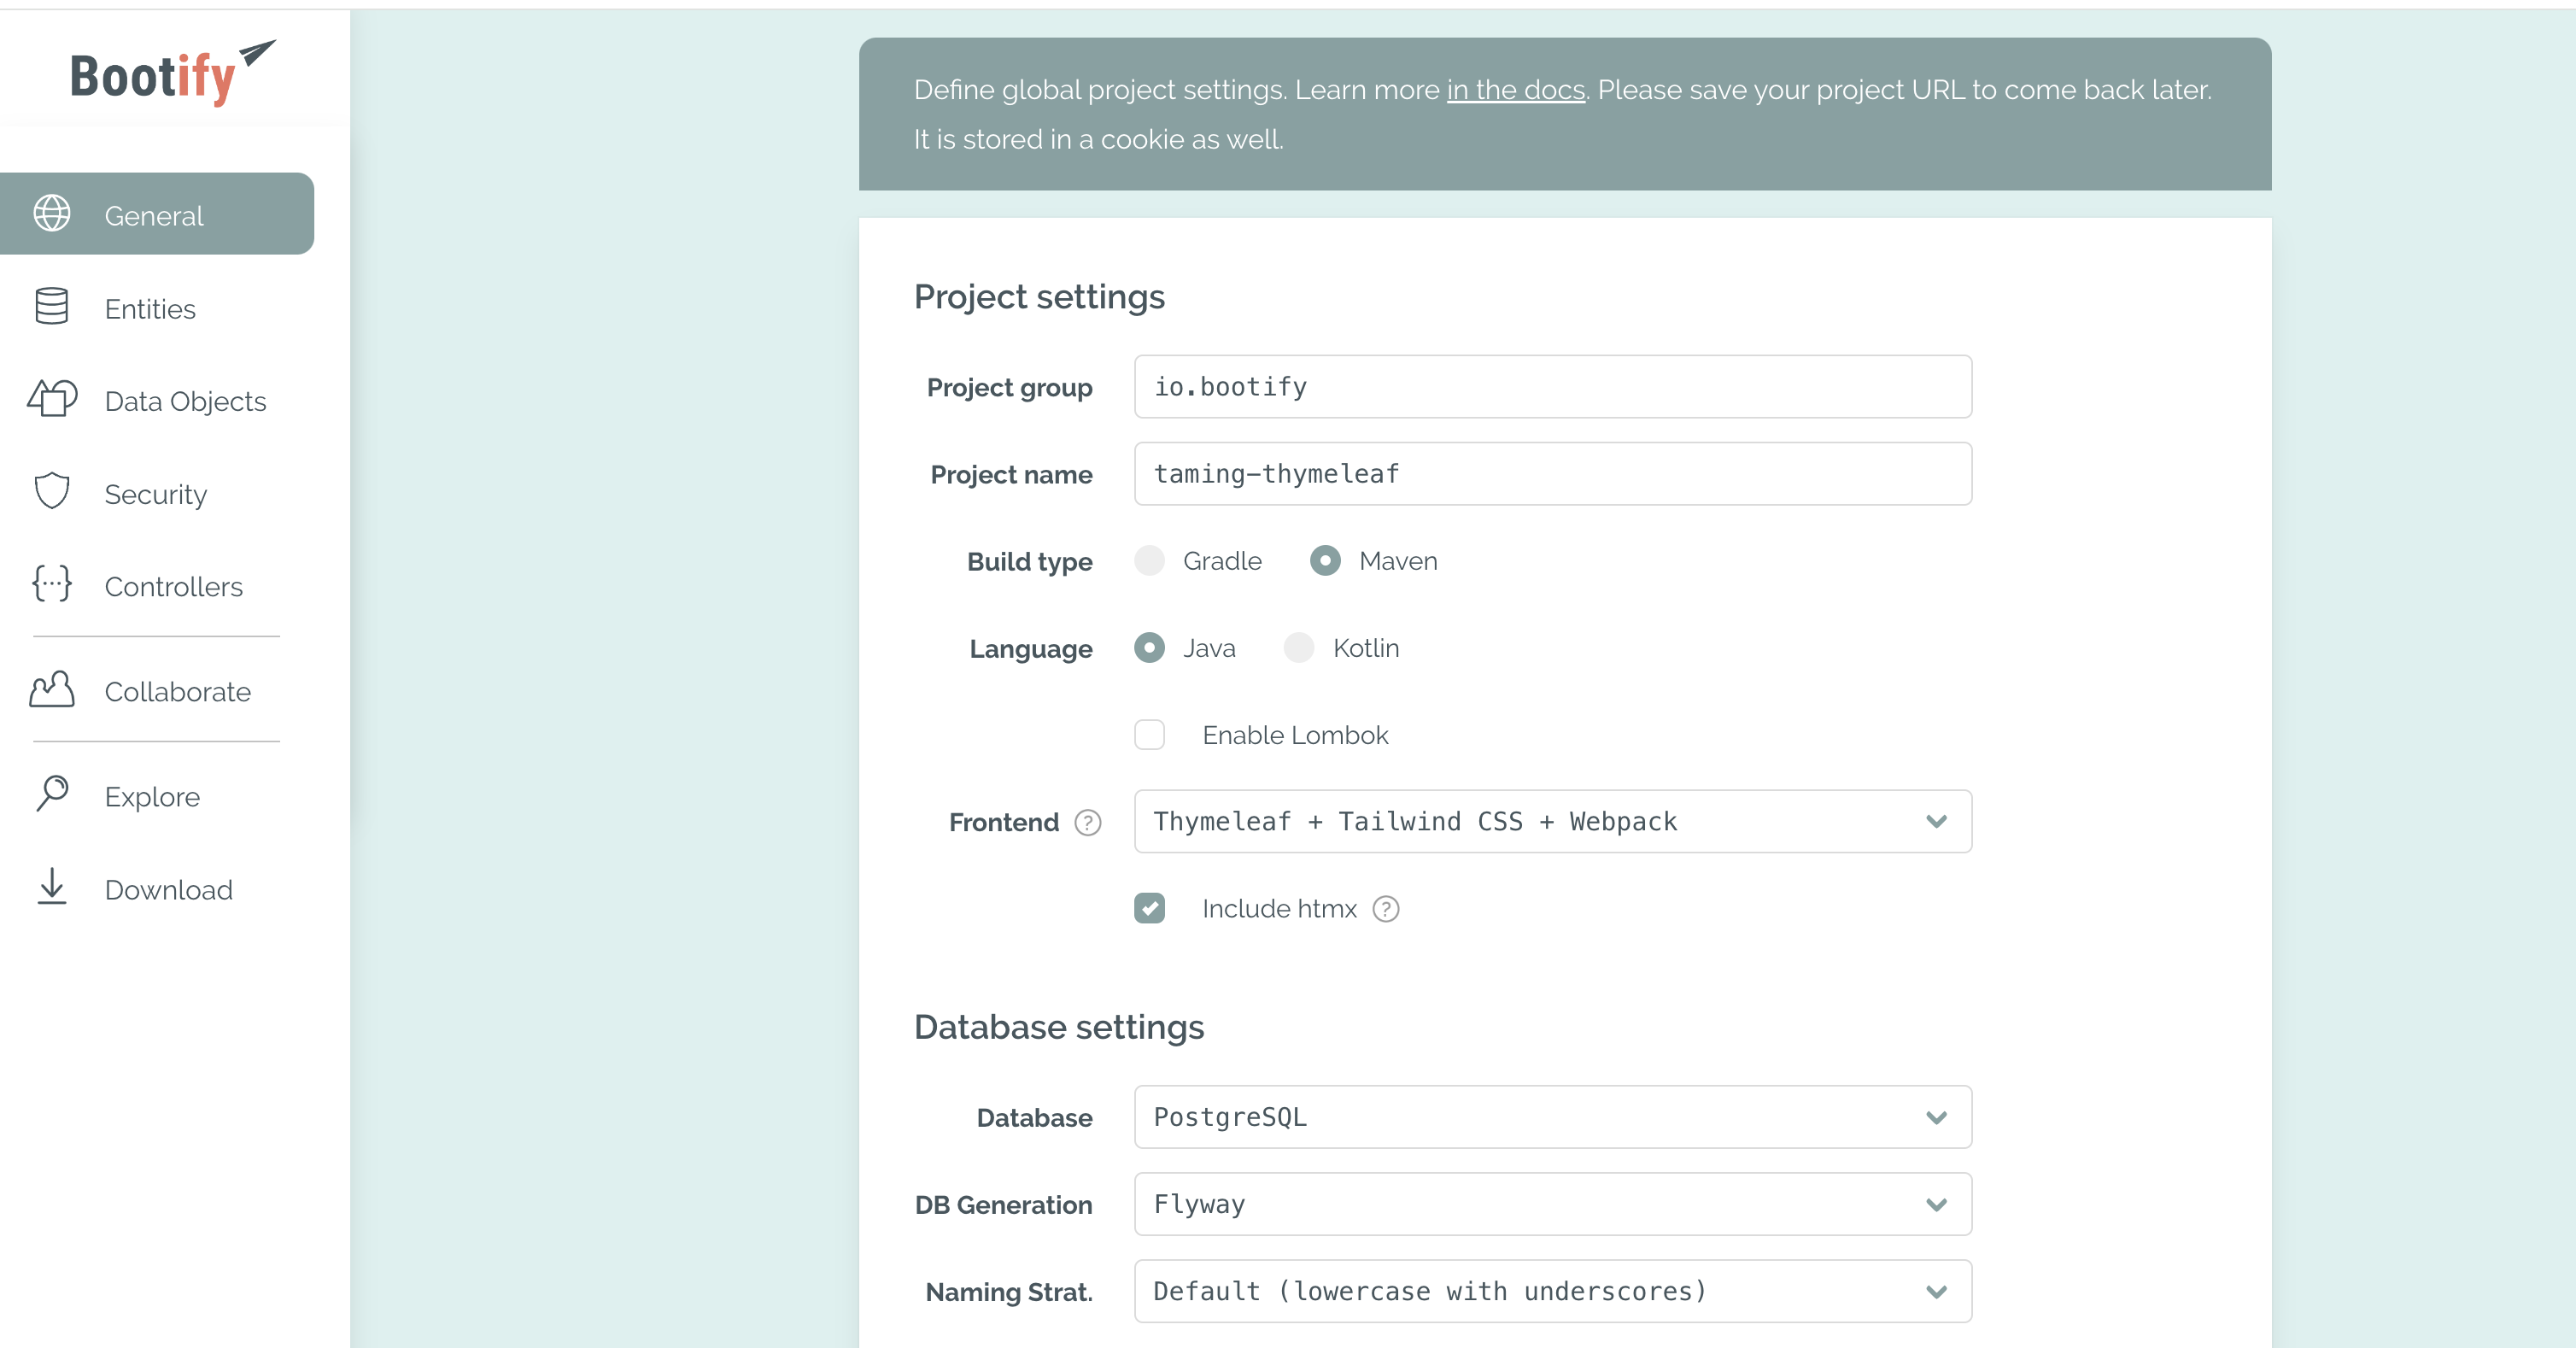
For the frontend, I selected Thymeleaf + Tailwind CSS + Webpack and opted in to use htmx.
One important setting is the packages structure. Bootify has 3 options for this:
-
Technical - each technical type has its own package like rest, service, repos, …
-
Domain driven - put classes together in a package named after the related entity
-
Mixed - each entity has its own main package with subpackages like rest, service, repos, …
I picked Mixed as this is what I like to use nowadays. I feel it brings the best structure to the project.
The next menu item allows to define the entities of the application. I created User, Team and TeamPlayer and defined the relations between them.
What is very nice is the entity diagram you get:
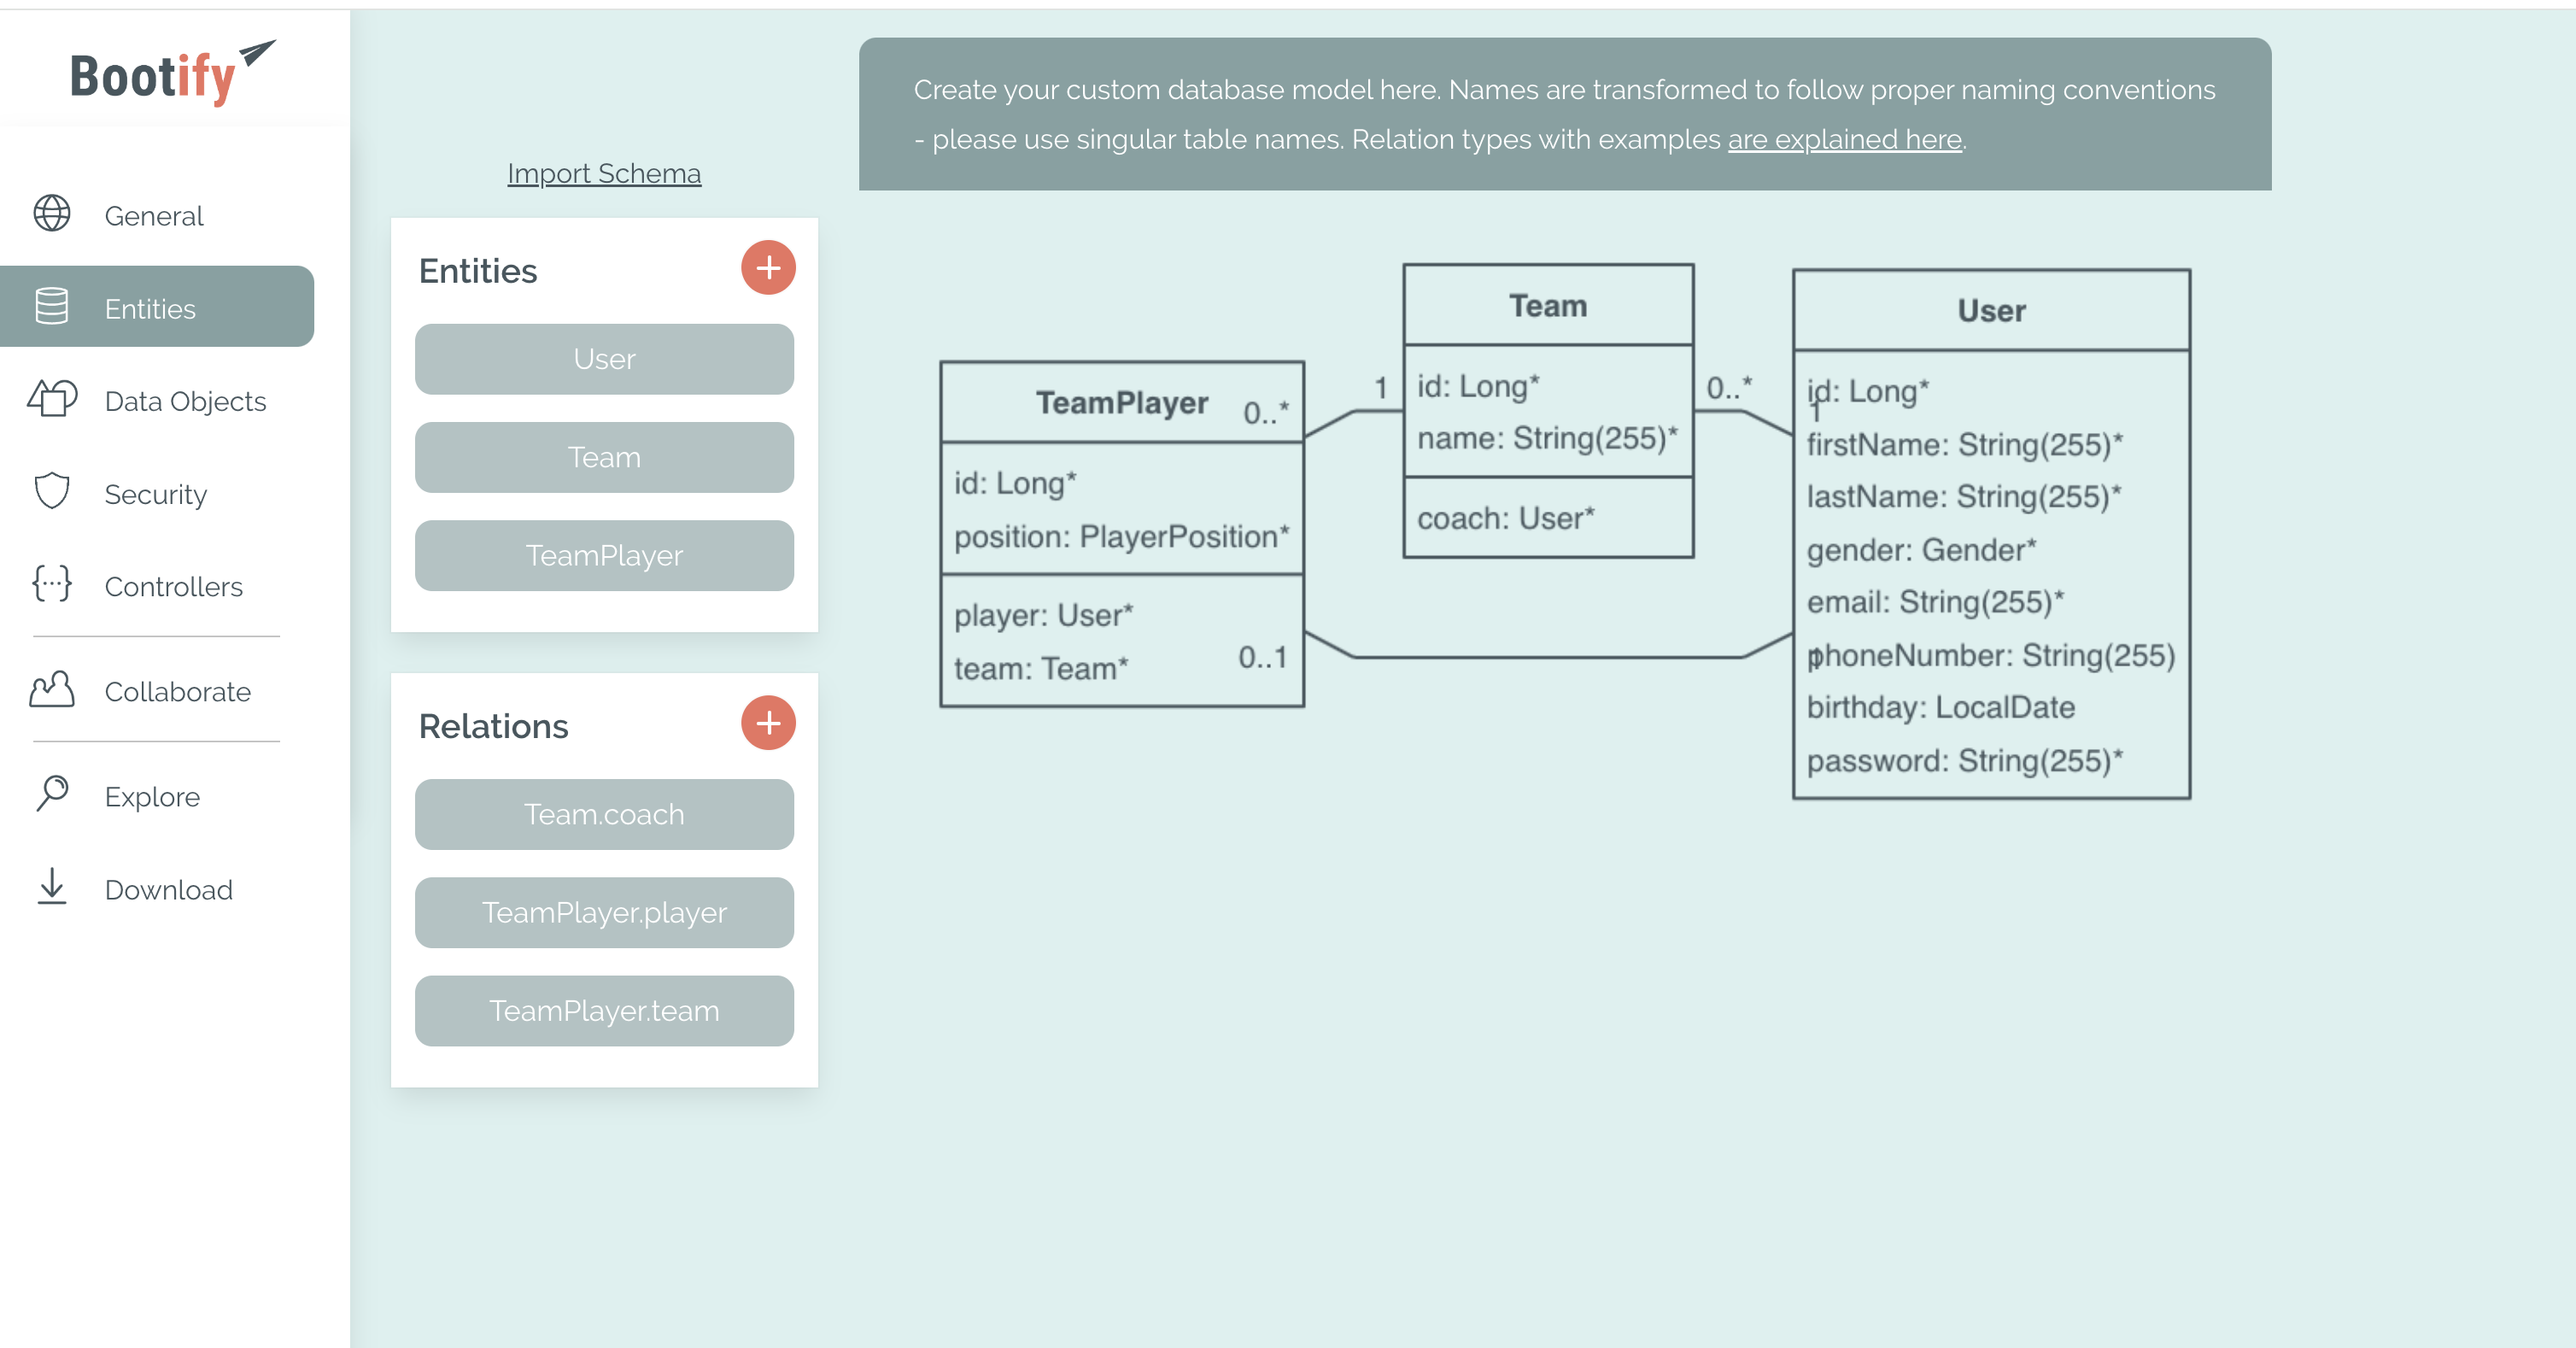
It shows the entities, their properties and the relationships between them.
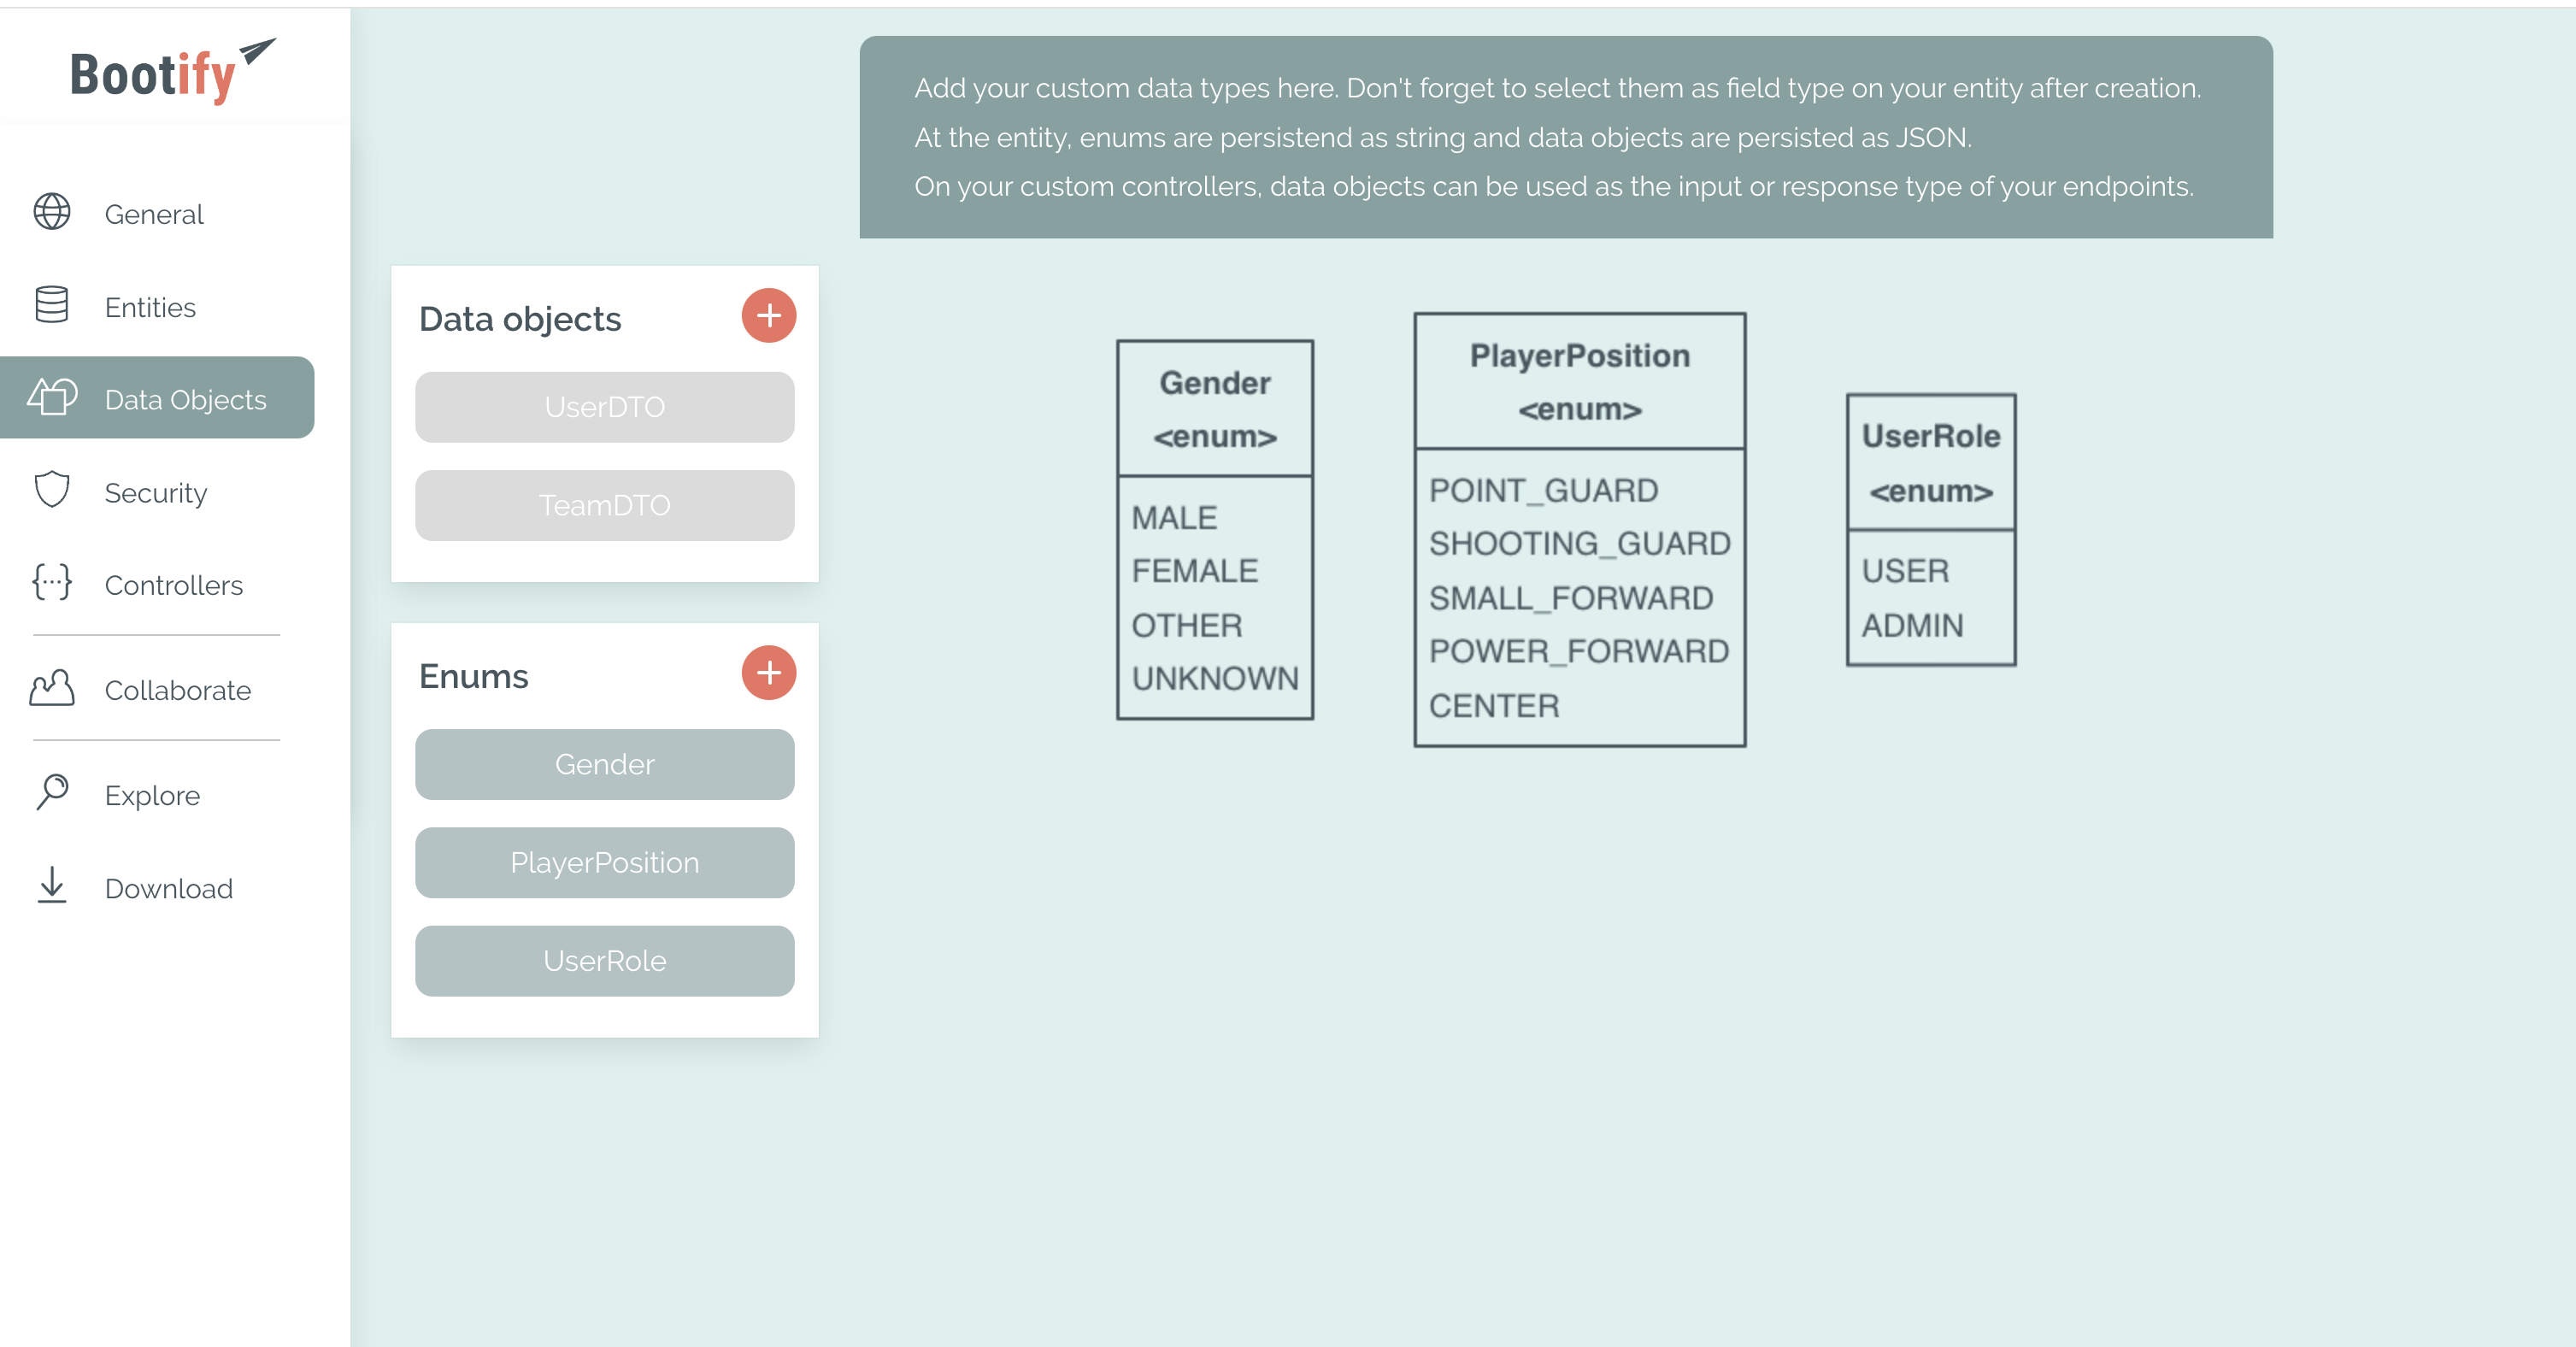
Next is Data Objects where you can define DTO’s and enums.
I used it for the Gender, PlayerPosition and UserRole enums.
After that, I configured the security:
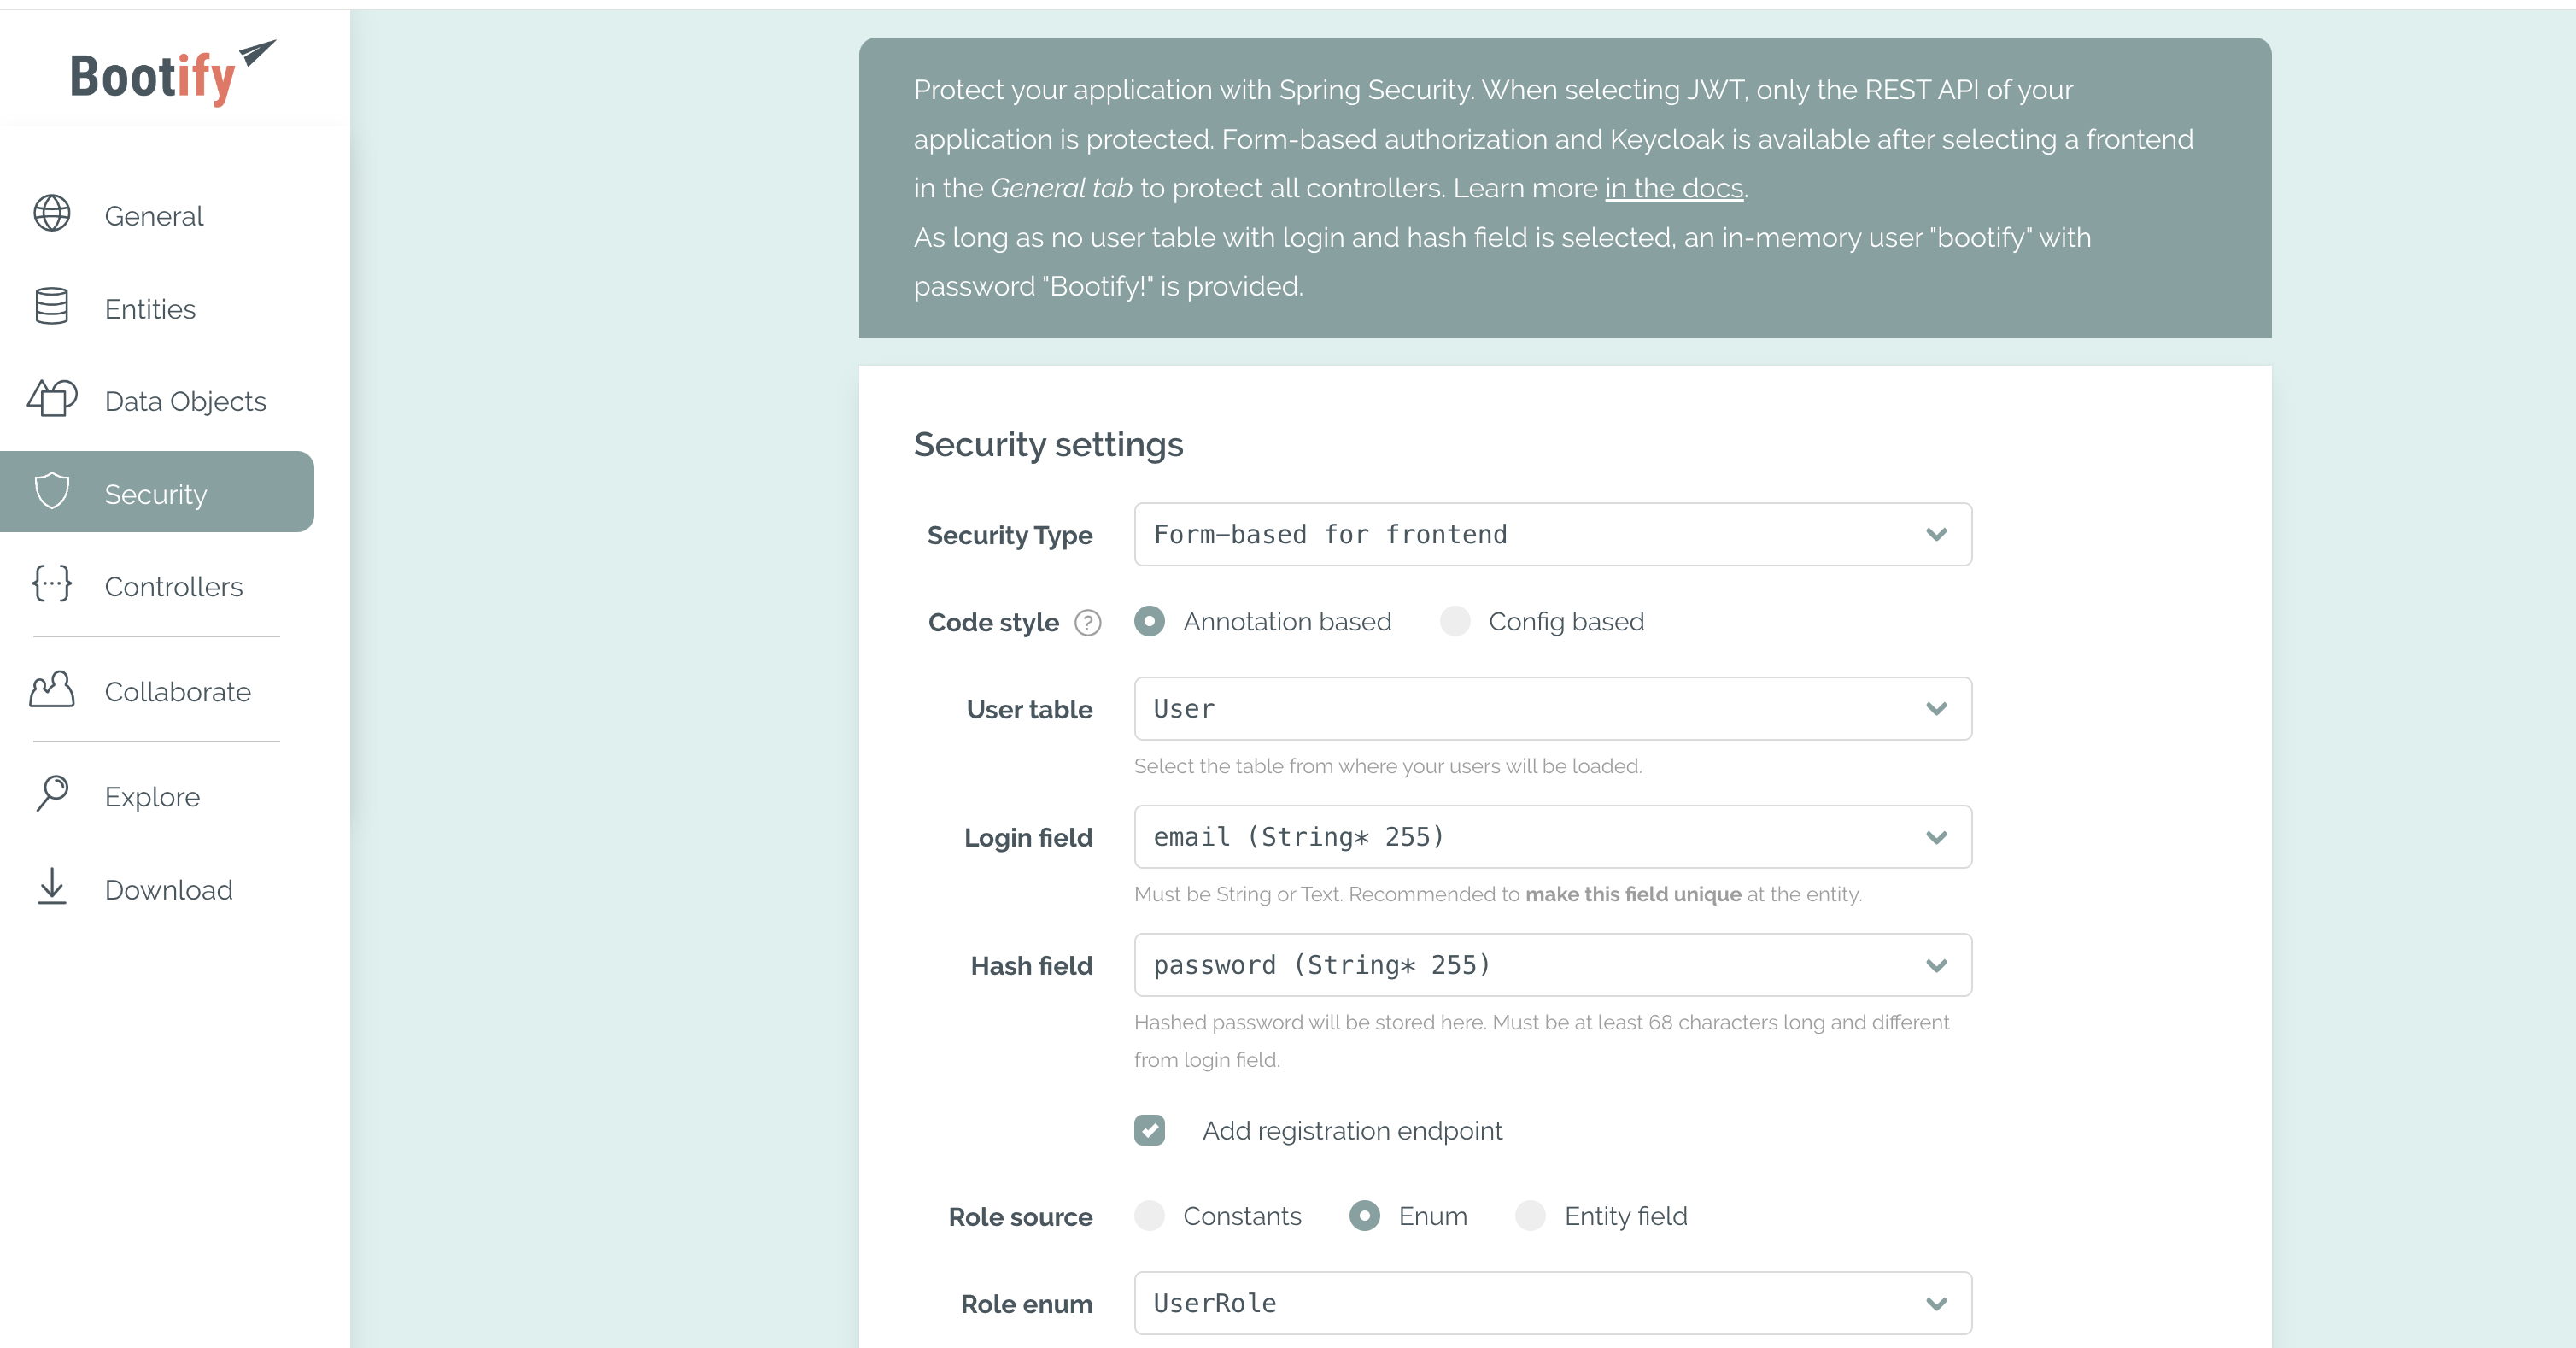
I selected Form-based for frontend with an annotation-based code style. You select which entity is your user entity from the entities you configured before. On that entity, define which field you want to use for the login field (this is usually the email address or username) and for the password field (called the Hash field in the user interface).
For the user roles in your application, you can define constants, use an enum, or refer to an entity. I used an enum as this is also what I have used in my Taming Thymeleaf book.
The final section is for the Controllers. I did not change anything there.
Bootify already added a UserController and TeamController automatically, which is just what I needed.
With everything defined, I can use Explore view all the files that will be generated and with Download I get a zip file with all the code.
Running the application
After downloading the zip file, I opened it up in my favorite editor:
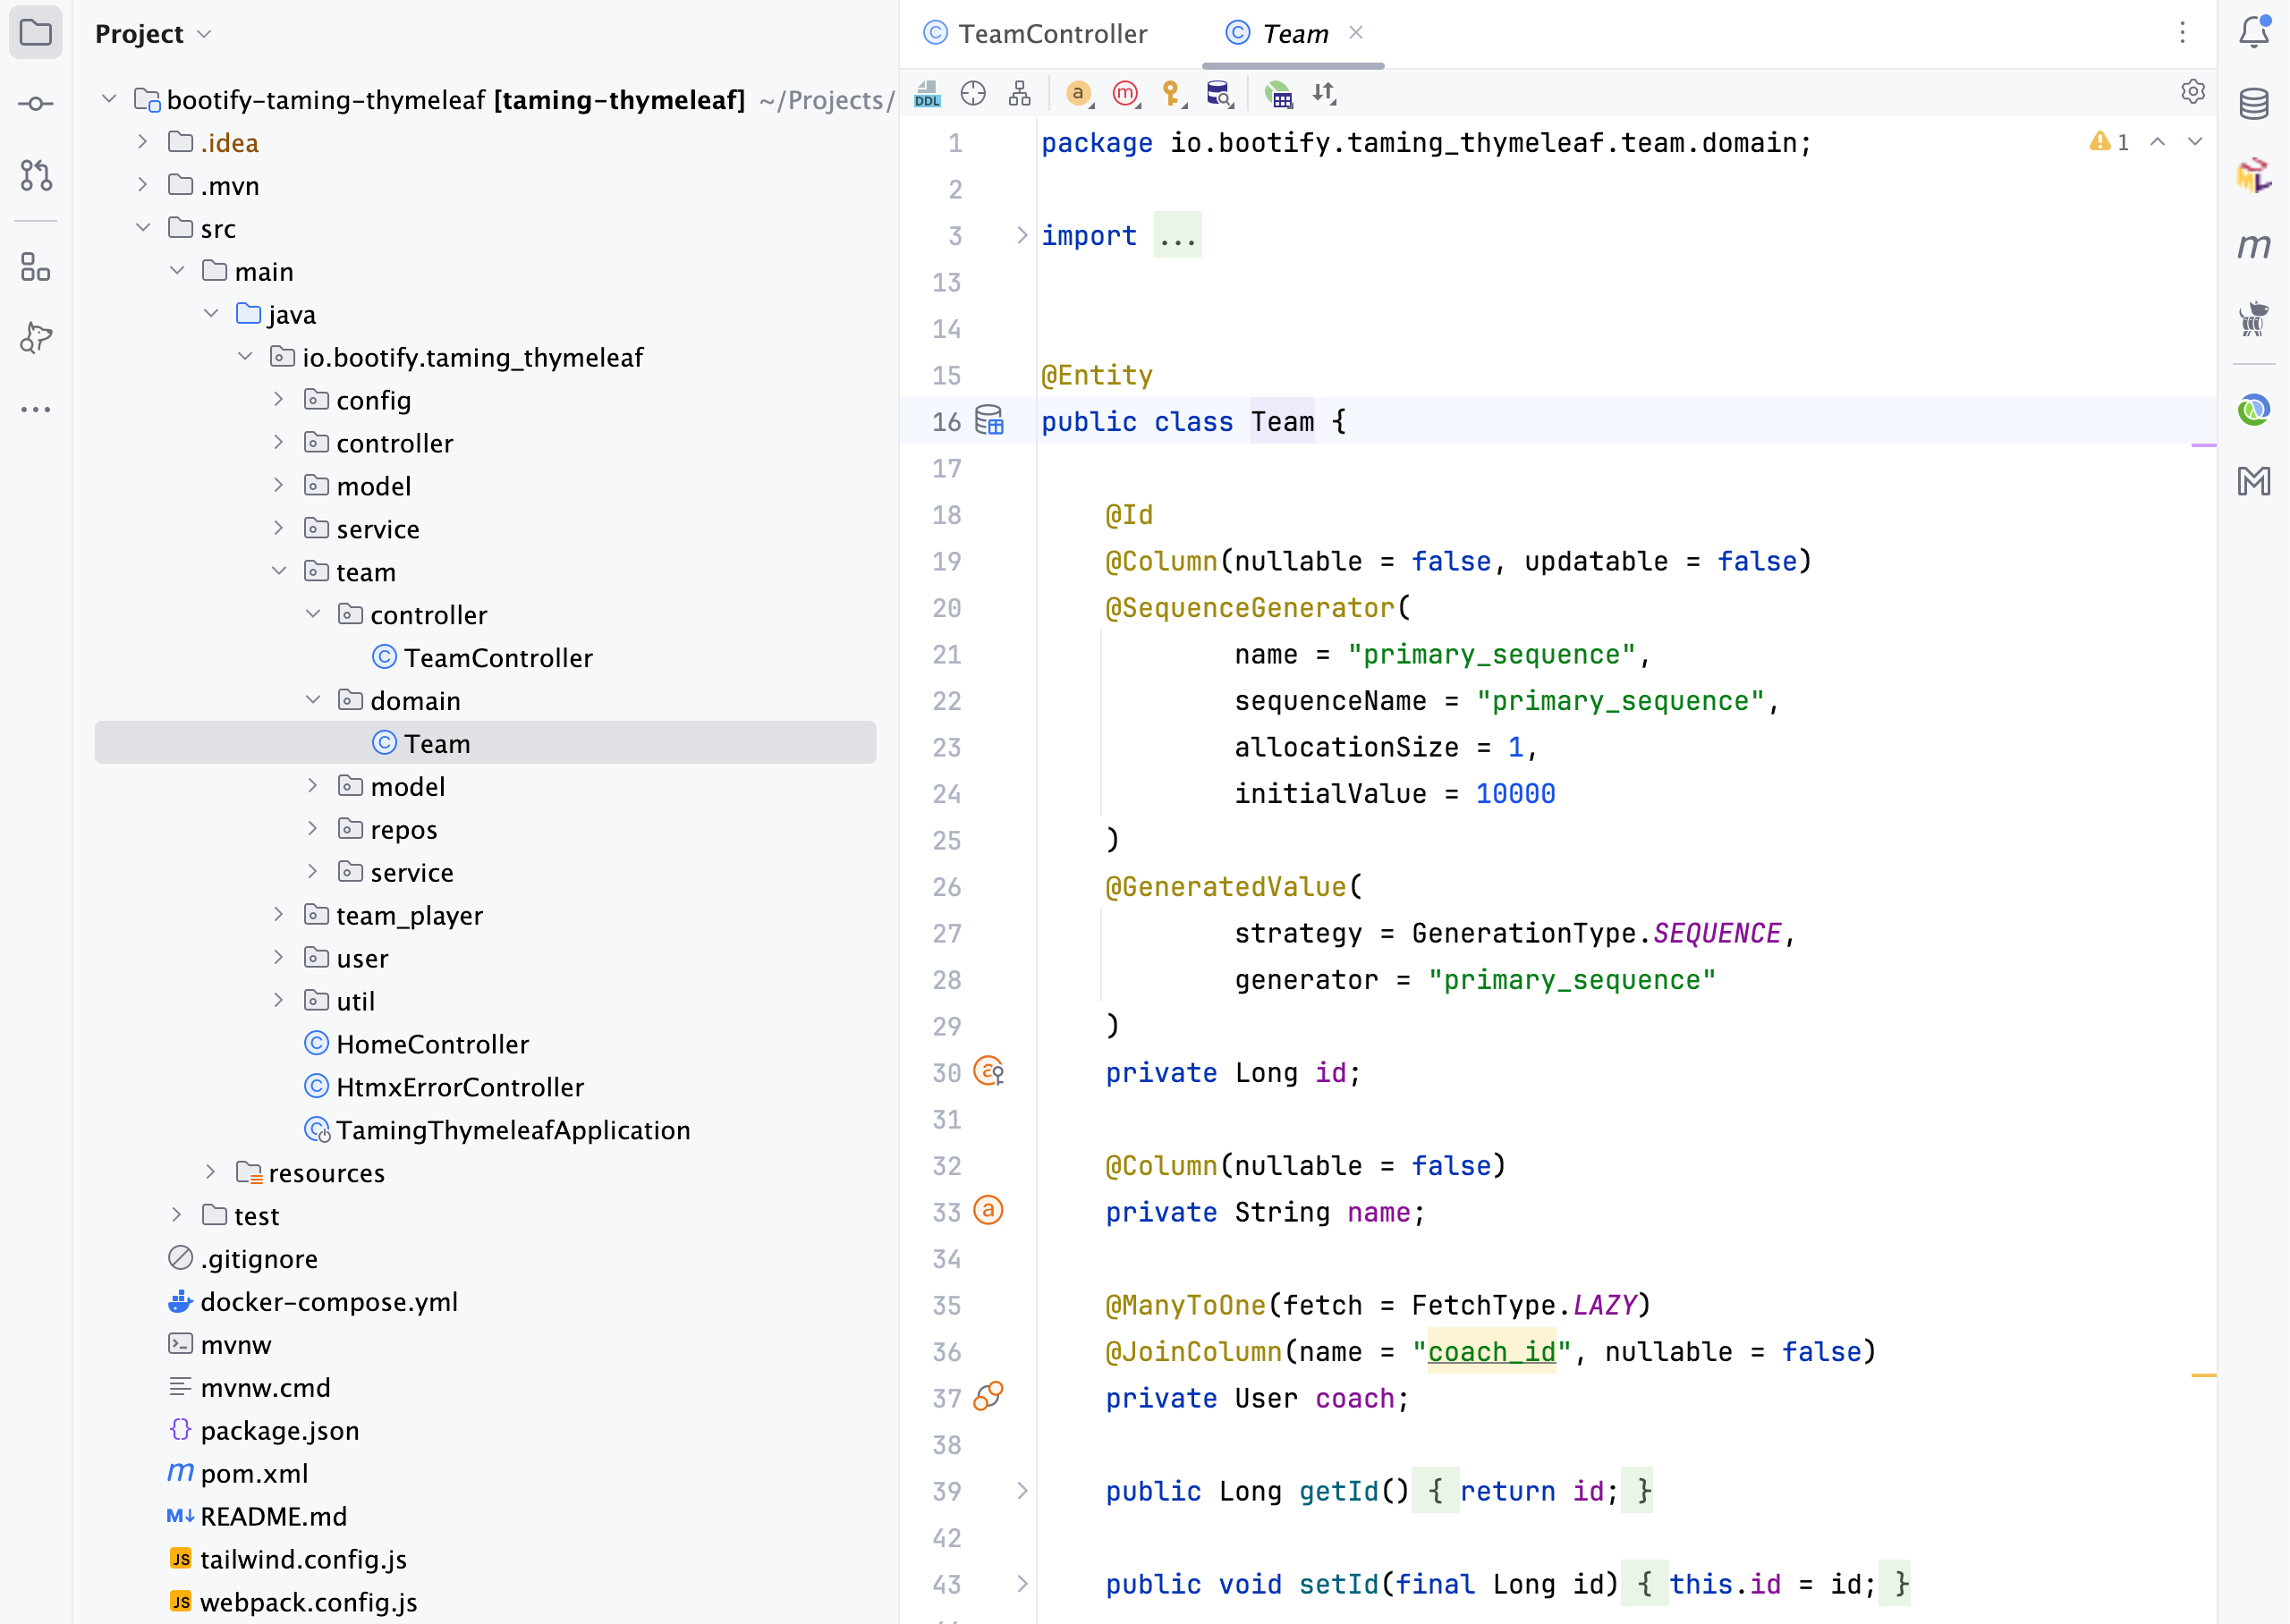
To run the application, I followed these steps (which are clearly described in the generated README.md):
-
Run
npm install -
Start the Spring Boot application from IntelliJ using the
localprofile. (This allows live editing of the Thymeleaf templates, nice!). Because of the Spring Boot Docker Compose integration, this automatically starts PostgreSQL in Docker as well. -
Run
npm run devserver. This starts the development server and opens the browser at http://localhost:8081.
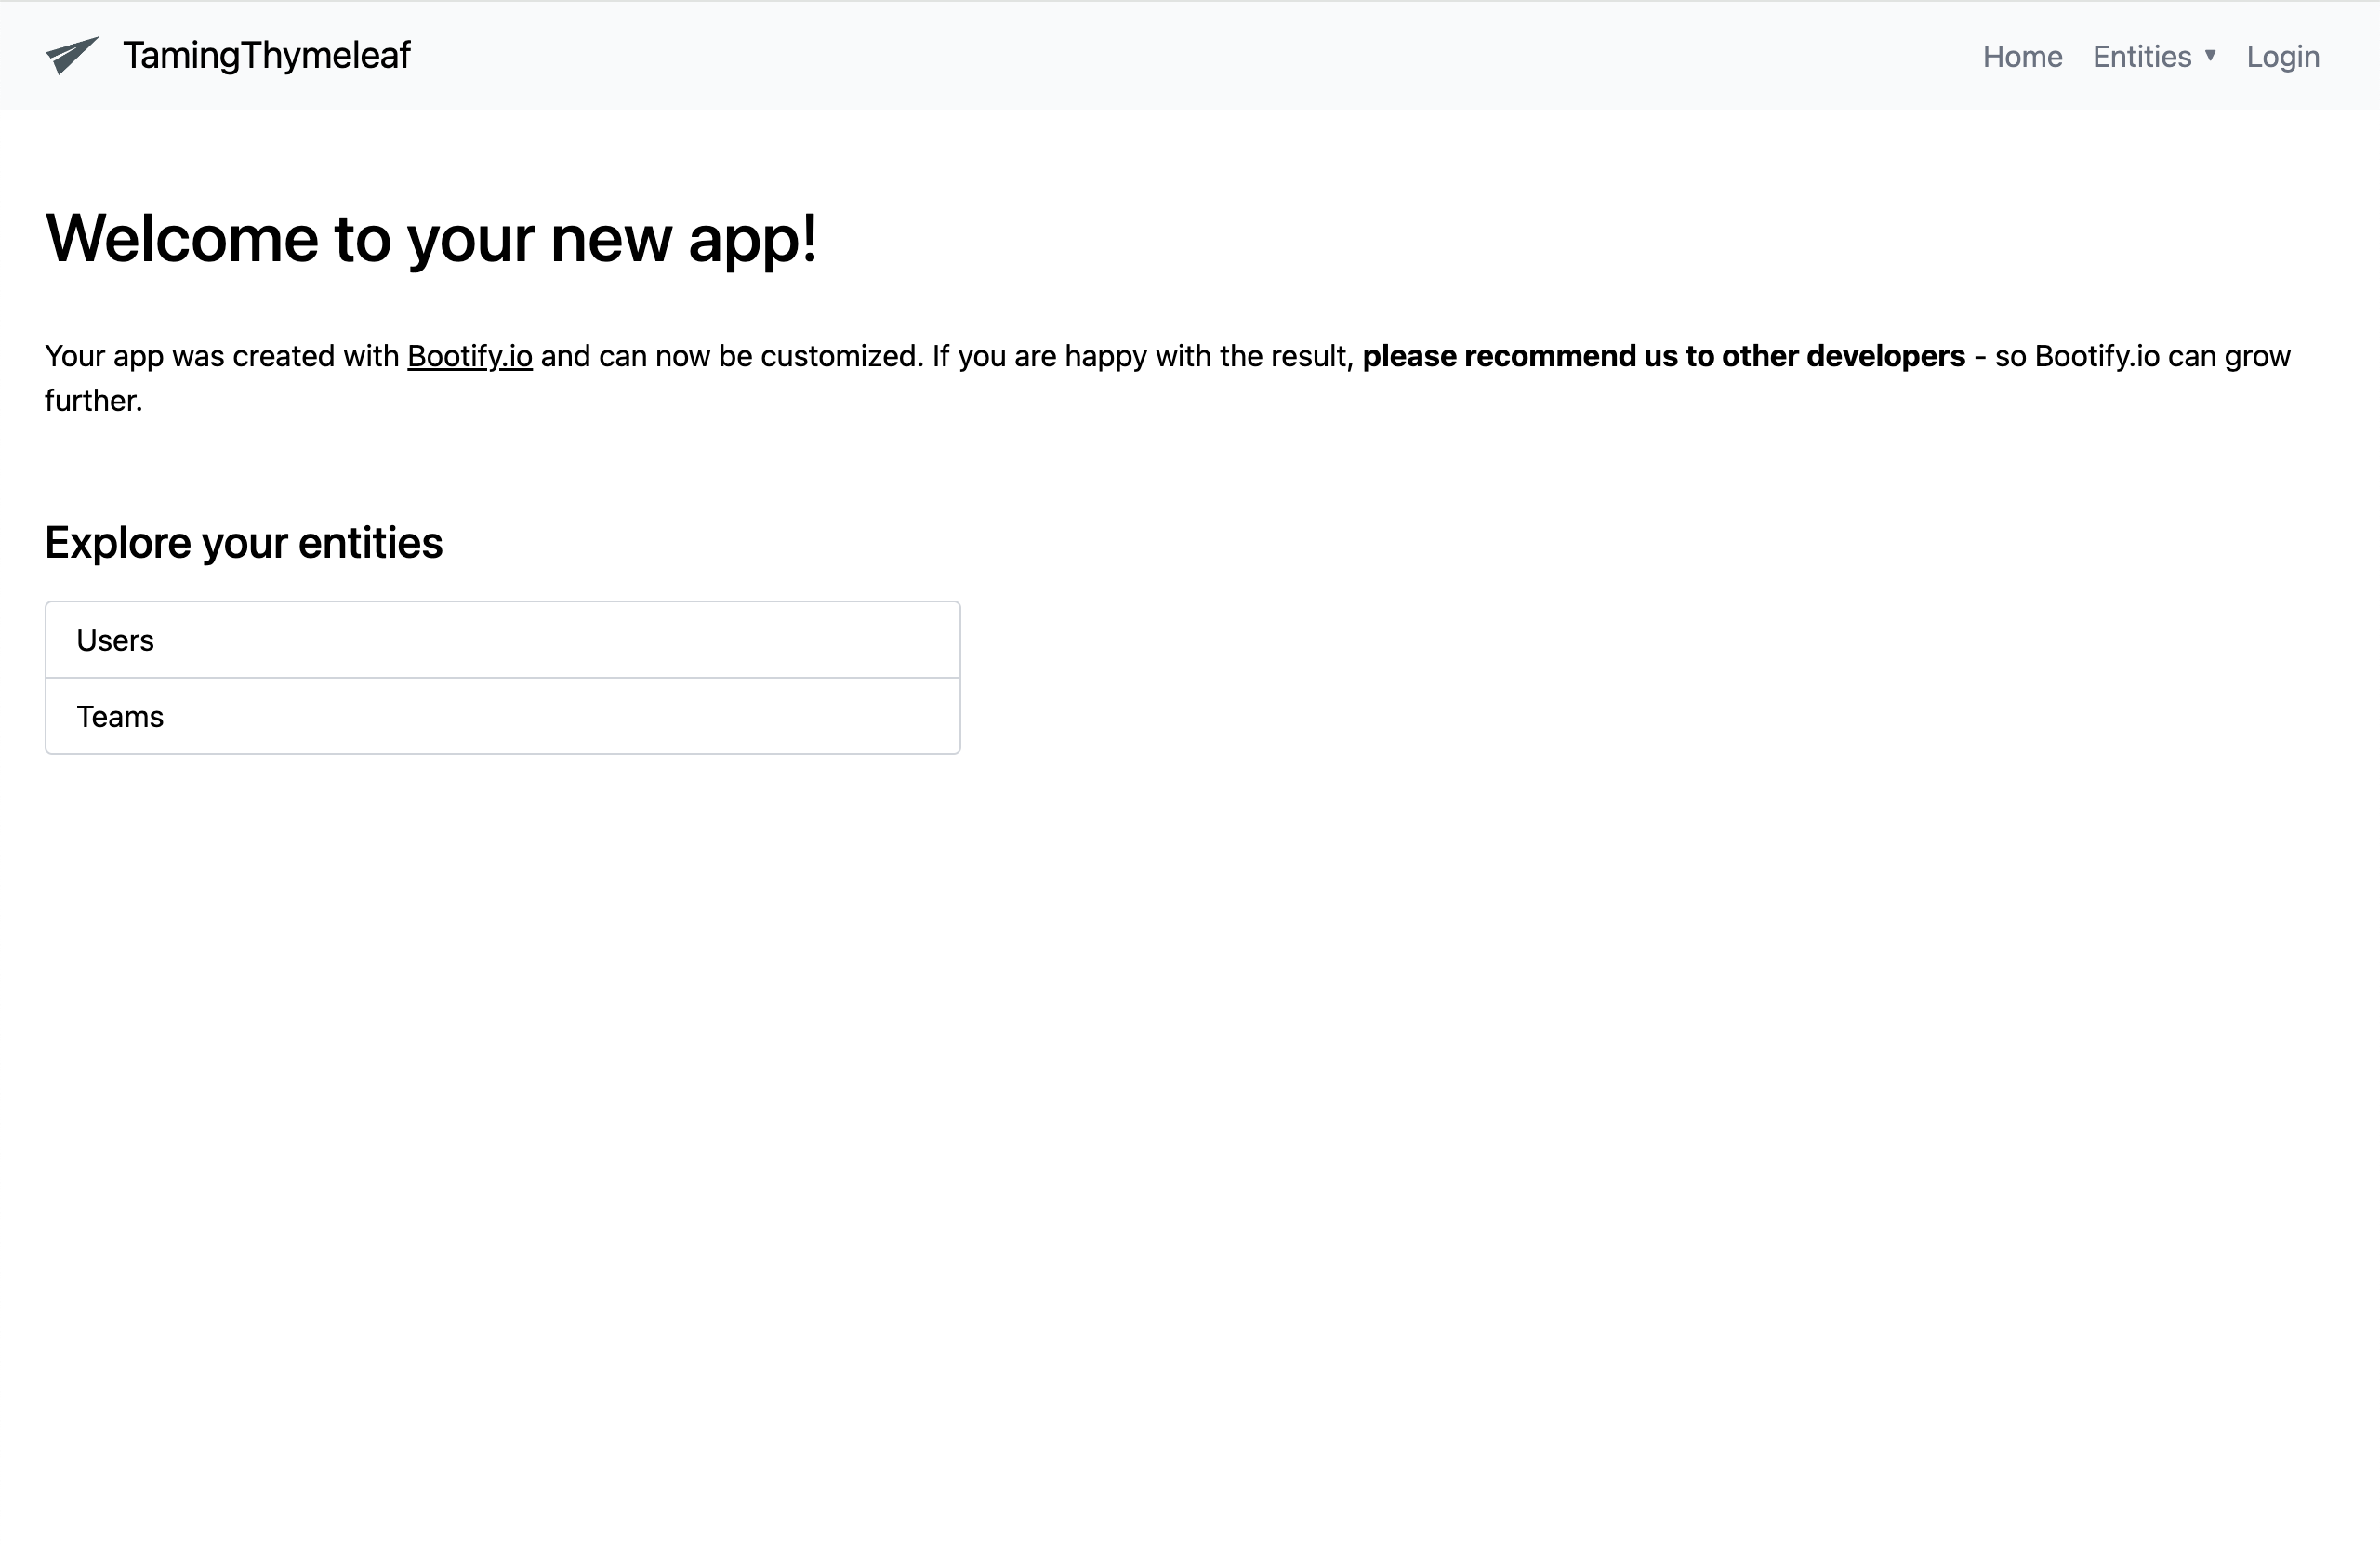
We are now greeted with the welcome page of our application:
Since we added security, anything we try to access requires a login:

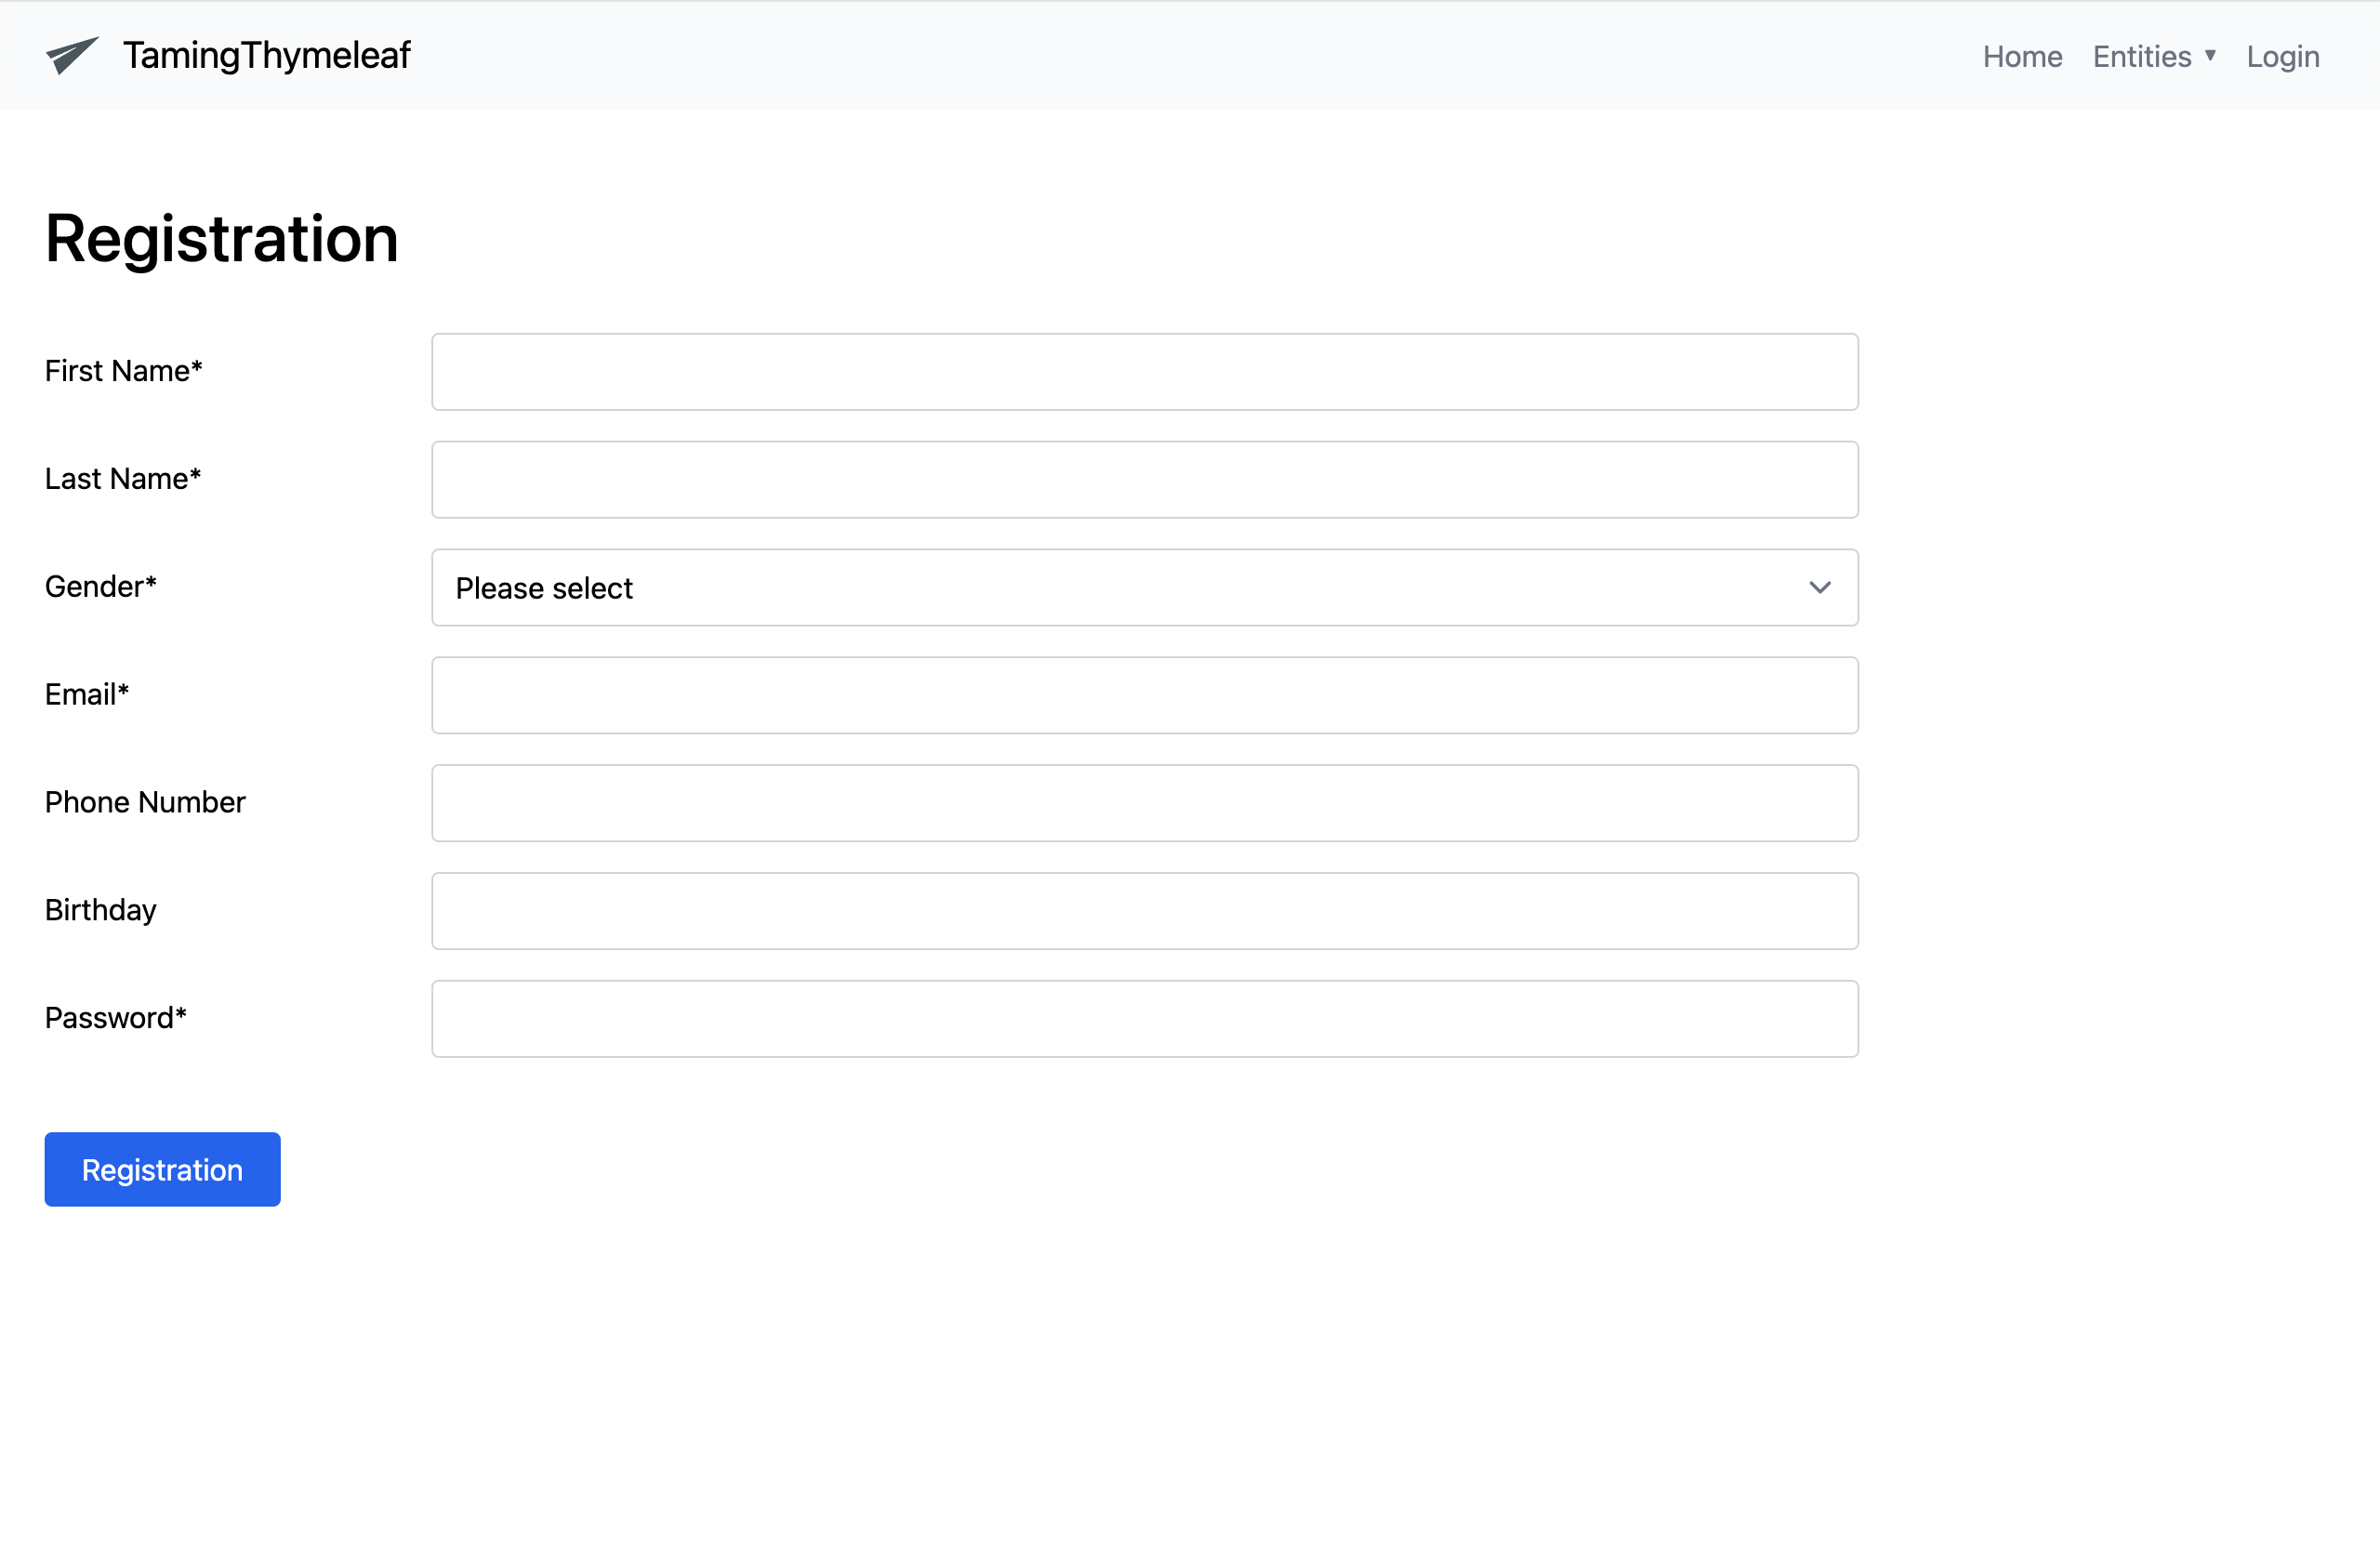
Good thing Bootify generated a user registration page for us:
We can now login and create users and teams.
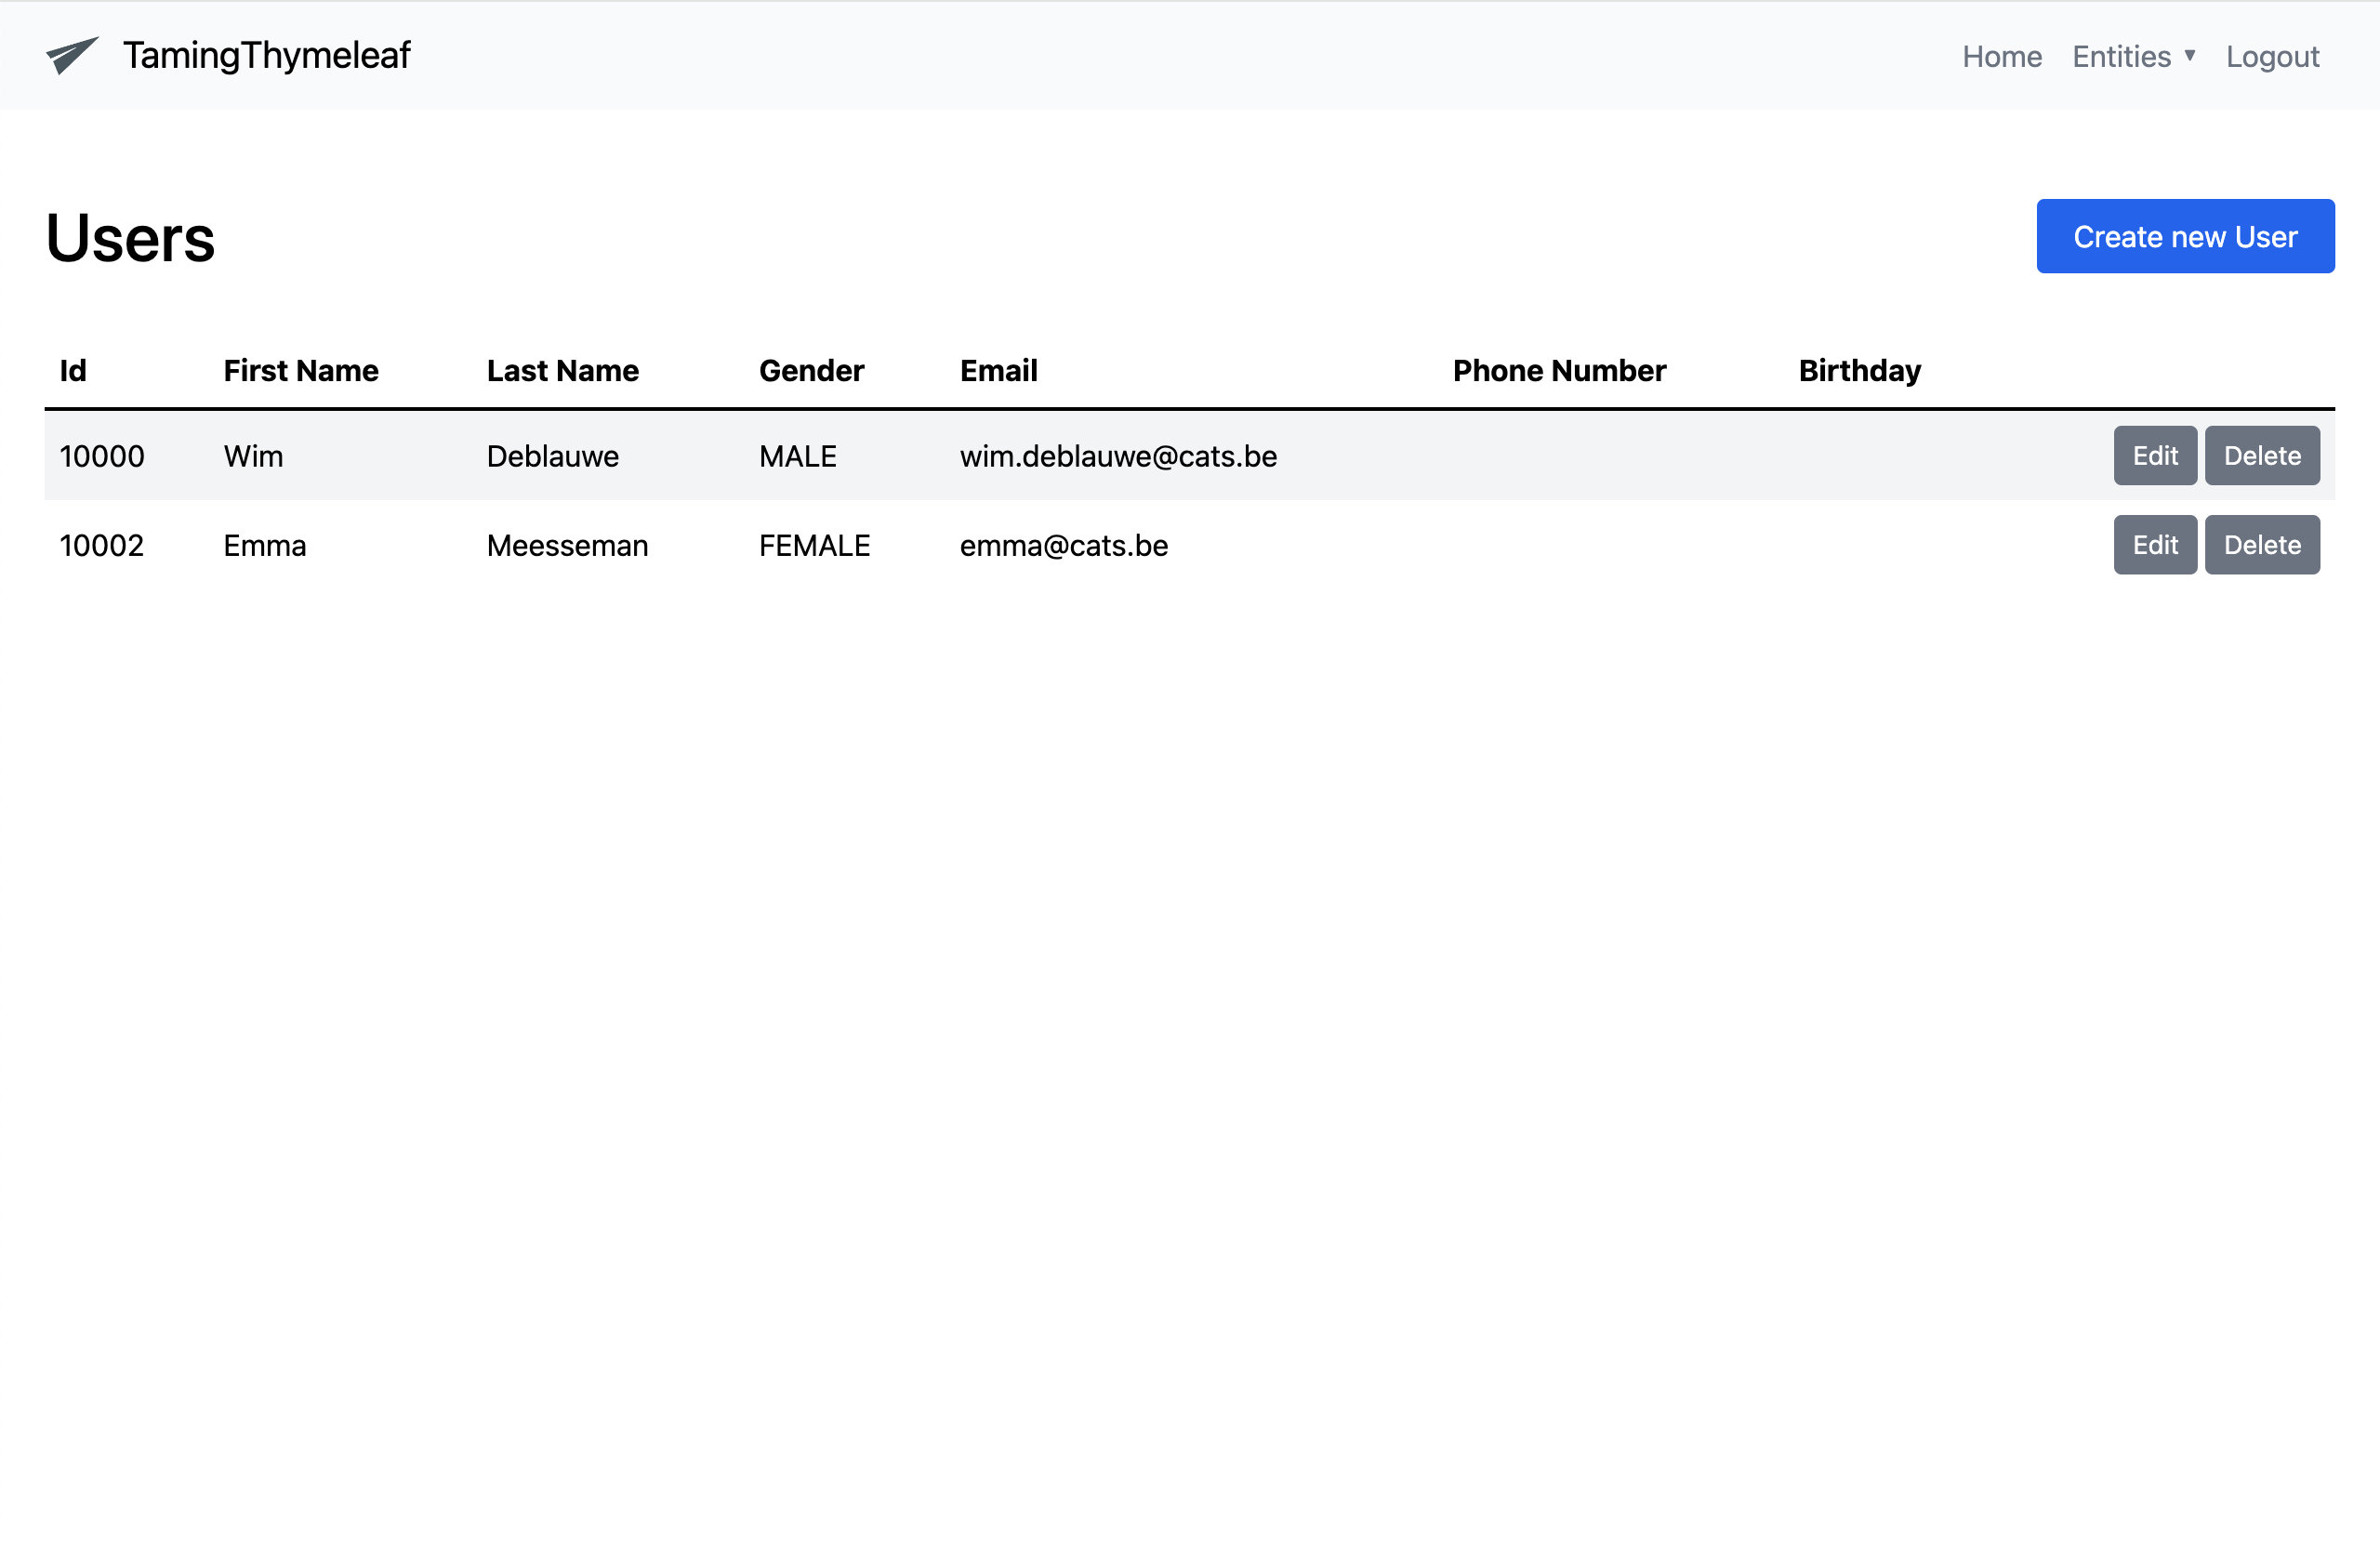
This is how the users table page looks like:
Code review
Skimming through the generated code, I find it fairly readable. I especially like the use of Thymeleaf fragments for the form elements in the Thymeleaf templates.
Conclusion
I find it very impressive what is generated. It is especially nice that you can easily go back and re-generate if you want to change some things. There are a ton of customization options to tweak the structure of the generated application to your liking.
That said, tools such as Bootify (and JHipster and similar), all have the same problem in my mind. You need to know what you are doing already. It should always be a starting point to work on further. For that to be possible, you will need to take the time to understand the generated code (I have a few books to help with that :-) ).
Of course, comparing a hand-coded application that took many man-hours to something generated in about an hour wouldn’t be fair. It remains a very impressive time-saver if you need to code some simple admin pages that don’t need a ton of customization.
See bootify-taming-thymeleaf on GitHub for the full sources of this example.
If you have any questions or remarks, feel free to post a comment at GitHub discussions.