Icons are a great way to spice up any UI. You can easily use the Font Awesome icons in JavaFX, by using the fontawesomefx library.
I will show a small example on how to use the icons in JavaFX code and how to apply some styling.
First import the library. I am using Maven, so I just add this dependency:
<dependency>
    <groupId>de.jensd</groupId>
    <artifactId>fontawesomefx</artifactId>
    <version>8.2</version>
</dependency>
We will start with a simple app that uses a BorderPane to put some content at the center and have a kind of header at the top:
public class FontAwesomeTest extends Application {

    @Override
    public void start(Stage stage) throws Exception {

        StackPane root = new StackPane();
        BorderPane borderPane = new BorderPane();

        HBox headerBox = new HBox();
        headerBox.getStyleClass().add( "header - component");
        borderPane.setTop(headerBox);

        Label centerComponent = new Label( "CENTER COMPONENT" );
        centerComponent.setPrefSize(Double.MAX_VALUE, Double.MAX_VALUE);
        centerComponent.getStyleClass().add( "center - component");
        borderPane.setCenter(centerComponent);

        root.getChildren().add(borderPane);

        Scene scene = new Scene(root);
        scene.getStylesheets().add( "font - awesome - test.css");

        stage.setScene(scene);
        stage.setWidth(300);
        stage.setHeight(400);
        stage.setTitle( "JavaFX 8 app");
        stage.show();
    }
}
The CSS file used:
.center-component {
-fx-background-color: coral;
-fx-alignment: center;
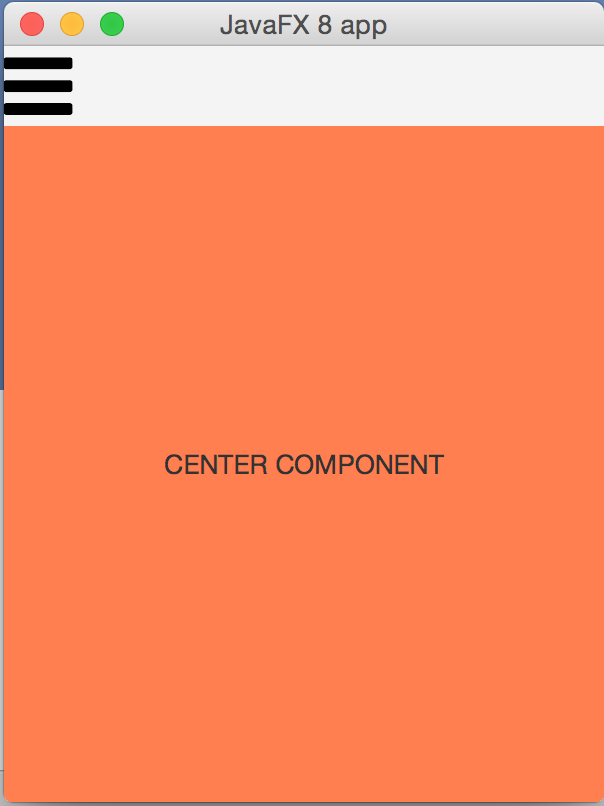
}The app looks like this initially:

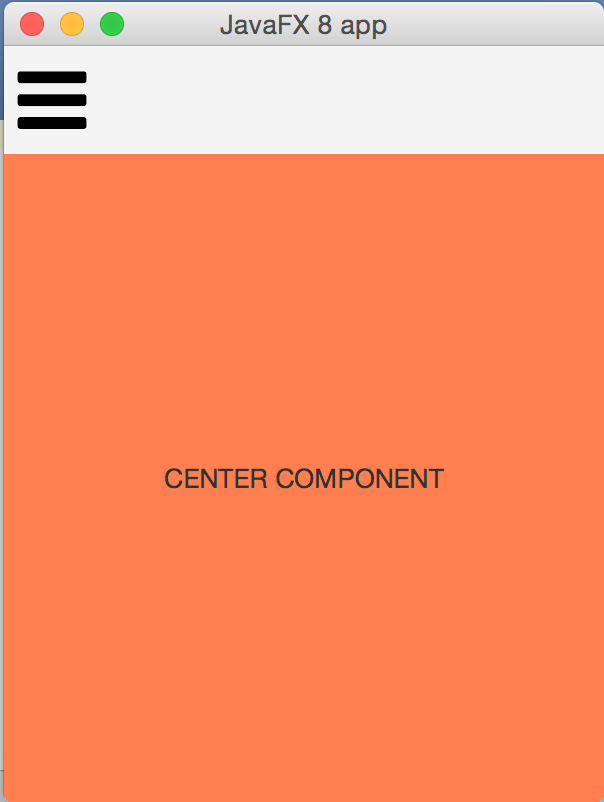
We will now add an icon in the header:
HBox headerBox = new HBox();
headerBox.getStyleClass().add( "header-component" );
headerBox.getChildren()
.addAll( GlyphsDude.createIcon( FontAwesomeIcons.BARS,
"40px" ) );
Notice how we use the static factory method createIcon to build us a Node with the icon from the constants in the enum FontAwesomeIcons. As a 2nd argument, we can specify the size of the icon.
We get the following result:
We can add some CSS to add a border so the icon does not stick to the side:
.header-component {
    -fx-border-width: 7px;
    -fx-border-color: transparent;
}
*NOTE:* Do not forget to set the -fx-border-color style as well as the -fx-border-width. Only setting the width will not do anything!
If we want to add some text next to the icon, we can use the static factory method createIconLabel:
HBox headerBox = new HBox();
headerBox.getStyleClass().add( "header-component" );

Label iconLabel = GlyphsDude.createIconLabel( FontAwesomeIcons.BARS,
                                            "Menu",
                                            "40px",
                                            "40px",
                                            ContentDisplay.LEFT );
iconLabel.getStyleClass().add( "header-label" );
headerBox.getChildren().addAll( iconLabel );
Which shows as:
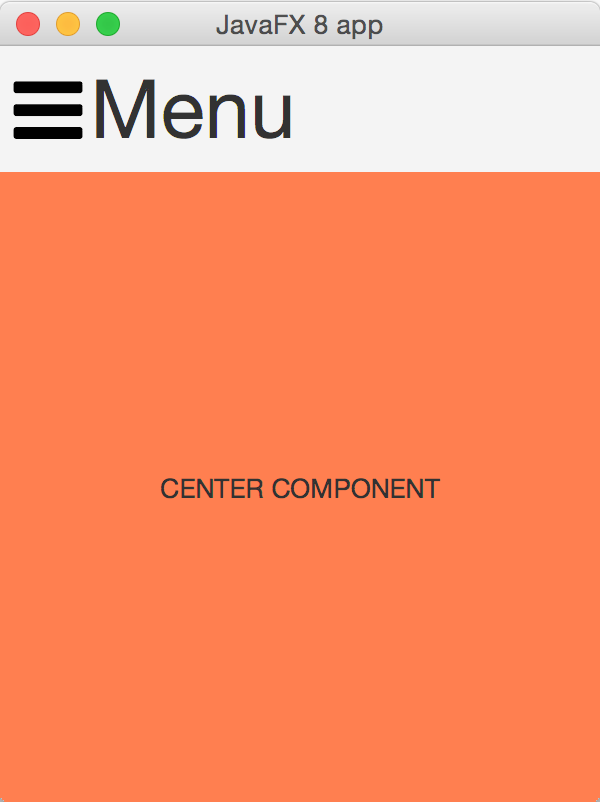
Finally, we can color the icon and the text by applying this CSS:
.header-label > .text {
    -fx-fill: #8A0808;
}

.header-label > .glyph-icon {
    -fx-fill: #8A0808;
}
Final result:
