The TodoMVC project has implementations of a simple todo list application for many different frontend frameworks. The goal is that a Single Page Application is implemented in a varity of technologies to be able to compare them. I wanted to stretch the concept a bit and create a Spring Boot backend with Thymeleaf server-side rendered HTML page just to see how that could work and how it would affect the user experience.
The tutorial is split in 3 parts:
This video shows the final application in action:
Project Setup
We start the project by creating a new Spring Boot project on https://start.spring.io with the following options:
-
Maven project
-
Java language
-
Spring Boot: 2.5.4
-
Jar packaging
-
Java 17
-
Dependencies:
-
Spring Web
-
Thymeleaf
-
Spring Data JPA
-
Validation
-
H2 Database
-
If you want to follow along, you can use this direct link to have the correct options selected.
The final project can be viewed at todomvc-thymeleaf on GitHub.
Model and repository
We will store the todo items persistently via Spring Data JPA and use a H2 database to keep thinks simple to setup.
Code for the TodoItem entity:
@Entity
public class TodoItem {
    @Id
    @GeneratedValue
    private Long id;

    @NotBlank
    private String title;

    private boolean completed;

    // constructors, getters and setters omitted
}
And the corresponding repository:
import org.springframework.data.jpa.repository.JpaRepository;

public interface TodoItemRepository extends JpaRepository<TodoItem, Long> {
}
That is all we need to do to be able to store TodoItem entities in the database.
UI setup
To start with the implementation of the UI, we’ll use the template.
We can start by copying the index.html from the template into src/main/resources/templates.
Next, we create a controller to serve the index.html at the root path of the application:
import org.springframework.stereotype.Controller;
import org.springframework.web.bind.annotation.GetMapping;
import org.springframework.web.bind.annotation.RequestMapping;

@Controller
@RequestMapping("/")
public class TodoItemController {

    @GetMapping
    public String index() {
        return "index";
    }
}
Start the application and go to http://localhost:8080 to view it. It will look something like this:
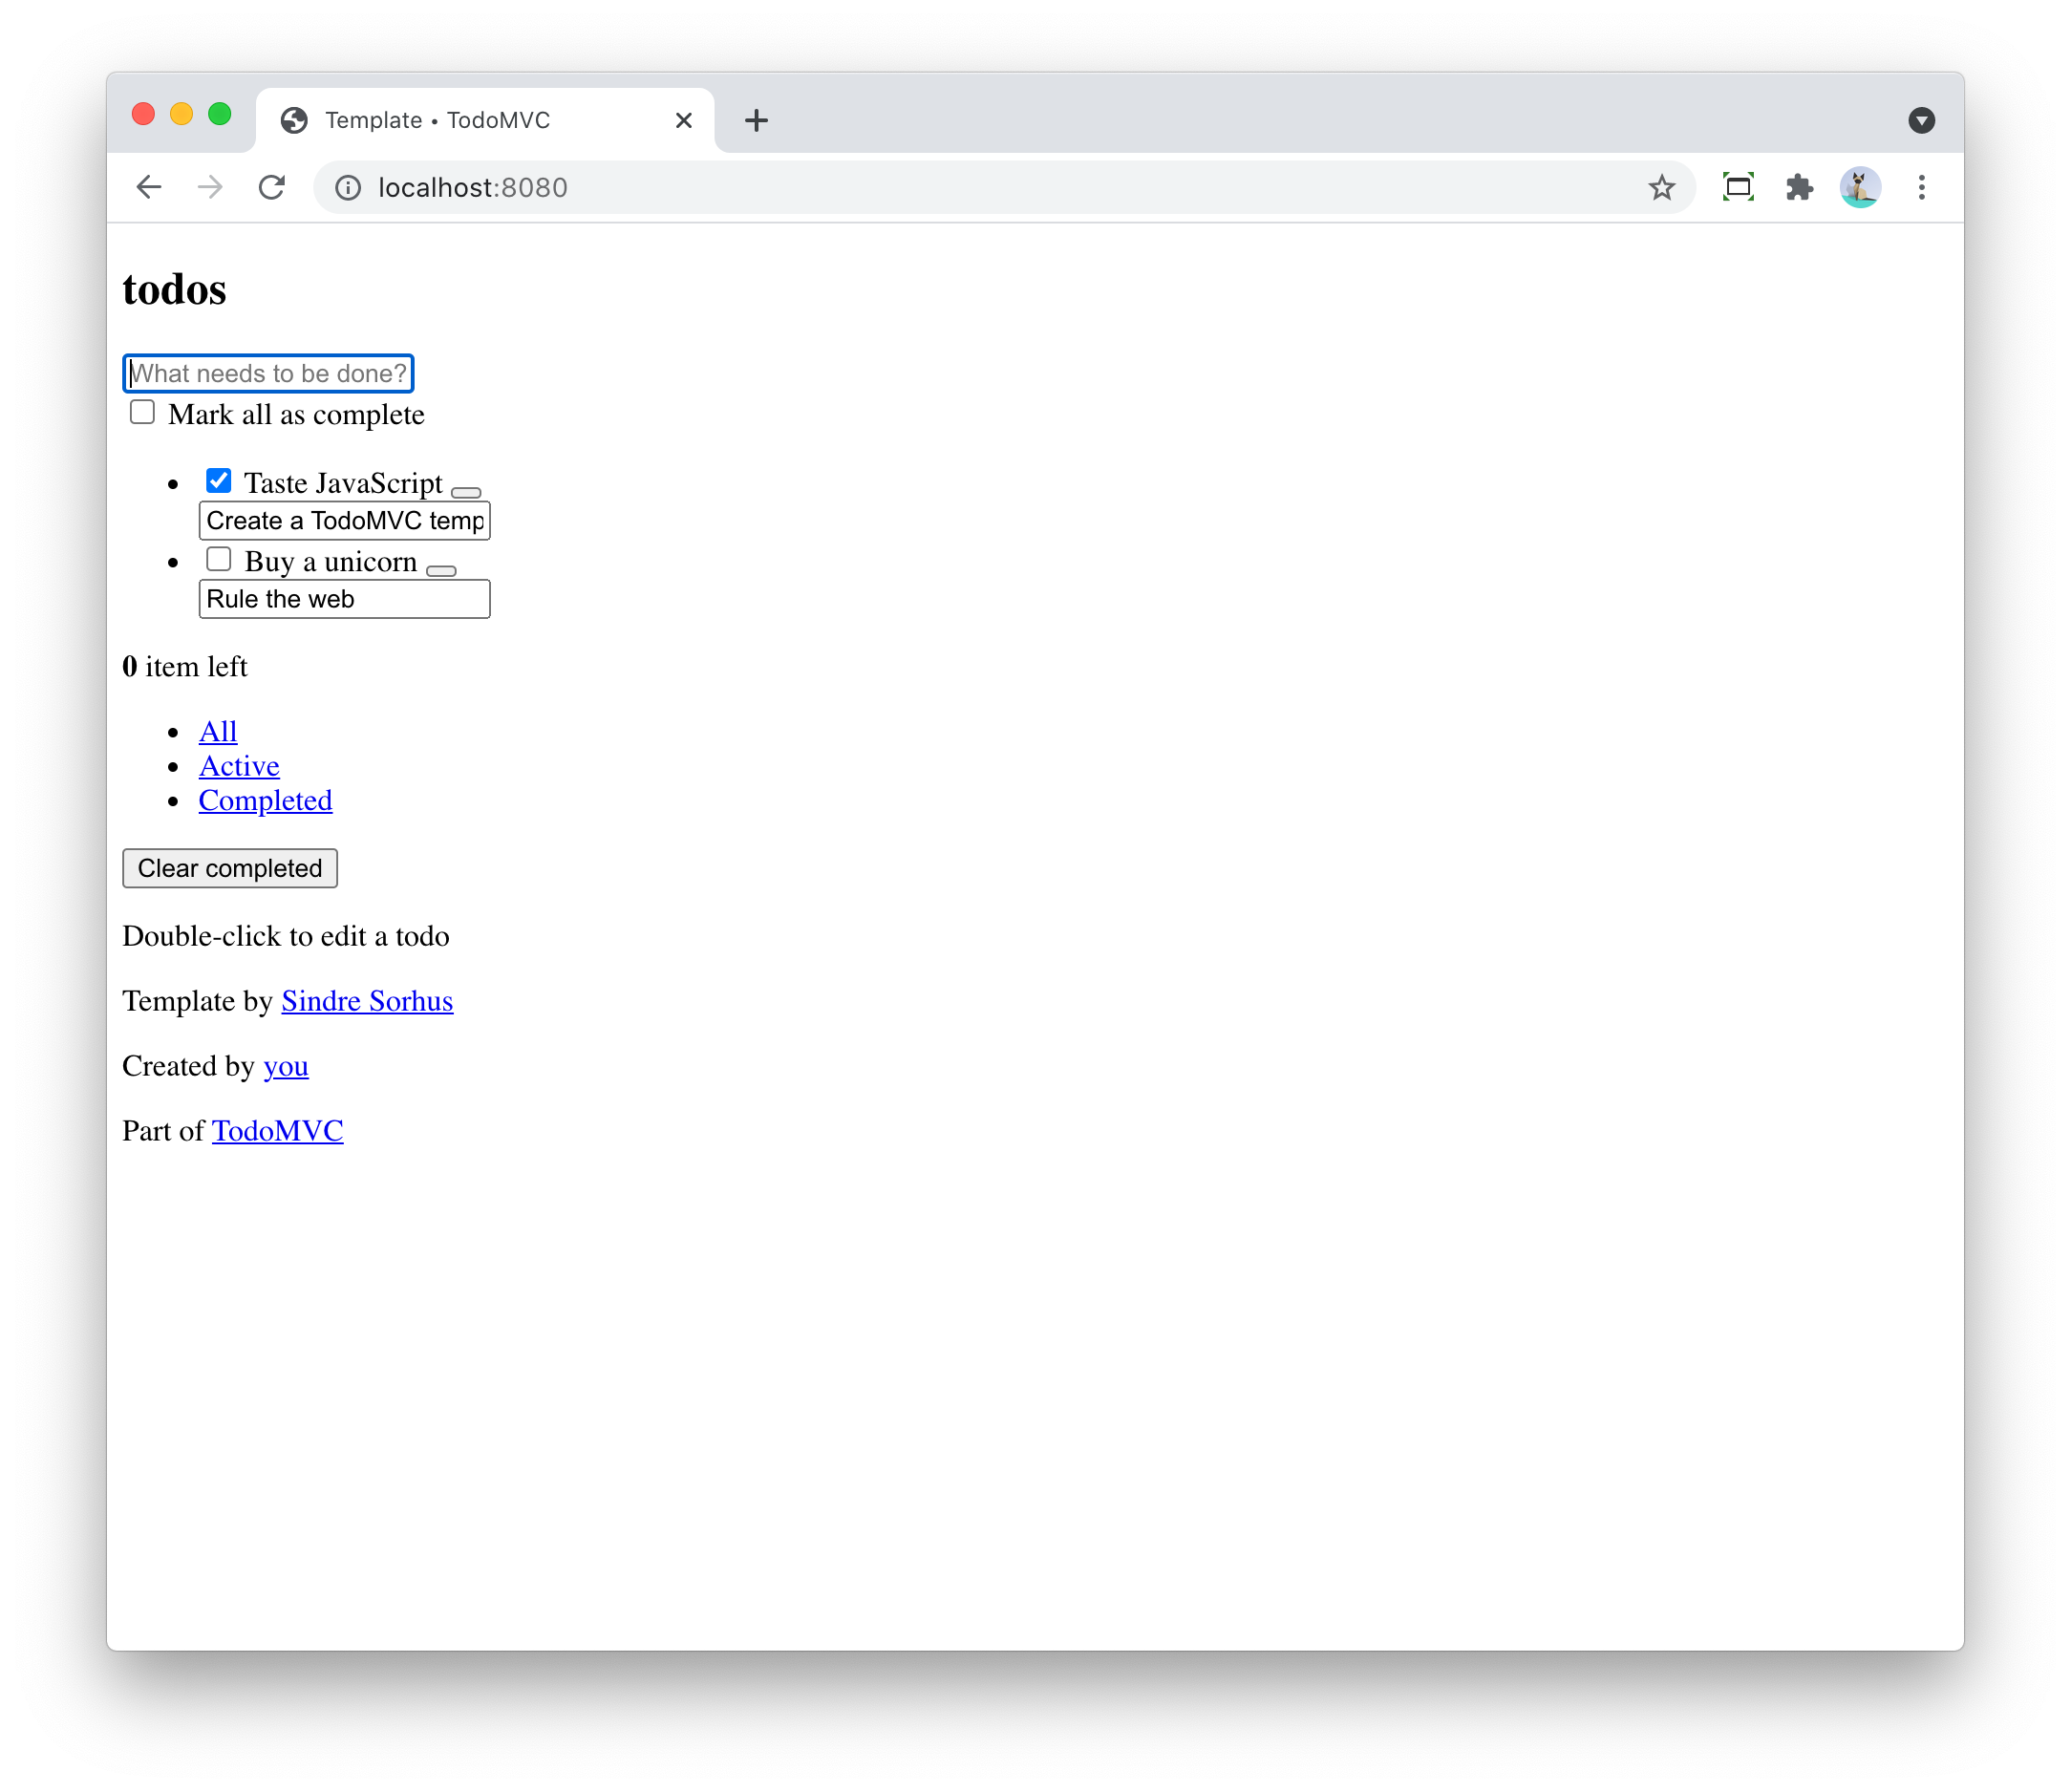
Quite ugly, but that is to be expected as the path to the CSS in index.html is specified like this:
    <link rel="stylesheet" href="node_modules/todomvc-common/base.css">
    <link rel="stylesheet" href="node_modules/todomvc-app-css/index.css">
    <!-- CSS overrides - remove if you don't need it -->
    <link rel="stylesheet" href="css/app.css">
We are not using npm, so those styles are not available on those paths.
We will use WebJars instead.
Add CSS and JavaScript via WebJars
WebJars allows us to use any NPM library as a Maven artifact in our application.
To get started, add the following dependencies:
		<!-- webjars -->
		<dependency>
			<groupId>org.webjars</groupId>
			<artifactId>webjars-locator</artifactId>
			<version>0.41</version>
		</dependency>
		<dependency>
			<groupId>org.webjars.npm</groupId>
			<artifactId>todomvc-common</artifactId>
			<version>1.0.5</version>
		</dependency>
		<dependency>
			<groupId>org.webjars.npm</groupId>
			<artifactId>todomvc-app-css</artifactId>
			<version>2.4.1</version>
</dependency>|
|
We can now update index.html with the links to the CSS served via WebJars:
    <link rel="stylesheet" th:href="@{/webjars/todomvc-common/base.css}">
    <link rel="stylesheet" th:href="@{/webjars/todomvc-app-css/index.css}">
We also need to add the Thymeleaf namespace at the top of our file:
<html xmlns="http://www.w3.org/1999/xhtml"
      xmlns:th="http://www.thymeleaf.org"
      lang="en">
We can do the same for the JavaScript file that is normally included by default.
Replace:
<script src="node_modules/todomvc-common/base.js"></script>
<script src="js/app.js"></script>
with:
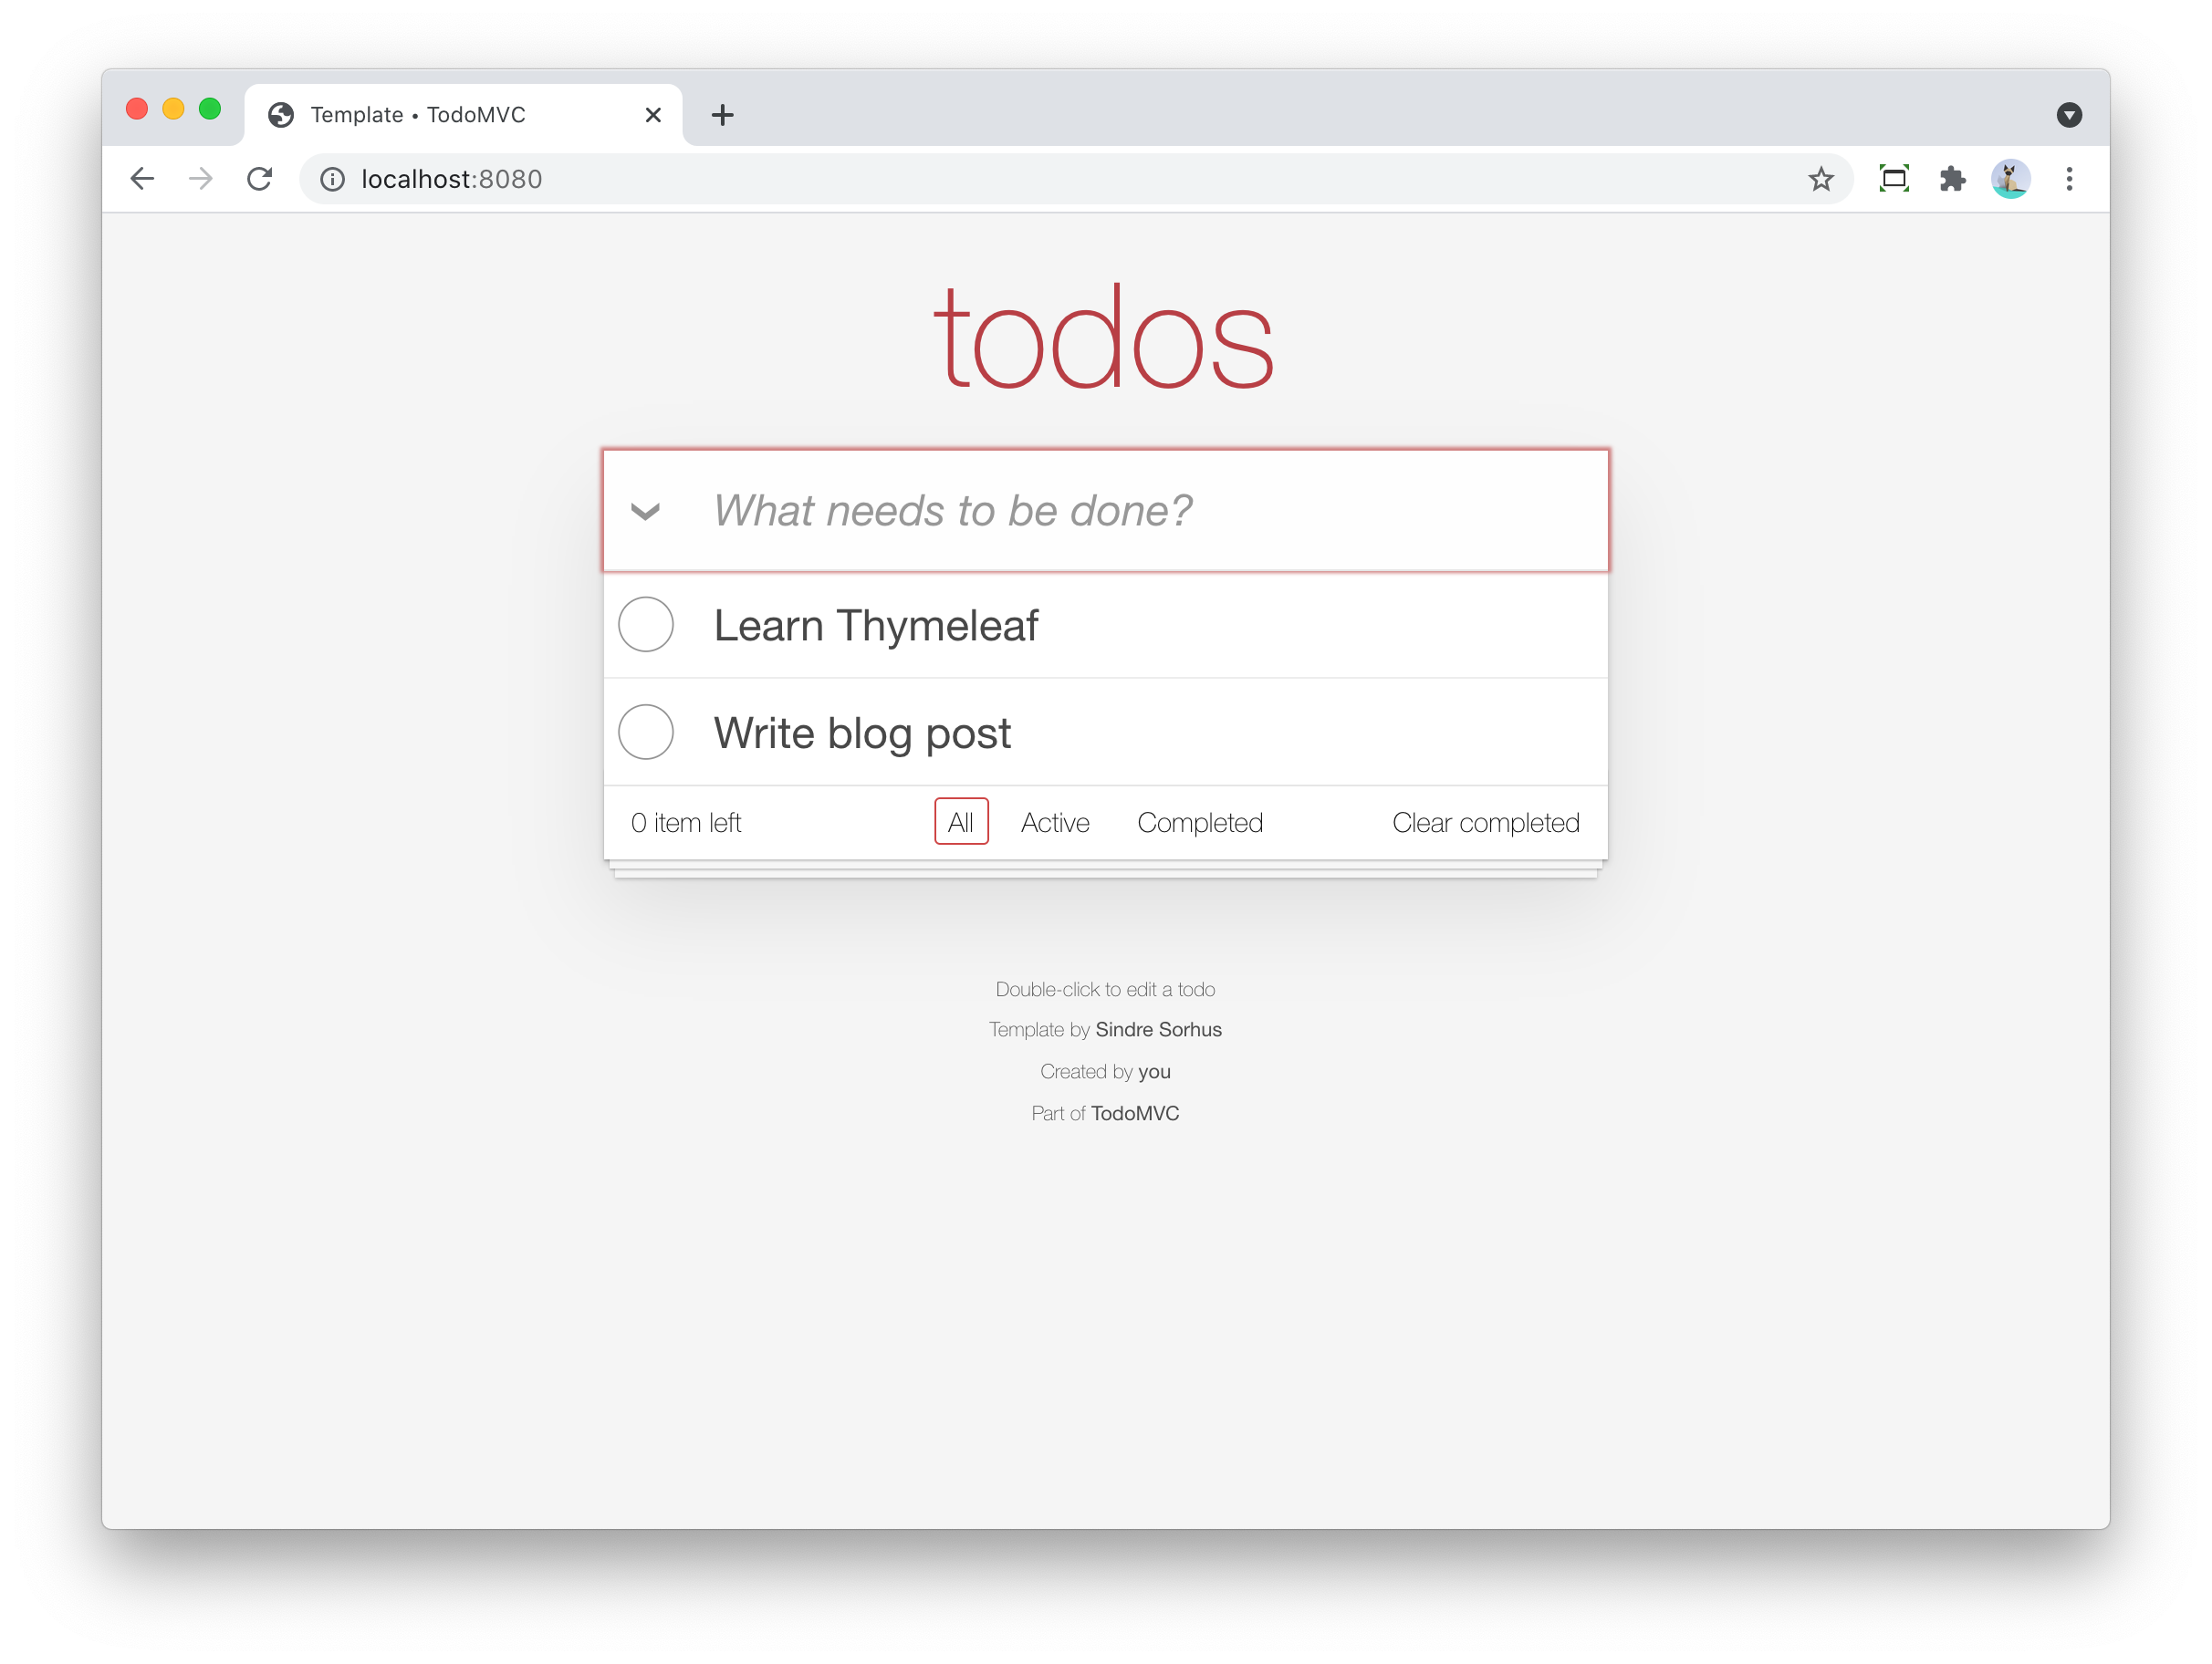
<script th:src="@{/webjars/todomvc-common/base.js}"></script>Restart the application and things start to look a lot better now:
Feature implementation
We will now extend our application feature-by-feature.
Hide sections if there are no todos
The "main" and the "footer" section need to be hidden if there are no todo items.
We’ll inject our TodoItemRepository in the controller to know the amount of todo items there are,
and put a variable in the Model so our Thymeleaf template can react to this.
import com.wimdeblauwe.examples.todomvcthymeleaf.todoitem.TodoItemRepository;
import org.springframework.stereotype.Controller;
import org.springframework.ui.Model;
import org.springframework.web.bind.annotation.GetMapping;
import org.springframework.web.bind.annotation.RequestMapping;

@Controller
@RequestMapping("/")
public class TodoItemController {

    private final TodoItemRepository repository;

    public TodoItemController(TodoItemRepository repository) { (1)
        this.repository = repository;
    }

    @GetMapping
    public String index(Model model) {
        model.addAttribute("totalNumberOfItems", repository.count()); (2)
        return "index";
    }
}| 1 | Inject TodoItemRepository via constructor injection. |
| 2 | Add the totalNumberOfItems attribute to the Model |
We can now use totalNumberOfItems to conditionally hide or show bits of HTML using th:if. Replace:
    <!-- This section should be hidden by default and shown when there are todos -->
    <section class="main">
with:
    <!-- This section should be hidden by default and shown when there are todos -->
    <section class="main" th:if="${totalNumberOfItems > 0}">
Do the same for the footer:
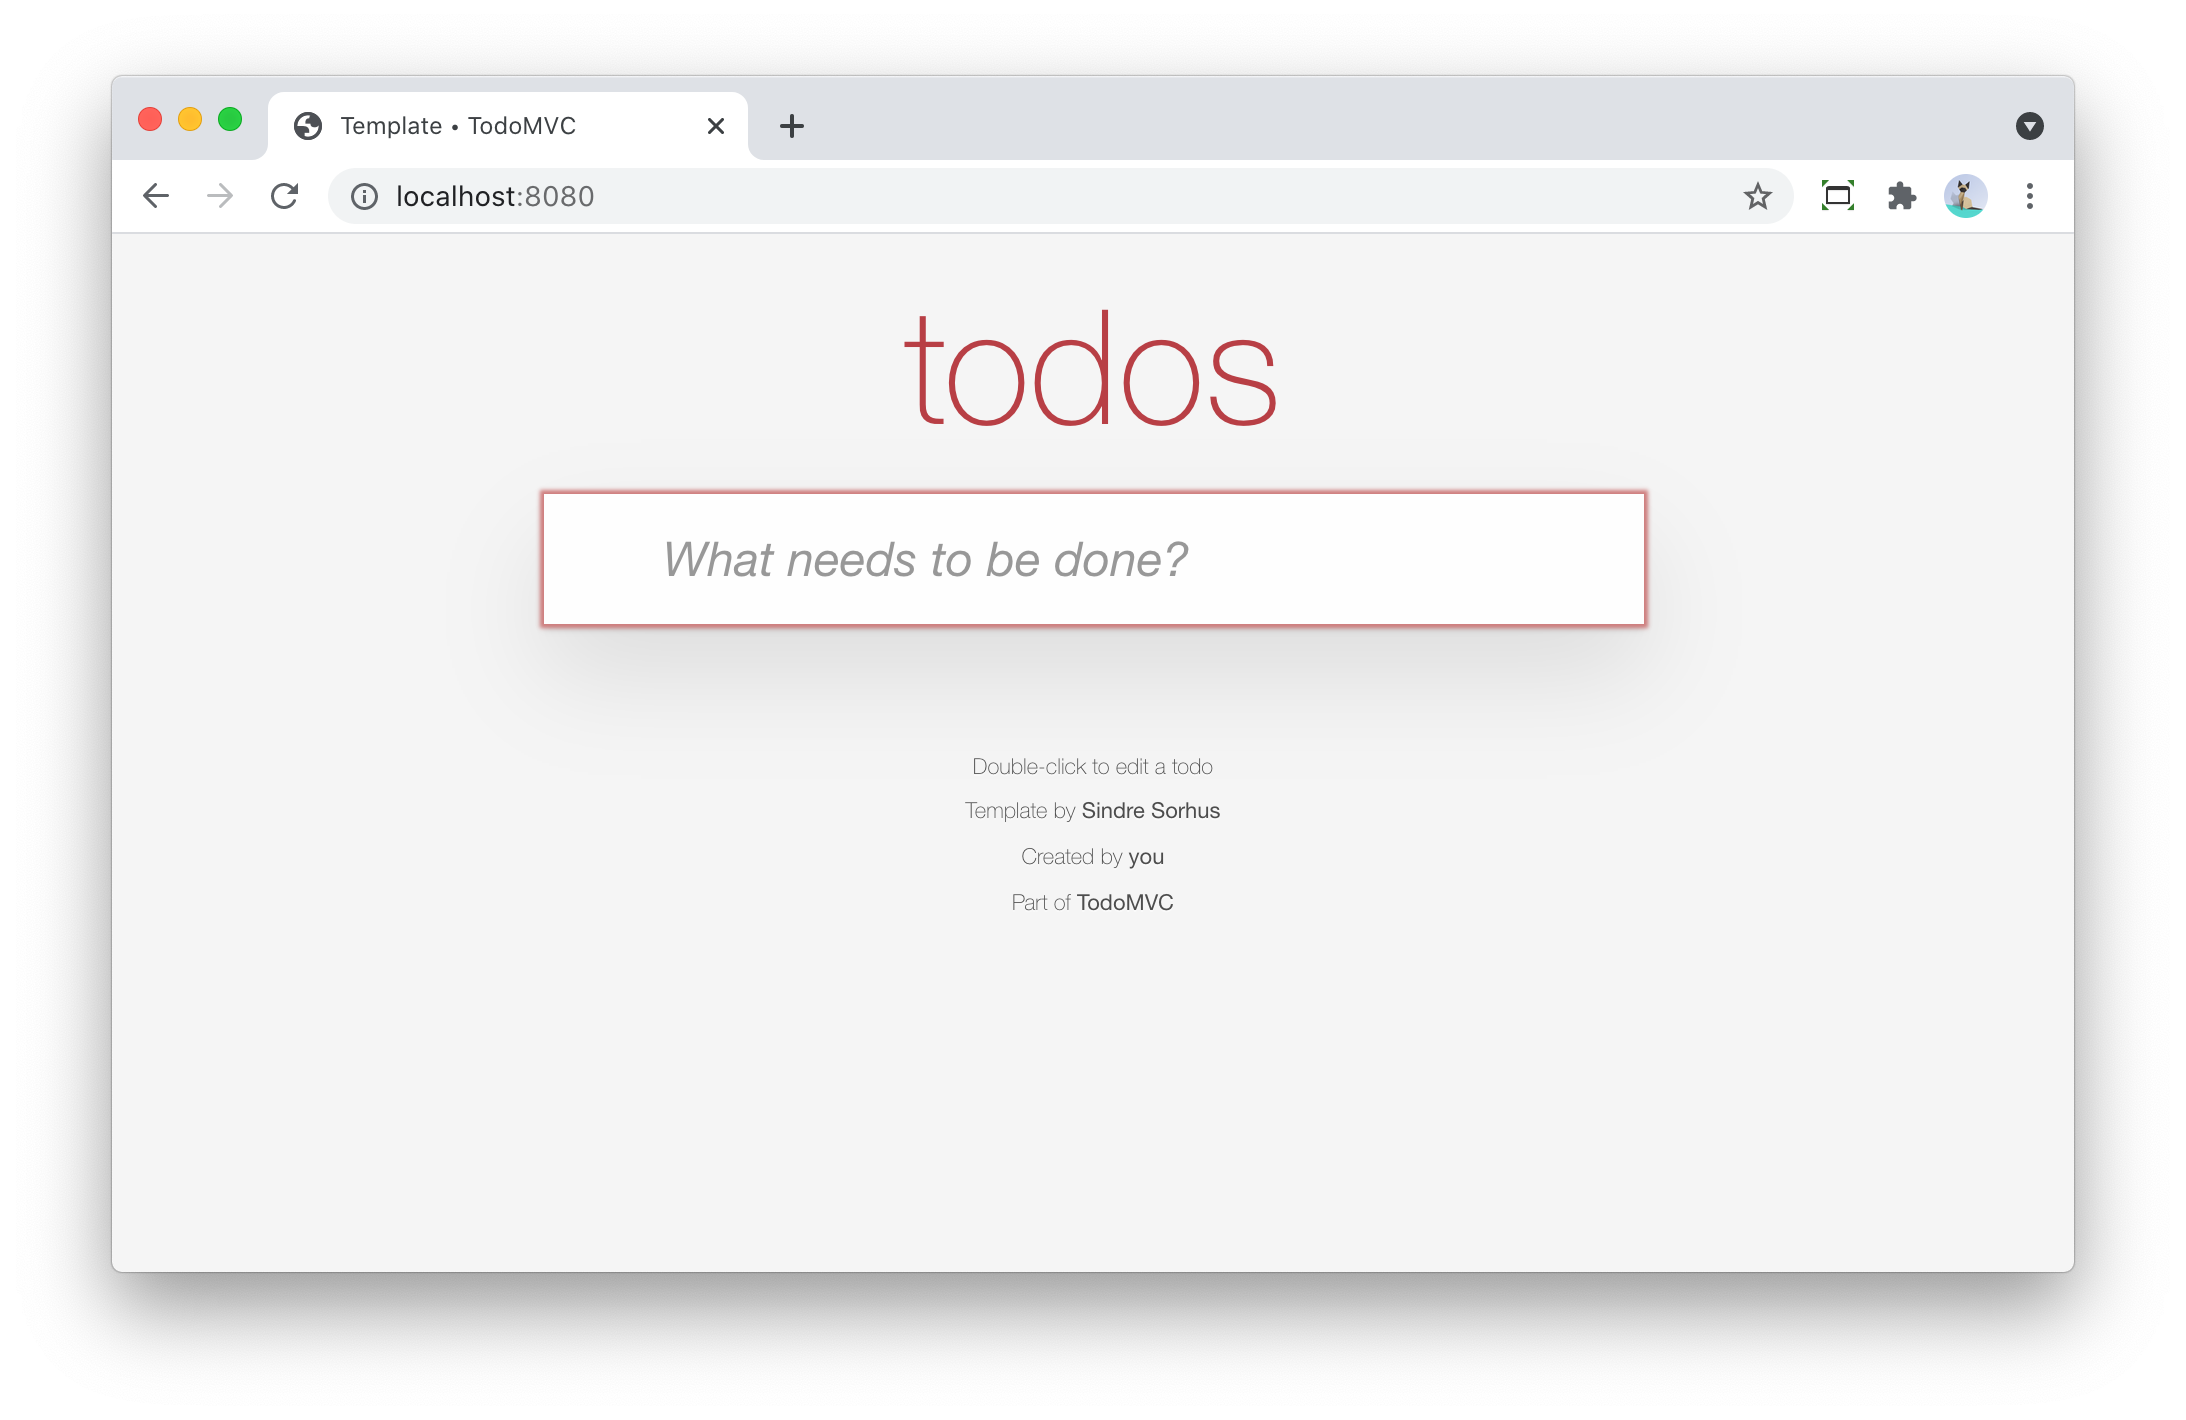
<footer class="footer" th:if="${totalNumberOfItems > 0}">The application should now look like this (since we don’t have any todo items yet):
Add a new todo item
When we want to perform an action with some user input in a Spring Boot/Thymeleaf application, we will usually use a form.
The index.html template has this input to enter a new todo:
<input class="new-todo" placeholder="What needs to be done?" autofocus>We will surround this with a <form> so we can do a HTTP POST with todo item title to store it in the database:
<form th:action="@{/}" method="post" th:object="${item}">
    <input class="new-todo" placeholder="What needs to be done?" autofocus
           th:field="*{title}">
</form>
There are 3 things important to make it work:
-
th:actiondefines the path that thePOSTwill happen on. This will be mapped via@PostMappingmethod on our controller. -
th:objectdefines the object that the form will bind to. -
th:fielddefines the field inside the object that will be used to bind the value of the HTML input on.
Each form should use a form data object that matches the HTML form and its inputs.
In this example, we’ll create TodoItemFormData like this:
import javax.validation.constraints.NotBlank;

public class TodoItemFormData {
    @NotBlank
    private String title;

    public String getTitle() {
        return title;
    }

    public void setTitle(String title) {
        this.title = title;
    }
}
The controller needs to change to this to use this:
@Controller
@RequestMapping("/")
public class TodoItemController {

    ...

    @GetMapping
    public String index(Model model) {
        model.addAttribute("item", new TodoItemFormData()); (1)
        model.addAttribute("totalNumberOfItems", repository.count());
        return "index";
    }

    @PostMapping
    public String addNewTodoItem(@Valid @ModelAttribute("item") TodoItemFormData formData) { (2)
        repository.save(new TodoItem(formData.getTitle(), false)); (3)

        return "redirect:/"; (4)
    }
}| 1 | When showing the application via the initial GET, we create an empty TodoItemFormData instance, so the form can bind to it. |
| 2 | When the POST happens, take the item attribute from the model via @ModelAttribute |
| 3 | Convert the TodoItemFormData to a TodoItem and save it via the repository. |
| 4 | Instruct the browser to redirect to the root again. This will allow the user to input the next todo item. |
If you test this, the main and footer sections should become visible again after entering a todo item.
However, it does not show the actual todo item yet, only the hardcoded ones that are currently in index.html.
Show list of todo items
Now that the user can add todo items, we can show them.
There are 2 examples in the index.html, one of a completed item and one of an active item.
We will leave those in place in the Thymeleaf template, but we will instruct Thymeleaf to not render them at runtime:
<ul class="todo-list" th:remove="all-but-first"> (1)
    <li th:insert="fragments :: todoItem(${item})" th:each="item : ${todos}" th:remove="tag"> (2)
    </li>
    </li>
    <li class="completed">
        ...
    </li>
    <li>
        ...
    </li>
</ul>| 1 | th:remove="all-but-first" instruct Thymeleaf to not render the child elements of the current element, except for the first one. This will ensure that only our dynamically created <li> elements will the be rendered. |
| 2 | This line will first insert the referenced fragement as a child element of the current element, iterate over each todo item and finally remove the superfluous <li> tag we would have without the th:remove. |
|
It might seem that using |
The fragment that is referenced here is added to fragment.html and looks like this:
<html xmlns="http://www.w3.org/1999/xhtml"
      xmlns:th="http://www.thymeleaf.org"
      lang="en">
<!--/*@thymesVar id="item" type="com.wimdeblauwe.examples.todomvcthymeleaf.todoitem.web.TodoItemController.TodoItemDto"*/-->
<li th:fragment="todoItem(item)">
    <div class="view">
        <input class="toggle" type="checkbox">
        <label th:text="${item.title}">Taste JavaScript</label>
        <button class="destroy"></button>
    </div>
    <input class="edit" value="Create a TodoMVC template">
</li>
</html>
Using fragments allows to keep the Thymeleaf templates short and clean.
If you looked closely to the template, you’ll notice we used the todos model attribute, so we need to update our controller to add this to the model:
    @GetMapping
    public String index(Model model) {
        model.addAttribute("item", new TodoItemFormData());
        model.addAttribute("todos", getTodoItems()); (1)
        model.addAttribute("totalNumberOfItems", repository.count());
        return "index";
    }

    private List<TodoItemDto> getTodoItems() {
    return repository.findAll()
                     .stream()
                     .map(todoItem -> new TodoItemDto(todoItem.getId(),  (2)
                                                      todoItem.getTitle(),
                                                      todoItem.isCompleted()))
                     .collect(Collectors.toList());
    }

    public static record TodoItemDto(long id, String title, boolean completed) {  (3)
}| 1 | Put the todo items in the model under the todos attribute name |
| 2 | Convert the TodoItem entities into a Data Transfer Object. This is not really needed here, but in an actual application always a good practise so you can control what properties you make available to the Thymeleaf template. |
| 3 | Use a Java record for the DTO. |
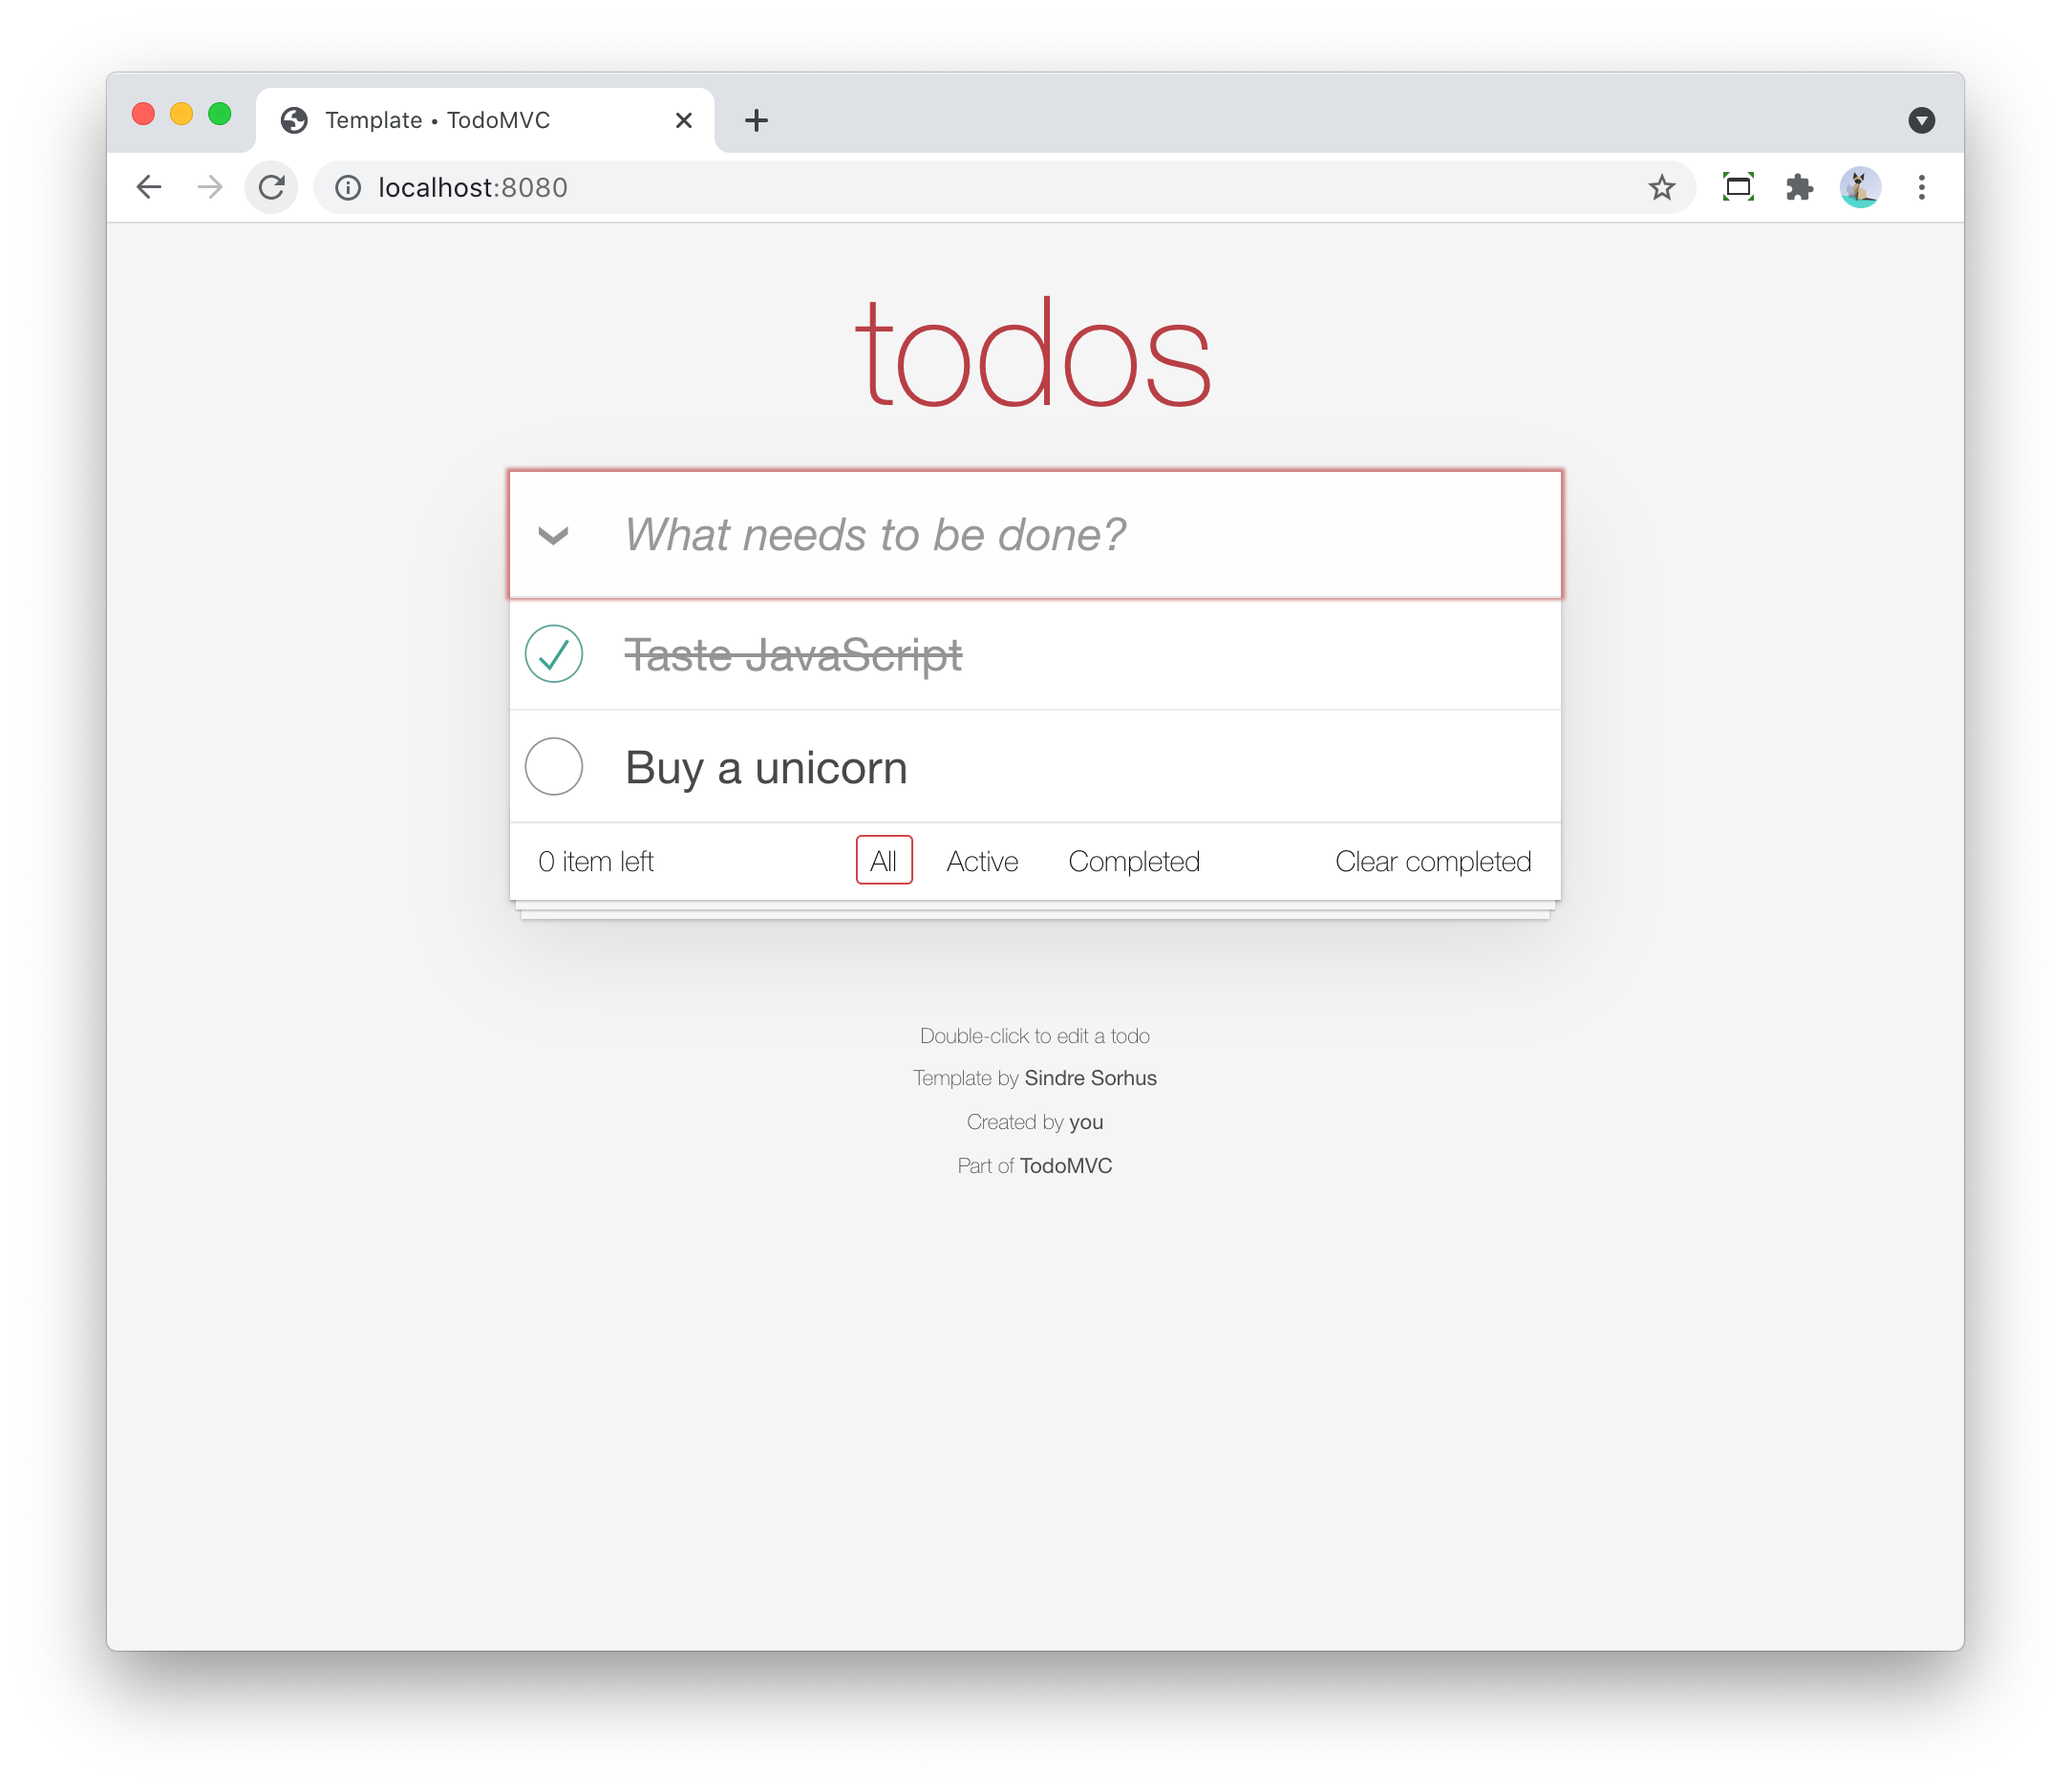
Restart the application and add a few todo items, the list of items should show what you entered:
This concludes the first part of this series of implementing TodoMVC using Spring Boot and Thymeleaf.
Continue to part 2 to learn how we can complete and delete todo items in the application.