
<li th:fragment="todoItem(item)">
    <div class="view">
        <form th:action="@{/{id}/toggle(id=${item.id})}" th:method="put"> (1)
            <input class="toggle" type="checkbox"
                   onchange="this.form.submit()"> (2)
            <label th:text="${item.title}">Taste JavaScript</label> (3)
        </form>
        <button class="destroy"></button>
    </div>
    <input class="edit" value="Create a TodoMVC template">
</li>TodoMVC with Spring Boot and Thymeleaf (Part 2)

Interested in learning more about Thymeleaf? Check out my book
Taming Thymeleaf.
The book combines all of my Thymeleaf knowledge into an easy to follow step-by-step guide.
In Part 1, we implemented TodoMVC using Spring Boot and Thymeleaf. The application already allows to add todo items and show them. We will continue in this part with completing items and deleting them.
Item completion
A user can complete an item by clicking on the circle in front of the description of the todo item.
To make this work in a "classic" Thymeleaf application, we need to add a form around the item so a PUT request can be send to the server.
Update the todoItem fragment in fragments.html to this:
| 1 | form element to send a PUT request to toggle the completed state of the item |
| 2 | Since we don’t have a separate submit button to submit the form, we need this little bit of JavaScript to trigger the submit as soon as the input checkbox changes. |
| 3 | The <label> needs to be in the <form> as well because of the way the CSS of TodoMVC is structured, it is not really needed functionally. |
The corresponding controller code to make this work is this:
    @PutMapping("/{id}/toggle") (1)
    public String toggleSelection(@PathVariable("id") Long id) { (2)
        TodoItem todoItem = repository.findById(id) (3)
                                      .orElseThrow(() -> new TodoItemNotFoundException(id));

        todoItem.setCompleted(!todoItem.isCompleted()); (4)
        repository.save(todoItem); (5)
        return "redirect:/"; (6)
}| 1 | Annotate the method with @PutMapping since we want to react to a HTTP PUT request. |
| 2 | Extract the id of the item from the path. |
| 3 | Use the repository to find the item in the database. |
| 4 | Toggle the boolean completed state of the item. |
| 5 | Save the item back to the database. |
| 6 | Redirect the browser to the root page so it can display the updated todo item. |
Because we are using PUT and browsers only really support POST and GET, we need to enable the HiddenHttpMethodFilter like this:
src/main/resources/application.properties
spring.mvc.hiddenmethod.filter.enabled=true|
The HiddenHttpMethodFilter works together with Thymeleaf to allowing using On the server, this will turn into a |
We could test this, but we would need to check in the database to see if the completed state was really changed.
Probably a better idea to update our application to also show the state.
If we look closely to the example HTML from TodoMVC, we can see that 2 things need to change in the generated HTML when an item is completed:
-
Add the
completedCSS class on the<li>element -
Add the
checkedattribute to the<input>element
We do this by using th:classappend to add a CSS class and th:attrappend to add an extra attribute:
<li th:fragment="todoItem(item)" th:classappend="${item.completed?'completed':''}"> (1)
    <div class="view">
        <form th:action="@{/{id}/toggle(id=${item.id})}" th:method="put">
            <input class="toggle" type="checkbox"
                   onchange="this.form.submit()"
                   th:attrappend="checked=${item.completed?'true':null}"> (2)
            <label th:text="${item.title}">Taste JavaScript</label>
        </form>
        <button class="destroy"></button>
    </div>
    <input class="edit" value="Create a TodoMVC template">
</li>| 1 | Conditionally add the completed CSS class depending on the completed attribute of the item. |
| 2 | Conditionally set the checked attribute. By using null if the item is not completed, the checked attribute is not added at all to the resulting HTML. |
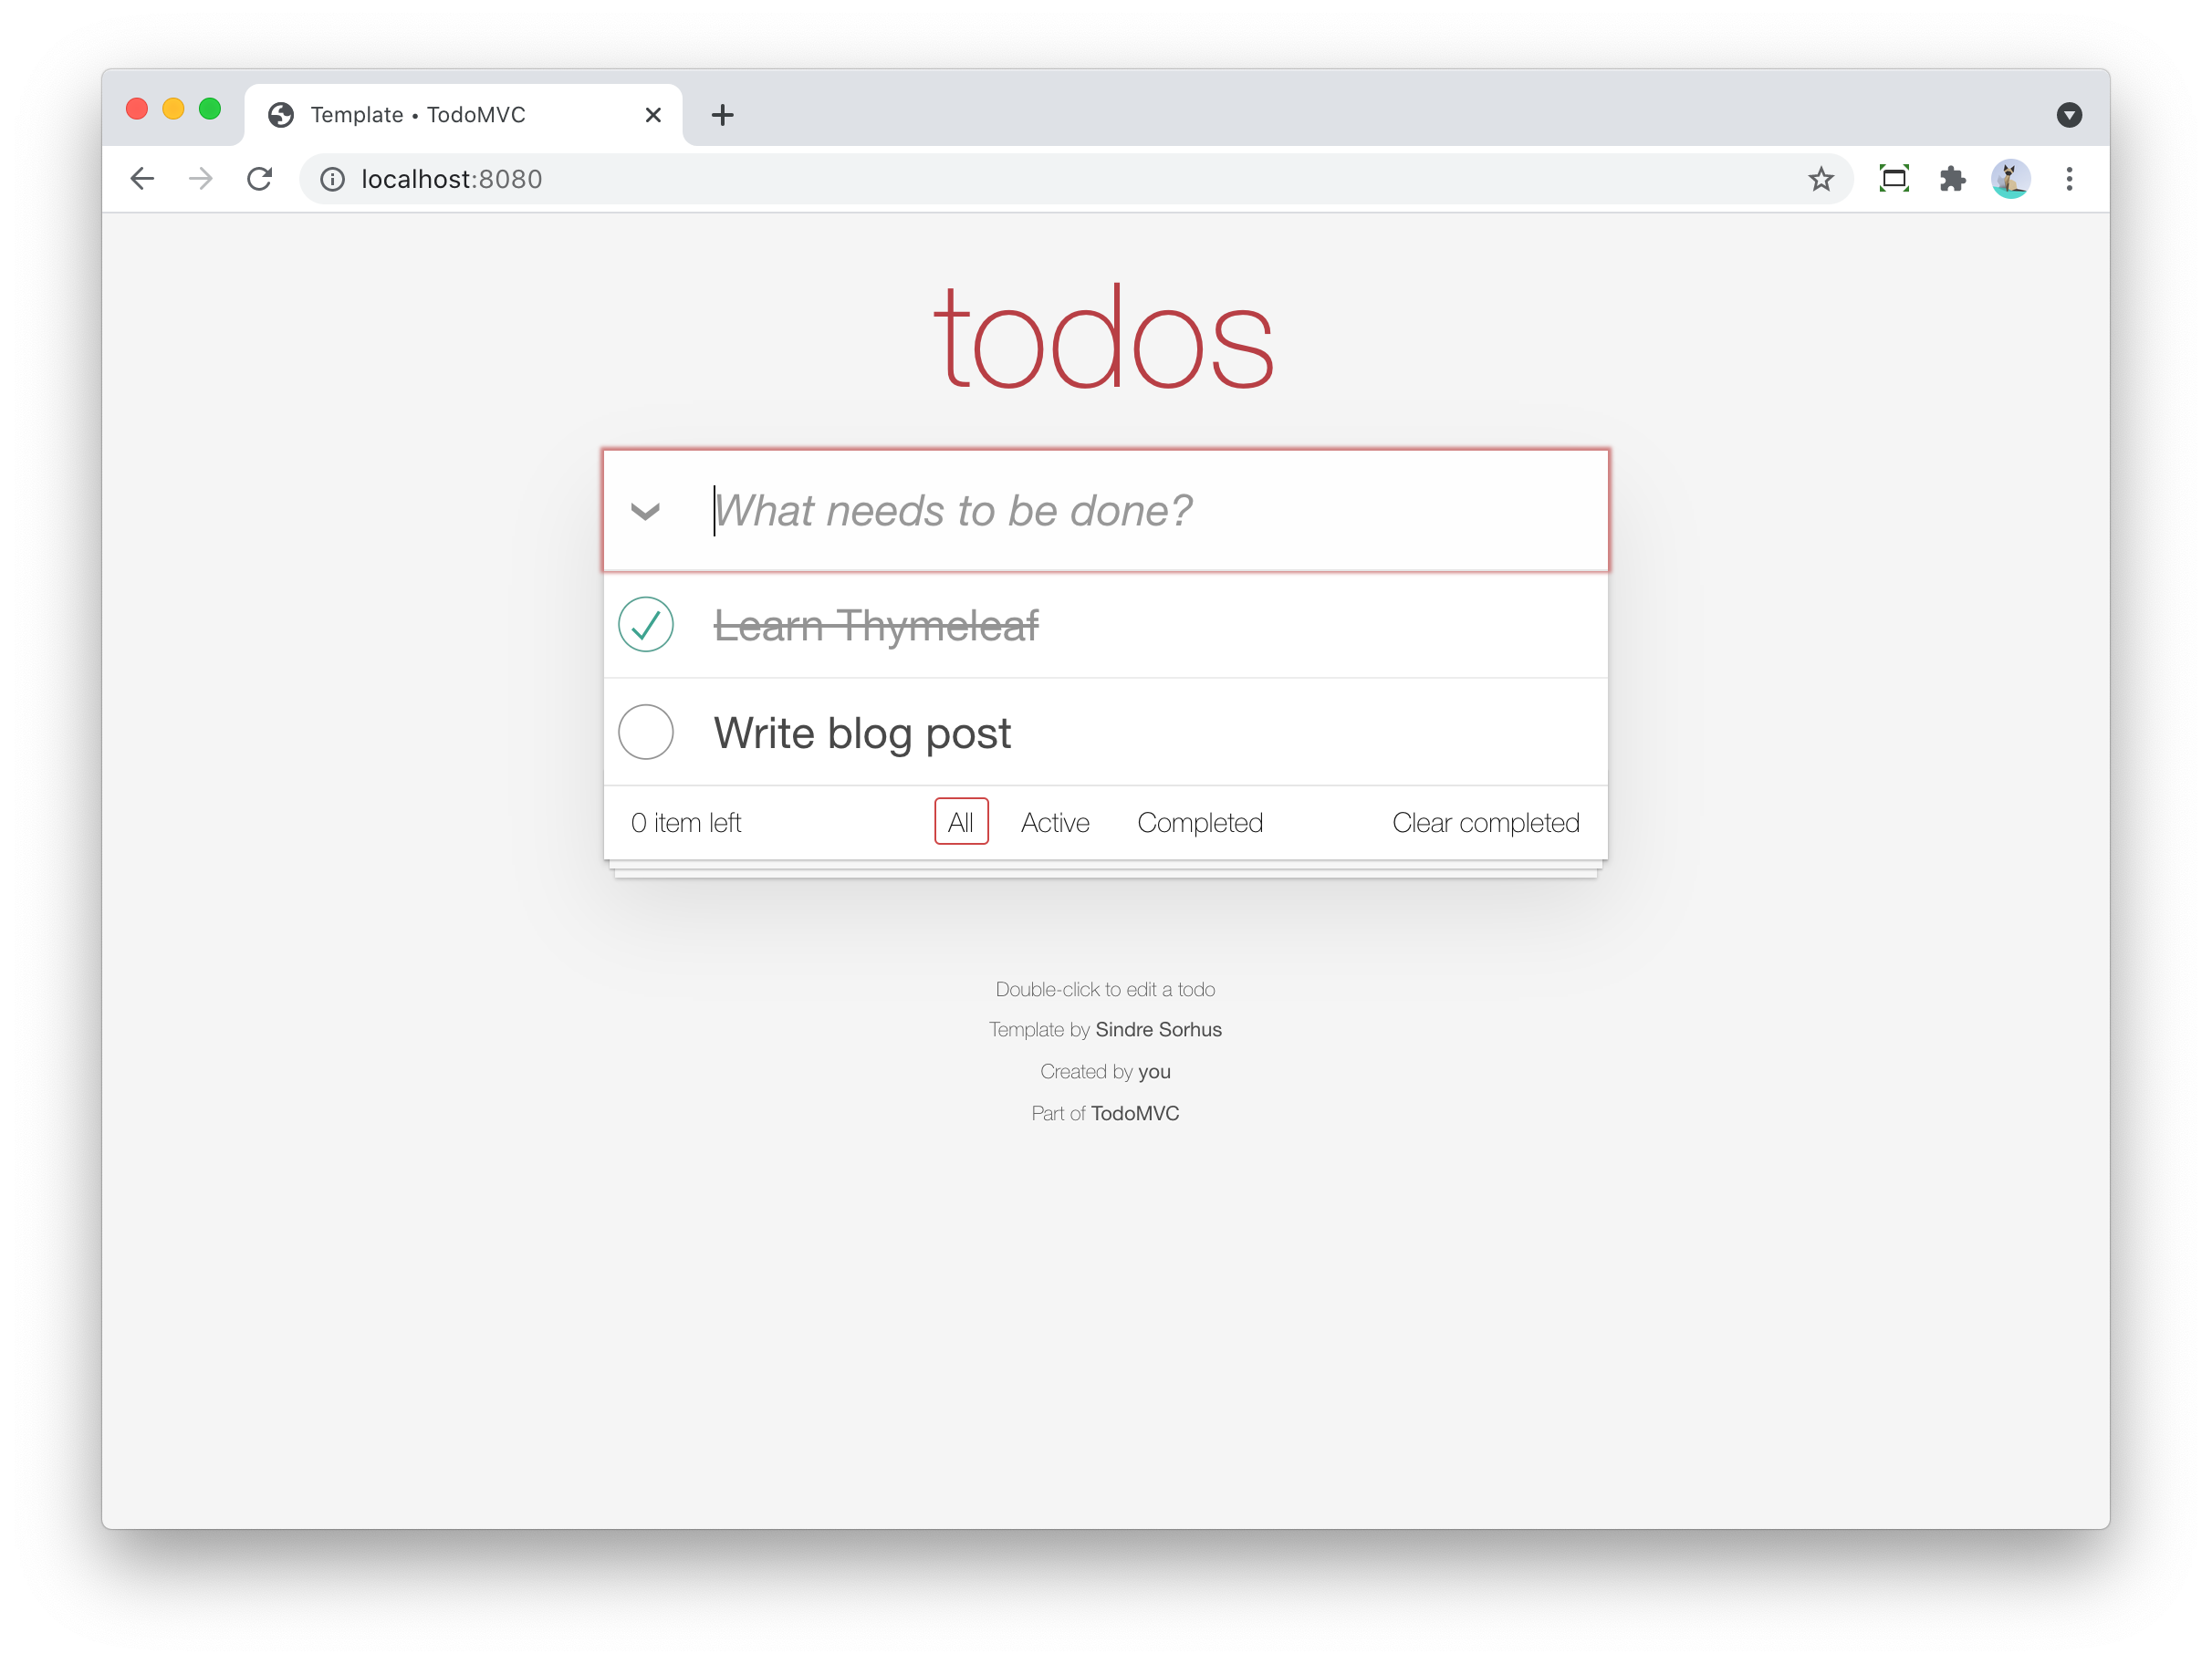
Start the application again and you should be able to complete the todo items:
Delete a todo item
Implementing the delete is very similar to what we already have done. We need to:
-
Put a
<form>around the delete button. -
Implement a controller method to react to the form submit
Let’s start by updating fragments.html to add the form:
<li th:fragment="todoItem(item)" th:classappend="${item.completed?'completed':''}">
    <div class="view">
        <form th:action="@{/{id}/toggle(id=${item.id})}" th:method="put">
            <input class="toggle" type="checkbox"
                   onchange="this.form.submit()"
                   th:attrappend="checked=${item.completed?'true':null}">
            <label th:text="${item.title}">Taste JavaScript</label>
        </form>
        <form th:action="@{/{id}(id=${item.id})}" th:method="delete"> (1)
            <button class="destroy"></button>
        </form>
    </div>
    <input class="edit" value="Create a TodoMVC template">
</li>| 1 | The <form> element with the URL to use via th:action and the delete method. |
The delete mapping is quite straightforward:
    @DeleteMapping("/{id}") (1)
    public String deleteTodoItem(@PathVariable("id") Long id) { (2)
        repository.deleteById(id); (3)

        return "redirect:/"; (4)
}| 1 | Annotate the method with @DeleteMapping since we want to react to a HTTP DELETE request. |
| 2 | Extract the id of the item from the path. |
| 3 | Use the repository to delete the item in the database. |
| 4 | Redirect the browser to the root page so it can display the remaining todo items. |
Show the number of uncompleted items left
As soon as you add the first todo item, there is a bar that appears at the bottom which has "0 items left". We are not yet updating this as we add items, complete them or delete them. Let’s add this functionally now.
We can start by adding a new attribute in the Model that indicates the number:
TodoItemController
    @GetMapping
    public String index(Model model) {
        model.addAttribute("item", new TodoItemFormData());
        model.addAttribute("todos", getTodoItems());
        model.addAttribute("totalNumberOfItems", repository.count());
        model.addAttribute("numberOfActiveItems", getNumberOfActiveItems()); (1)
        return "index";
}| 1 | Put numberOfActiveItems in the model so our view can react to that. |
To get that number, we expand our TodoItemRepository with a dedicated query method:
public interface TodoItemRepository extends JpaRepository<TodoItem, Long> {
    int countAllByCompleted(boolean completed); (1)
}| 1 | Query method to count the completed (or not completed) items |
Thanks to the power of Spring Data JPA, we don’t even need to implement this method. The code for it is generated automatically.
With this, we can complete our getNumberOfActiveItems() private method in the controller:
    private int getNumberOfActiveItems() {
        return repository.countAllByCompleted(false);
    }
With the information we need in the model, we can update the view to react to it:
Replace:
<span class="todo-count"><strong>0</strong> item left</span>with:
<th:block th:unless="${numberOfActiveItems == 1}"> (1)
    <span class="todo-count"><strong th:text="${numberOfActiveItems}">0</strong> items left</span>
</th:block>
<th:block th:if="${numberOfActiveItems == 1}"> (2)
    <span class="todo-count"><strong>1</strong> item left</span>
</th:block>| 1 | For all cases, except when the number of active items is 1, we use … items left. |
| 2 | If there is 1 item, then we need to use 1 item left. |
Restart the application and watch how the amount of items left is updated when adding, completing and deleting items:

Conclusion
This is all for part 2, continue to part 3 for the final installment of this series.
If you want to be notified in the future about new articles, as well as other interesting things I'm working on, join my mailing list!
I send emails quite infrequently, and will never share your email address with anyone else.